
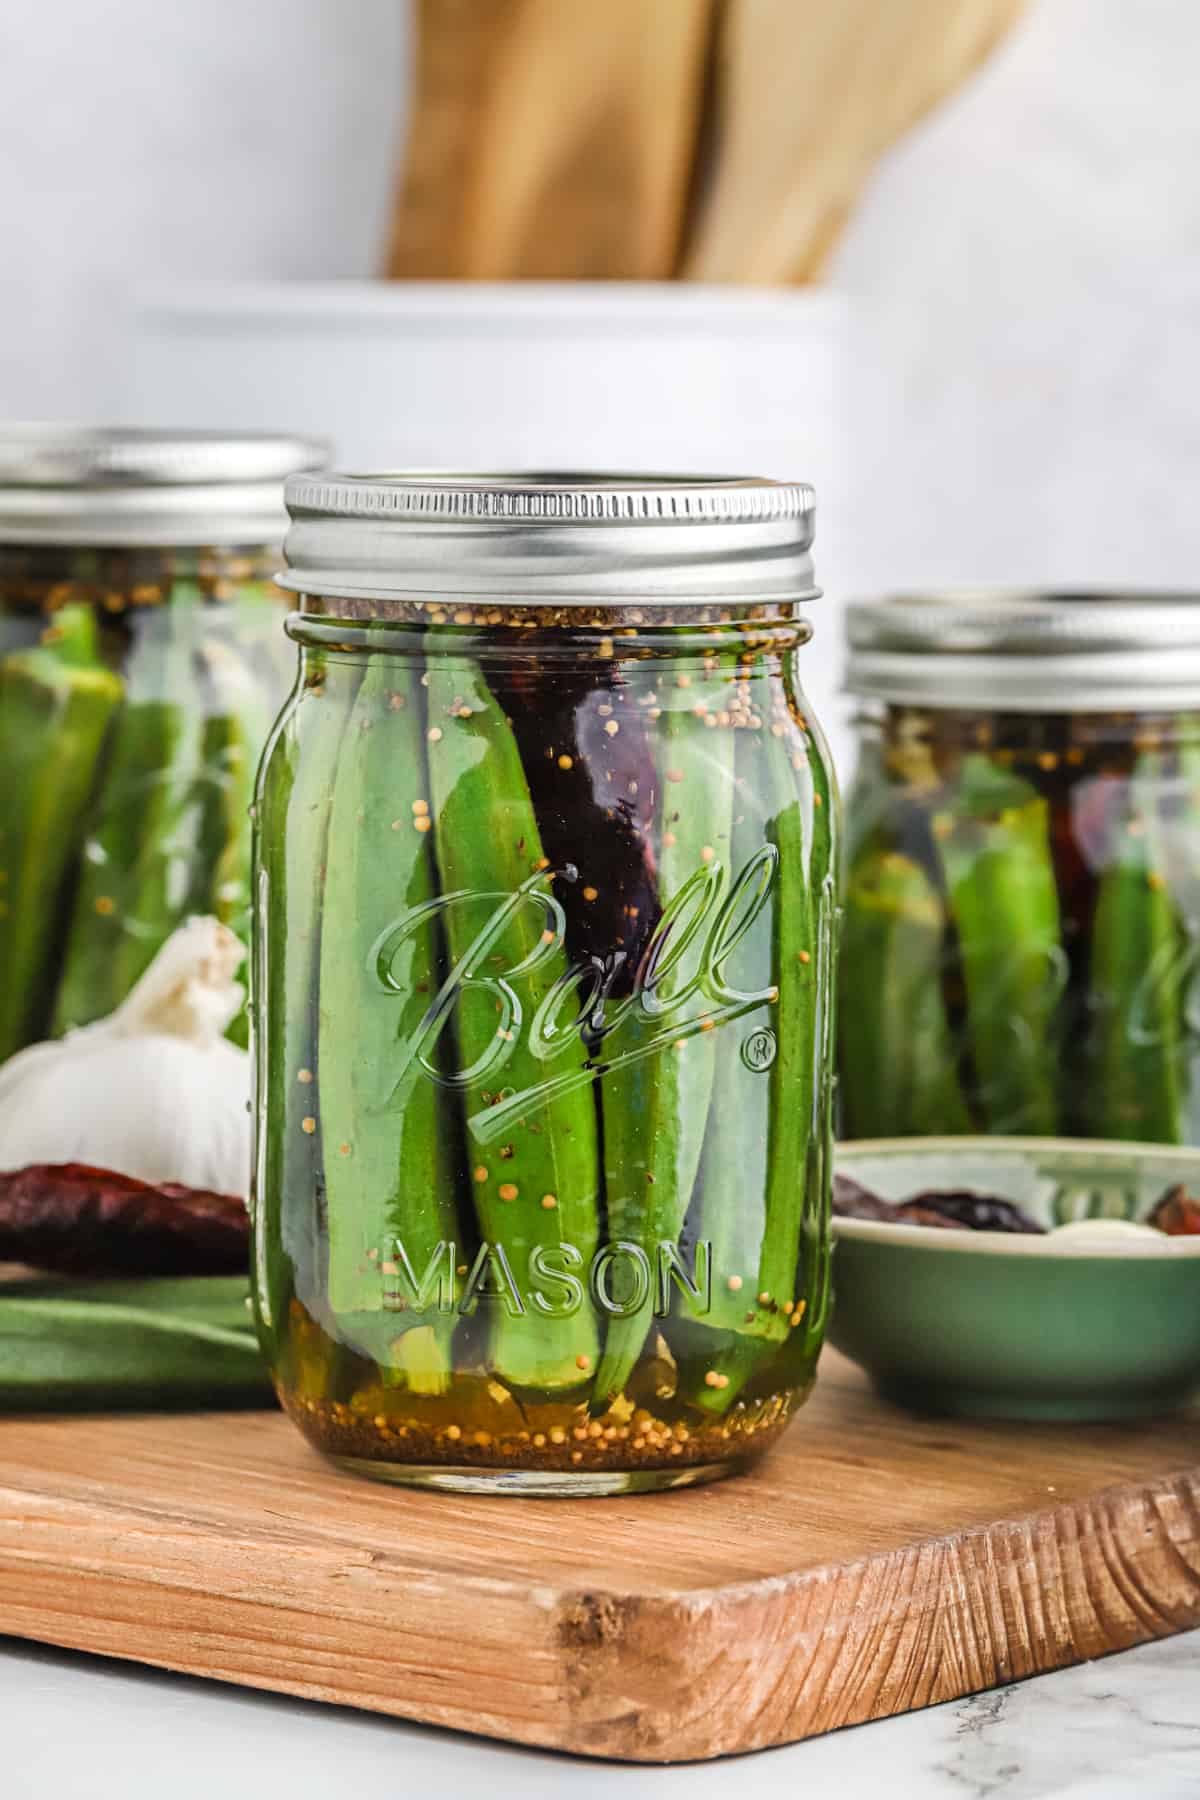
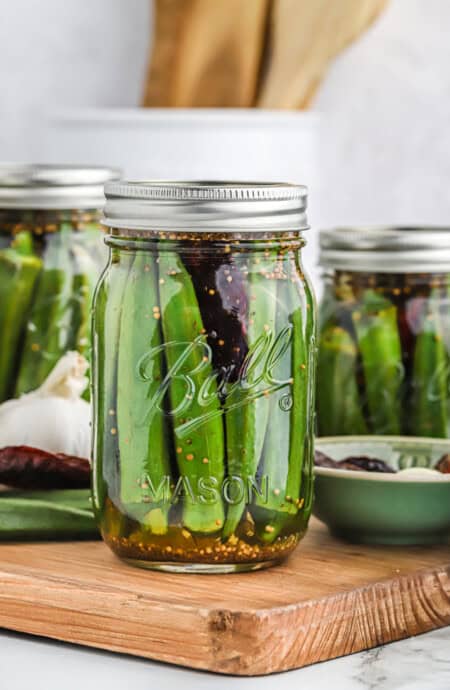
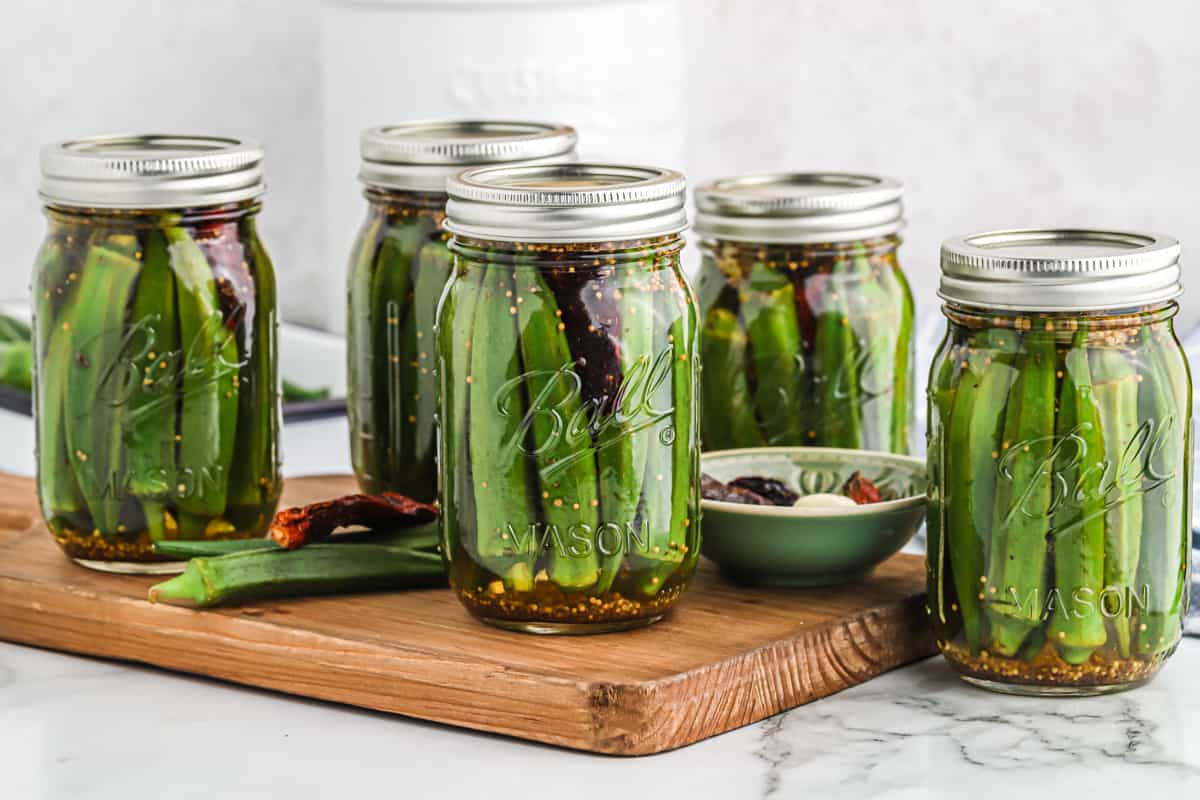
Okra is one of my daddy’s fav veggies. I grew up eating fried okra, okra stewed up with tomatoes, and one of his all time faves, this pickled okra recipe. We make this recipe by adding fresh okra to a vinegar mix full of spices with a little sugar and peppers. Plus its quick to make too. You will be ruined from ever eating store-bought again.
This post may contain affiliate links. Read our disclosure policy.
How To Make Pickled Okra
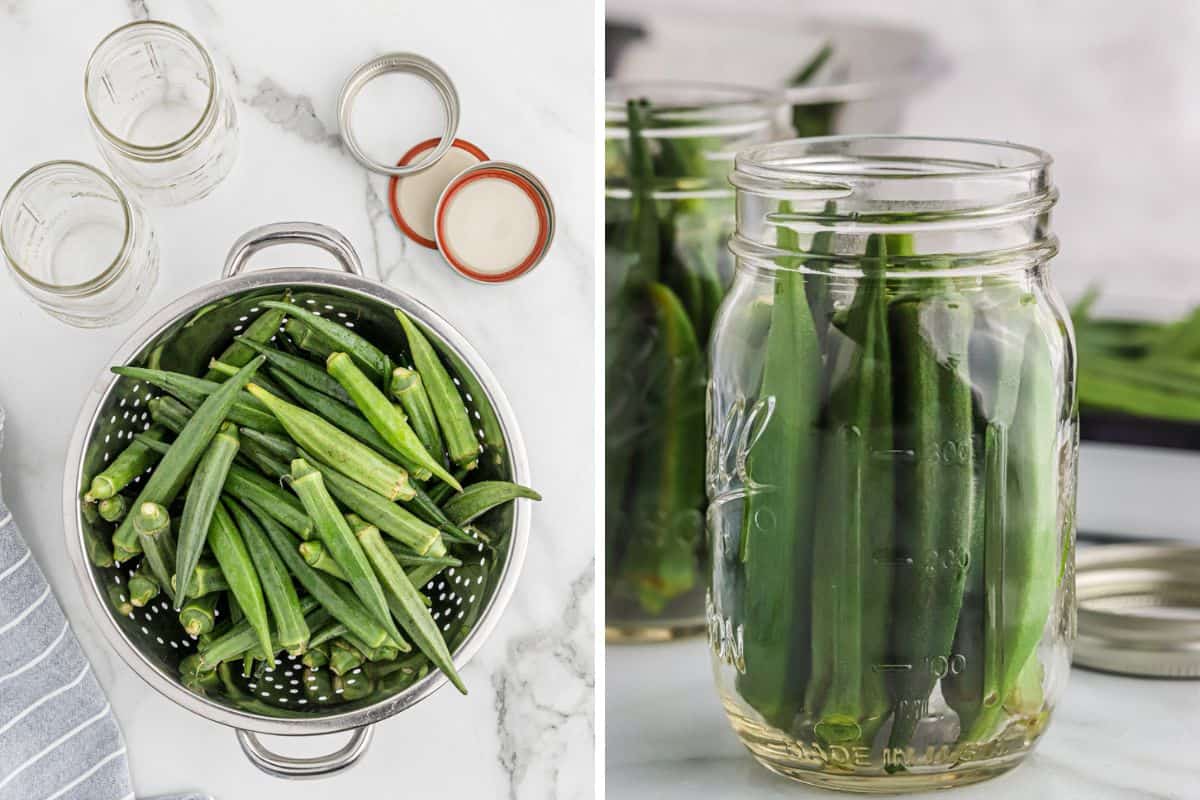
Step 1: Prepping the Okra
- Wash okra and pack them in 12 sterilized pint jars.
- Alternate the tips going up and down in the jar to pack them in.
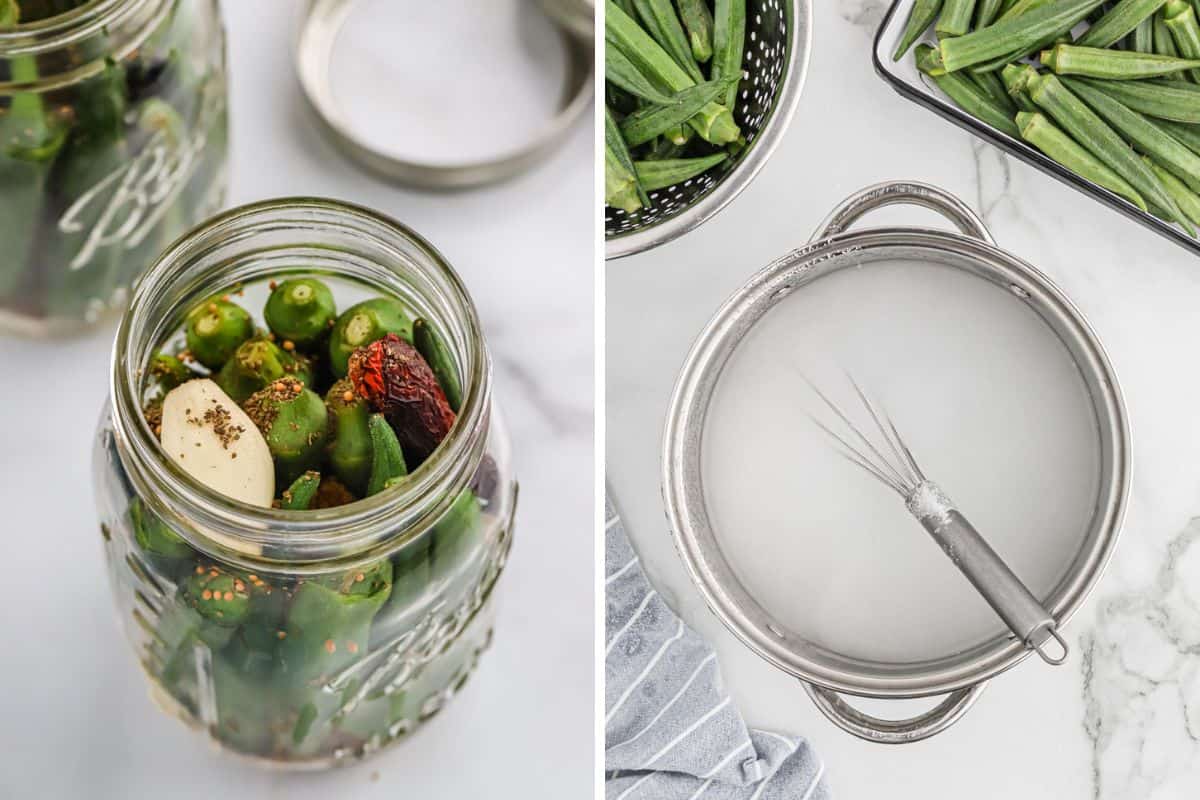
Step 2: Pickling the Okra
- Add equal amounts of garlic, peppers, celery and mustard seed in jars.
- Bring water and vinegar to a slow boil in a large pot. You’ll start to see bubbles forming. Add the sugar, salt and stir with a whisk until combined. Let boil for another minute and then turn off the heat.
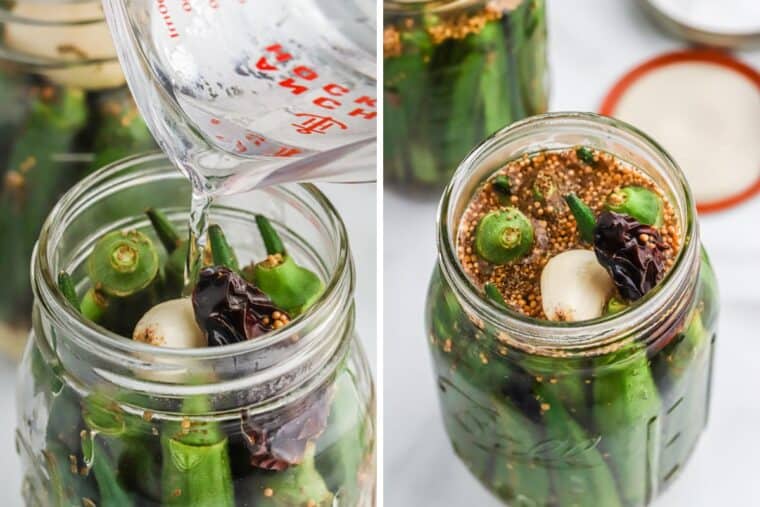
Step 3: Jarring the Okra
- Pour liquid into jars. Place the lid on the jars, close and let sit for 10 minutes.
- Let it sit even longer to develop the flavors.
Pickled Okra Recipe
Want to Save This Recipe, Boo?
Ingredients
- 6 lbs Okra
- 12 cloves Garlic
- 12 Dried chili peppers
- 12 teaspoons Mustard seeds
- 12 teaspoons Celery seeds
- 1 cup Non-iodized salt
- 2 cups White sugar
- 2 quarts Water
- 2 quarts White vinegar
Instructions
- Wash okra and pack in 12 sterilized pint jars. Alternate the tips going up and down in the jar to pack them in.
- Put equal amounts of garlic, peppers, celery, and mustard seed in jars.
- Bring water and vinegar to a slow boil in a large pot. You’ll start to see bubbles forming. Then add the sugar, and salt and stir with a whisk until combined. Let boil for another minute and then turn off the heat.
- Pour liquid into jars. Place the lid on the jars, close, and let sit for 10 minutes. Let it sit even longer to develop the flavors.
To properly seal
- Cap the lid and tighten: Snap a lid on each jar and twist on a canning ring or band until it’s snug. We want to go for fingertip tight so the air can escape during processing.
- Time for a Hot Bath: Drop those jars into a big pot of boiling water and let them chill for about 10 minutes. This step helps to seal everything. My big mama would do this all the time when jarring.
- Seal it up!: Once done, grab the jars with tongs or a jar lifter and let them relax for a few hours. This step is necessary because it sucks out that extra air so it seals super tight preventing bacteria for getting up in there. Once they cool, make them at home in a cool, dry spot away from the sun. They will last for up to a year this way.
- After opening: Make sure you store it in the fridge after you open and enjoy from there.
Notes
How long does this pickled okra recipe last?
When you store it up right, it can last for about a year. Find a cool, cozy spot like a pantry or cellar, somewhere away from the light, and make sure those jars are sealed tight to keep the air out and the goodness in. However as it ages, the okra might switch up its flavor and texture on you. If something seems off – maybe the texture’s not right, or it doesn’t look or taste like it should – toss it boos. If you spot any mold or bubbles in the jar, throw that thang away!Nutrition
Recipe Tips for Sealing
Properly sealing your jars of this quick pickled okra recipe is important to ensure the safety and quality of all your hard work. Here are the steps I take:
Want to Save This Recipe, Boo?
- Cap the lid and tighten: Snap a lid on each jar and twist on a canning ring or band until it’s snug. We want to go for fingertip tight so the air can escape during processing.
- Time for a Hot Bath: Drop those jars into a big pot of boiling water and let them chill for about 10 minutes. This step helps to seal everything. My big mama would do this all the time when jarring.
- Seal it up: Once done, grab the jars with tongs or a jar lifter and let them relax for a few hours. This step is necessary because it sucks out that extra air so it seals super tight preventing bacteria for getting up in there. Once they cool, make them at home in a cool, dry spot away from the sun. They will last for up to a year this way.
- After opening: Make sure you store it in the fridge after you open and enjoy from there.
Ingredient Notes
- White Vinegar: Apple cider vinegar also works.
- Granulated Sugar: Or brown sugar or even honey.
- Herb it Up: Play around with adding additional herbs like dill, oregano and thyme for more earthy goodness.
Recipe Help
Unfortunately, frozen okra is not good for canning. The outside of the okra softens in the freezing process, meaning it won’t crisp up when it’s pickled.
The only vinegar you should use for canning is one with an acidity level of 5%. Some vinegar varieties are classified in terms of “grain,” and 5% acidity is equivalent to 50 grain. Distilled white vinegar typically has 5% acidity, but it’s always best to double-check.
More Delish Southern Veggie Recipes to Try
*Did you make this recipe? Please give it a star rating and leave comments below!* Post a photo of how your version of the recipe came out on Instagram (using #grandbabycakes)!!
 pinterest
This pickled okra looks interesting. I think it sound delicious. Definitely going to give it a try.
Never tried okra this way before. SOunds so delicious. Thanks for sharing.
You’re so welcome, doll!
These were so delicious and had the perfect amount of flavor. Making an extra batch next time so I have more, they were too good!! Thank you so much!
I love okra so much but never tried the pickled version of it mostly I only eat them when it’s steamed or fried.
I am going to try this at home. Thank you!
I love okra in all of its forms but this recipe is addicting. I served them with my smoked brisket this past weekend and they were all gone by the time I went back for seconds!
This was my first time make this pickled okra and it came out amazing! Thanks for the great recipe!
This is a classic made better! Perfect as a snack at lunch today – thanks for the detailed instructions too.
My mother used to make pickled okra like this, and I was so happy to find your recipe. I’m trying to convert my husband to okra, and this might finally do the trick!
This was such a unique and unexpected recipe! Quick, easy and delicious; definitely, a new favorite snack!
These make for such an amazing snack or addition to a charcuterie board! We loved them.