
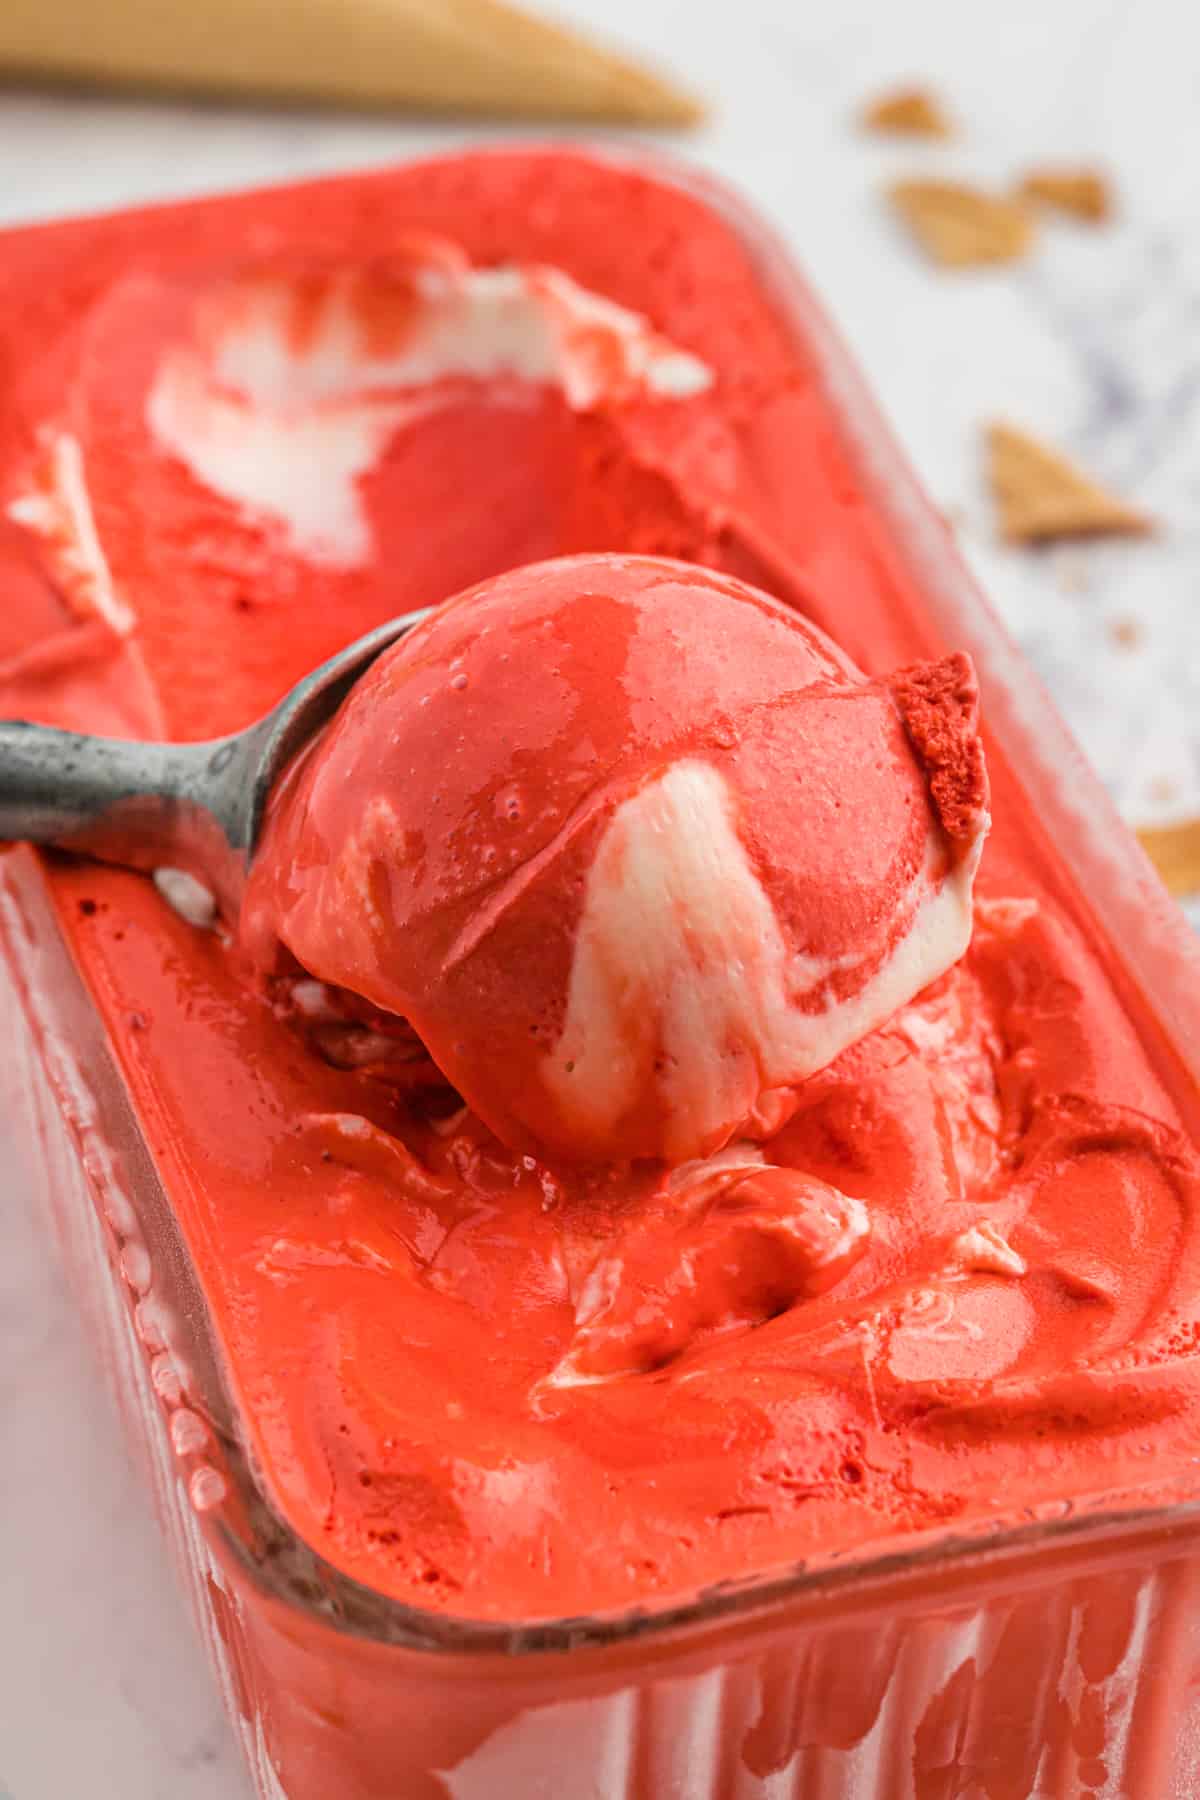
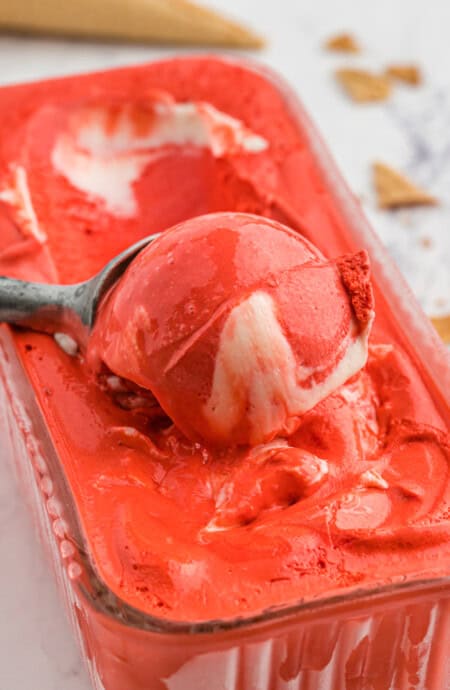
Recently, Harmony and I made a homemade ice cream so good I just knew I needed to share it with y’all! This red velvet ice cream is so rich you won’t know what hit you. Each scoop is lightly flavored with chocolate (just enough to get that malty, indulgent goodness) and swirled with sweet cream cheese frosting. If you like red velvet cake, then you’re gonna love this homemade ice cream recipe!
This post may contain affiliate links. Read our disclosure policy.
How to Make Red Velvet Ice Cream
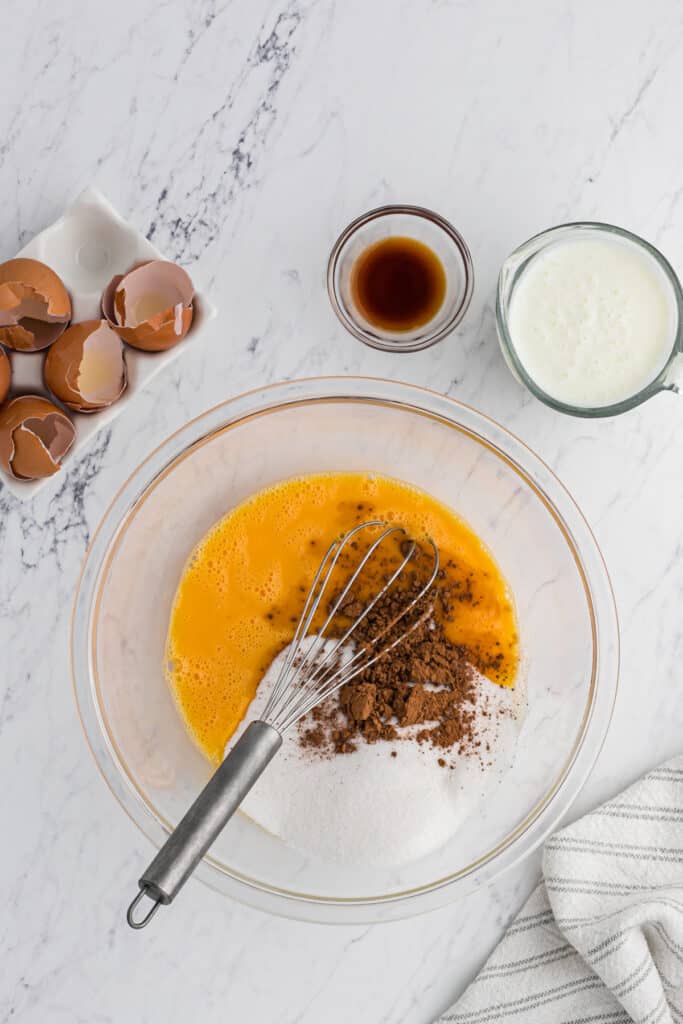
Step 1: Beat eggs and egg yolks in a medium sized bowl. Next add sugar and cocoa powder to the bowl and whisk together.

Step 2: Add heavy cream to a large saucepan and heat gently; do not let come to a boil. Temper eggs by slowly pour 1 cup of hot heavy cream mixture into egg mixture while whisking quickly. This will raise the temperature of the eggs carefully without scrambling them. Then while stirring, pour the tempered egg mixture slowly into the remaining heavy cream mixture in the saucepan.
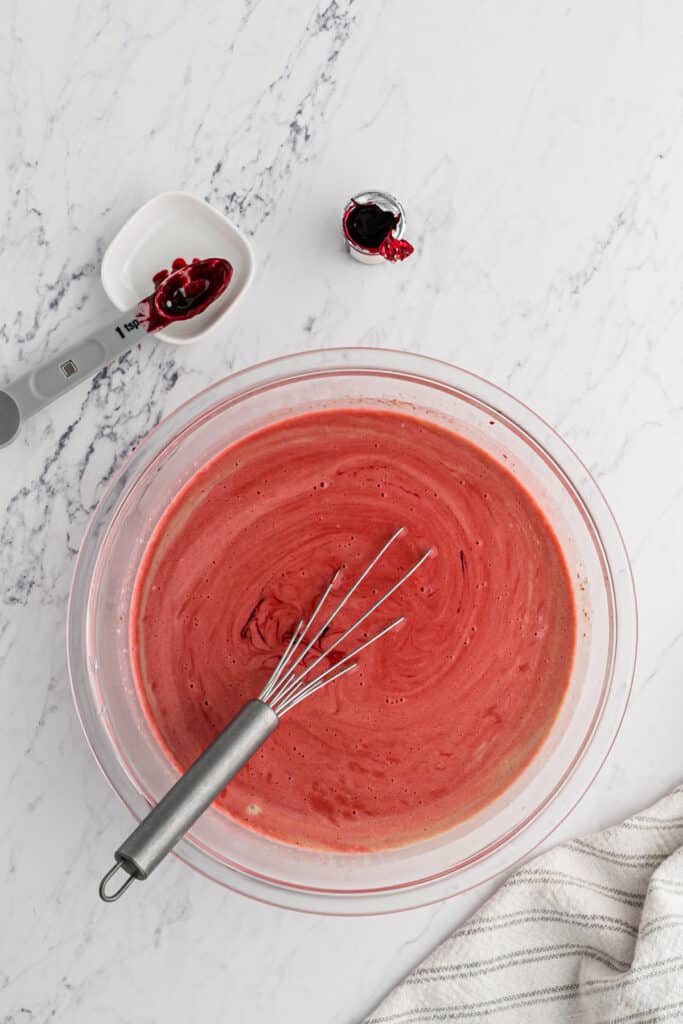
Step 3: Gently heat ice cream base over medium low heat, stirring constantly (especially the corners of the pot), until thickened and reaches 170F on a digital thermometer. The mixture should look silky and coat the back of a spoon so when you run your finger through it, it doesn’t come back together. Remove from heat and add buttermilk and vanilla extract as well as red food coloring.
Step 4: Strain through a fine-mesh sieve (to catch any cooked egg pieces) and chill in an ice bath (a bowl set inside of a bowl of ice water) until it’s cooled to room temperature. Then cover with plastic wrap and move into the refrigerator until completely cold, about 2-3 hours.
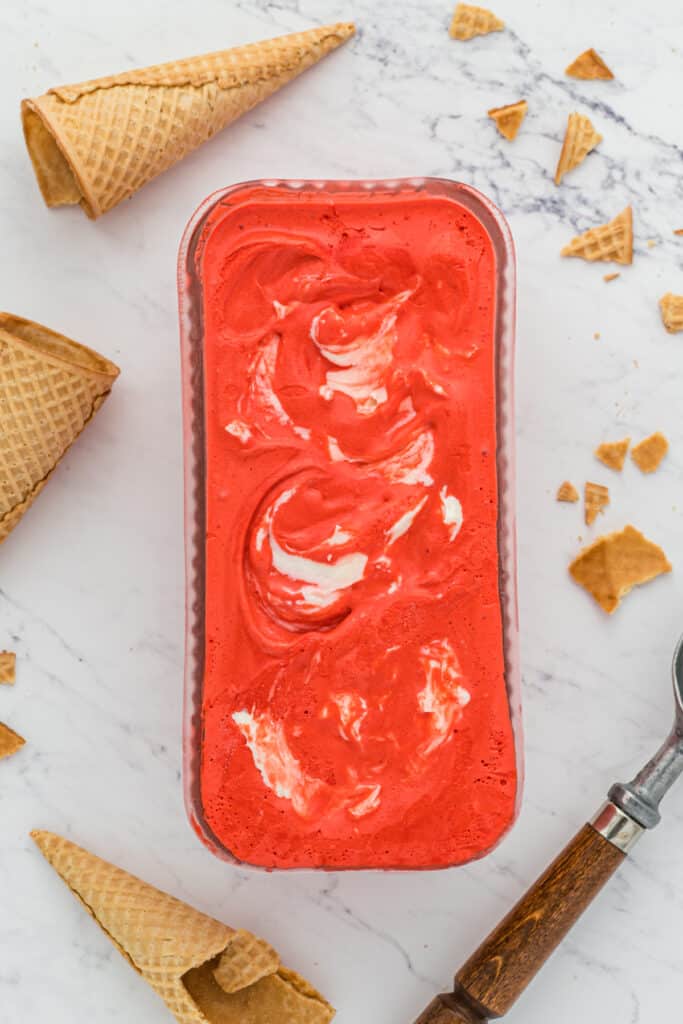
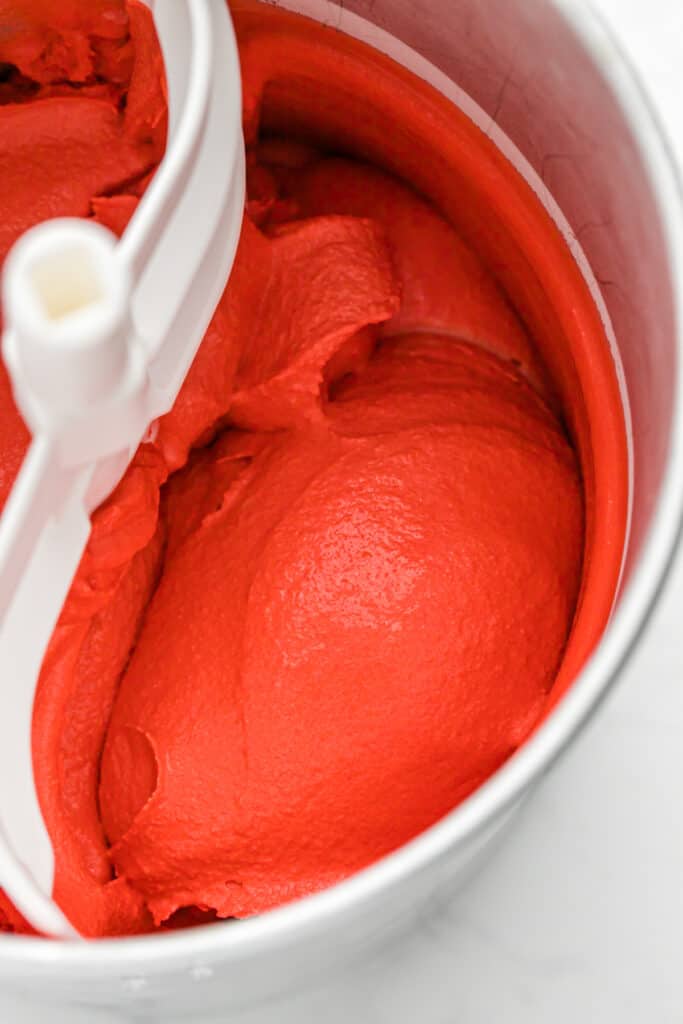
Step 5: Once finished, add 1/3 of ice cream to the container and swirl with 1/3 of the cream cheese frosting and repeat until all is in the container. Store in freezer while not serving. If you want a super firm set up of this ice cream, set in the freezer for at least two days. This recipe is more closer to soft serve in terms of texture but absolutely delicious.
Want to Save This Recipe, Boo?
Red Velvet Ice Cream Recipe
Want to Save This Recipe, Boo?
Ingredients
- 3 large eggs
- 2 large egg yolks
- 1½ cups granulated sugar
- 1 tablespoon cocoa powder
- 3 cups heavy whipping cream
- 1 cup buttermilk
- 1 tablespoon pure vanilla extract
- Red food coloring
- cream cheese frosting a delicious cream cheese frosting recipe can be found here
Instructions
- Next add sugar and cocoa powder to the bowl and whisk together. Add heavy cream to a large saucepan and heat gently; do not let come to a boil.
- Temper eggs by slowly pour 1 cup of hot heavy cream mixture into egg mixture while whisking quickly. This will raise the temperature of the eggs carefully without scrambling them. Then while stirring, pour the tempered egg mixture slowly into the remaining heavy cream mixture in the saucepan.
- Gently heat ice cream base over medium low heat, stirring constantly (especially the corners of the pot), until thickened and reaches 170F on a digital thermometer. The mixture should look silky and coat the back of a spoon so when you run your finger through it, it doesn’t come back together.
- Remove from heat and add buttermilk and vanilla extract as well as red food coloring. Strain through a fine-mesh sieve (to catch any cooked egg pieces) and chill in an ice bath (a bowl set inside of a bowl of ice water) until it’s cooled to room temperature. Then cover with plastic wrap and move into the refrigerator until completely cold, about 2-3 hours.
- Once finished, add 1/3 of ice cream to the container and swirl with 1/3 of the cream cheese frosting and repeat until all is in the container.
- Store in freezer while not serving. If you want a super firm set up of this ice cream, set in the freezer for at least two days. This recipe is more closer to soft serve in terms of texture but absolutely delicious.
Notes
Nutrition
Recipe Tips
- Freeze the ice cream bowl and beaters- This helps the ice cream set up nicely and churn perfectly. I like to freeze my bowl for at least 2 days.
- Use homemade cream cheese frosting- For the best result, I recommend using my easy to make cream cheese frosting. Sweet, fluffy, slightly tangy, and insanely easy to whip up.
- Don’t overmix the frosting- You don’t want the frosting to disappear into the ice cream. Instead, you want thick, distinguishable swirls. Use a butter knife to carefully swirl the frosting throughout the ice cream.
- Soft Serve Texture – This recipe doesn’t get rock rock hard like other ice creams but it is still a delicious treat. If you want a harder texture, make sure to freeze for up to 48 hours.
 pinterest
Hi Jocelyn,
I made your Red Velvet Ice Cream last weekend. The cream cheese swirl was a delightful surprise, reminding me of my grandmother’s red velvet cake. It was a big hit with my family. Thanks for a great recipe!
Cheers,
Kimberly
Wonderful! So happy to hear that you enjoyed it and what a compliment, thank you!
Thanks for the red velvet ice cream recipe.
This was really fun for my kids to make with me and the color and flavor were stunning! Will make again – thank you!
My mind is blown! I literally had no idea you could make red velvet ice cream. This might be my new favorite now!
This cake is totally irresistible!! Thanks so much for sharing your recipe!
You are speaking my language! Homemade ice cream is one of my favorite things to eat! Love the color and the taste is awesome!
The colour of this is amazing. Anything red velvet is good with me.
Red velvet is one of my favorite flavors, and this ice cream is the best way to celebrate it. Thanks so much for sharing!