
Confession: I’m not a coffee fan. Believe me, I’ve tried it black and loaded with sugar, I’ve sipped on lattes and bad espresso but I just don’t get down with it unless it’s in my mocha ice cream. This stuff is enough to make anyone a believer. I mix coffee and chocolate together in my custard that freezes up super creamy! I toss in some crushed Oreos for texture, and it’s next level.
This post may contain affiliate links. Read our disclosure policy.

How to Make Mocha Ice Cream
Step 1: Make the Ice Cream Base
- Add the sugar, cocoa powder, and instant coffee to the bowl of whisked eggs and egg yolks.
- Whisk the mixture together until it is well mixed.
- Add the heavy cream and half and half to a large pot and heat to a boil.
- Remove the hot milk from the heat.
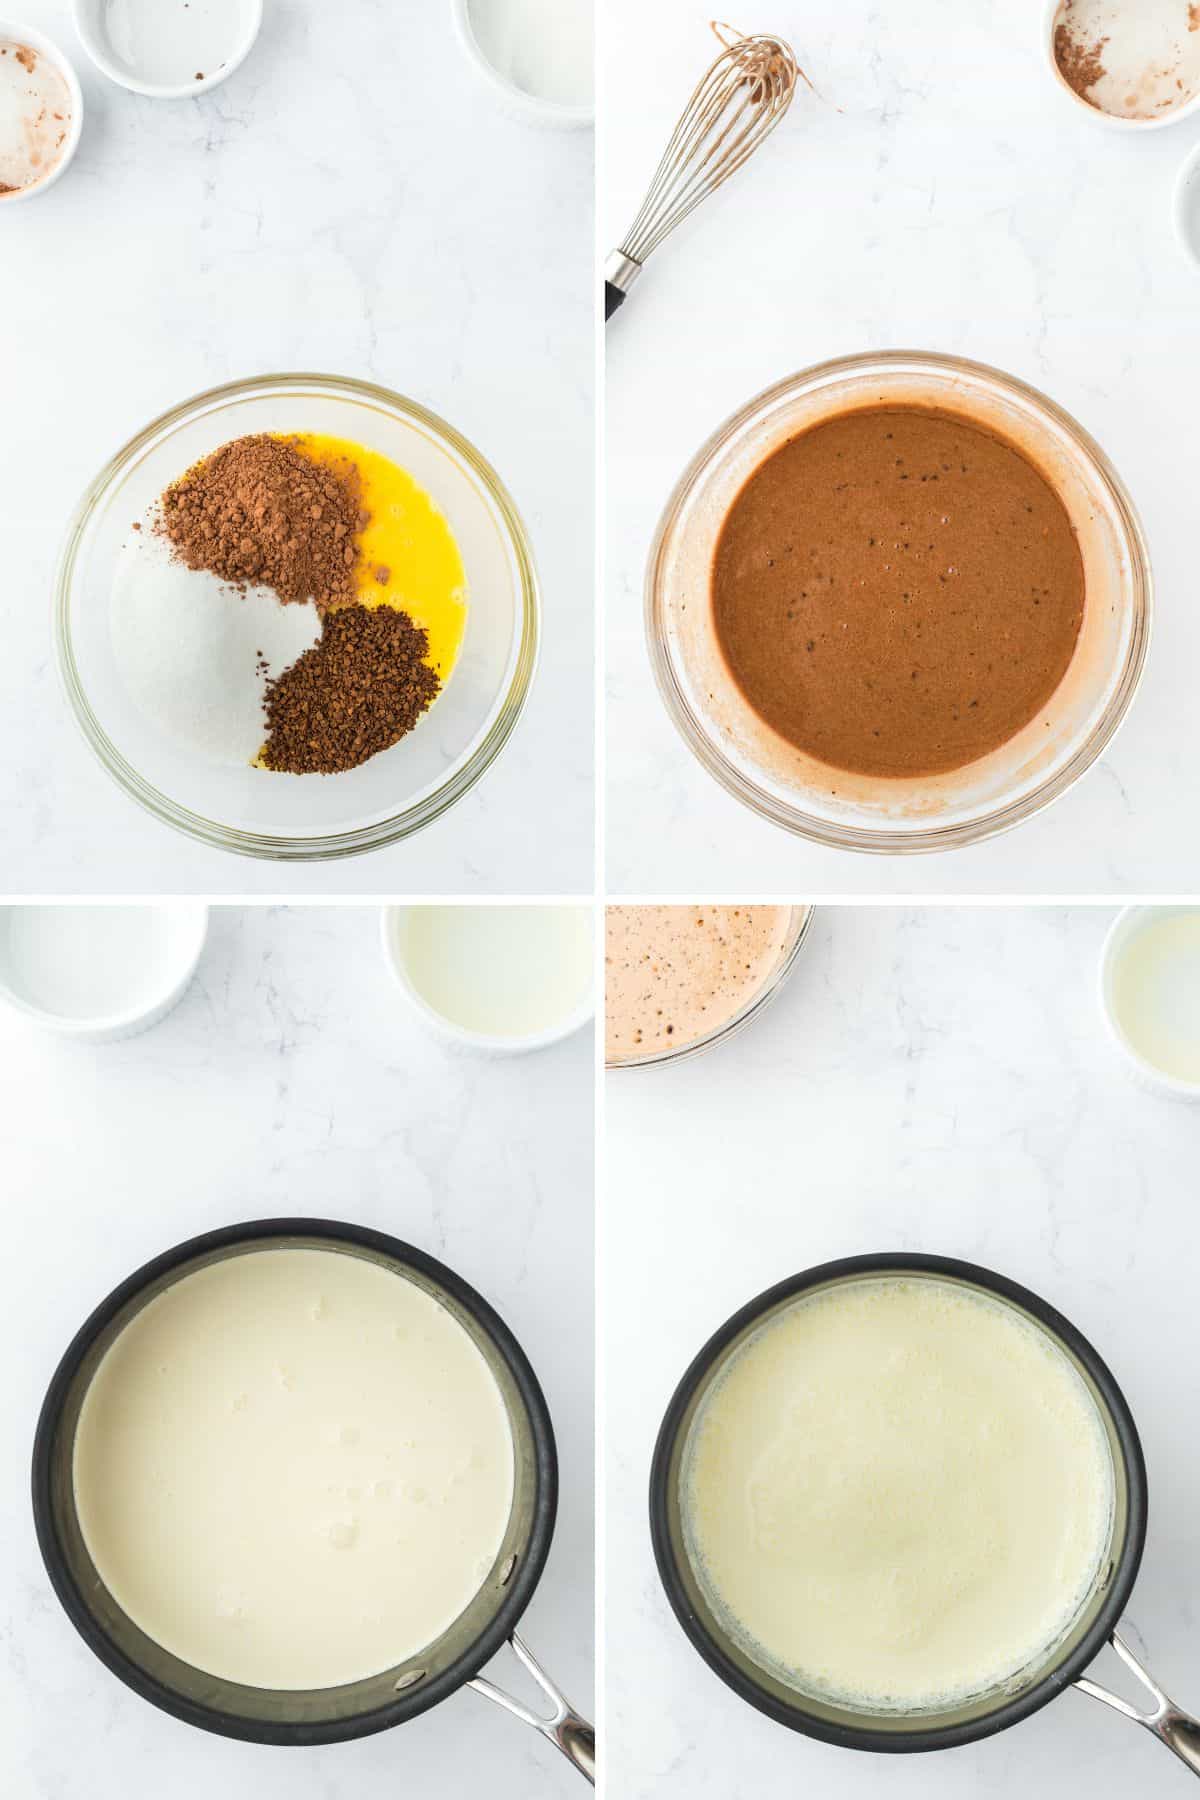
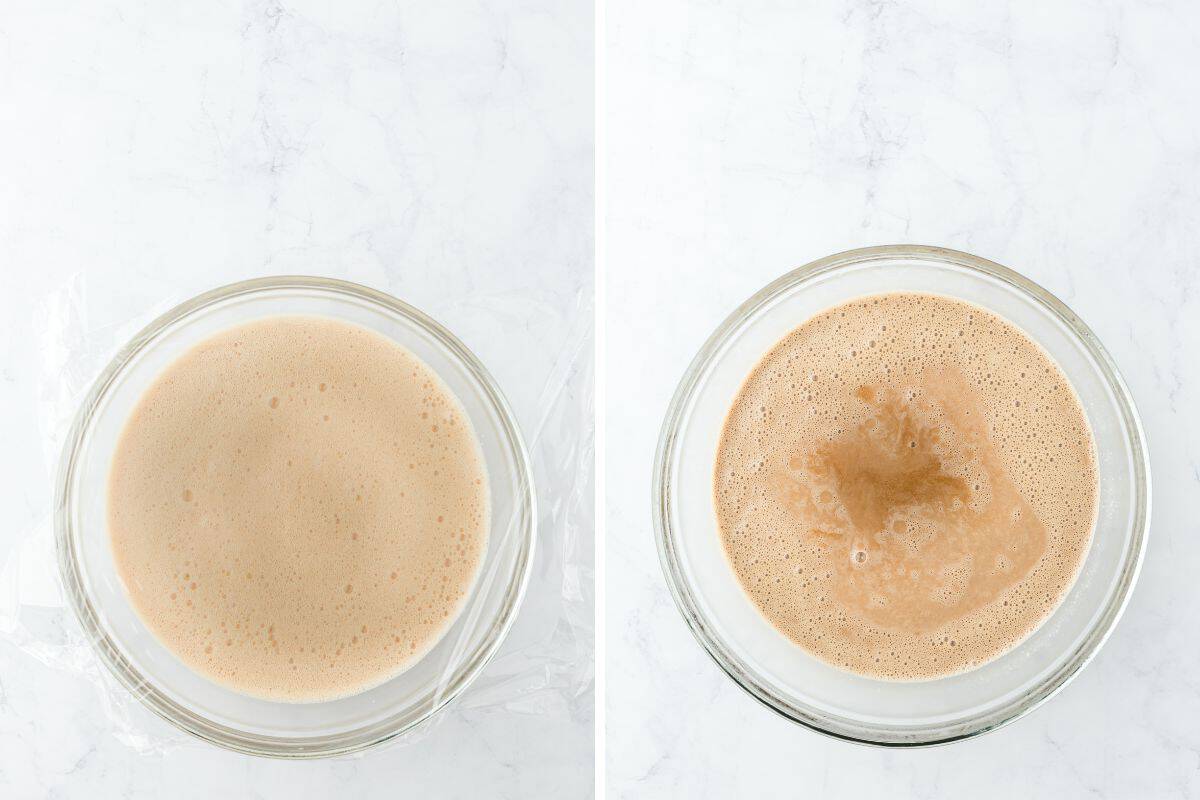
- Slowly add three tablespoons of the hot milk mixture to the egg mixture to temper it and whisk together to combine. Then slowly add in the rest of the milk mixture and continue whisk the entire time to make sure it doesn’t scramble. Cover with plastic and place the mixture in the refrigerator for 2-3 hours to chill completely.
- Remove the mixture from the refrigerator and stir in the vanilla extract.
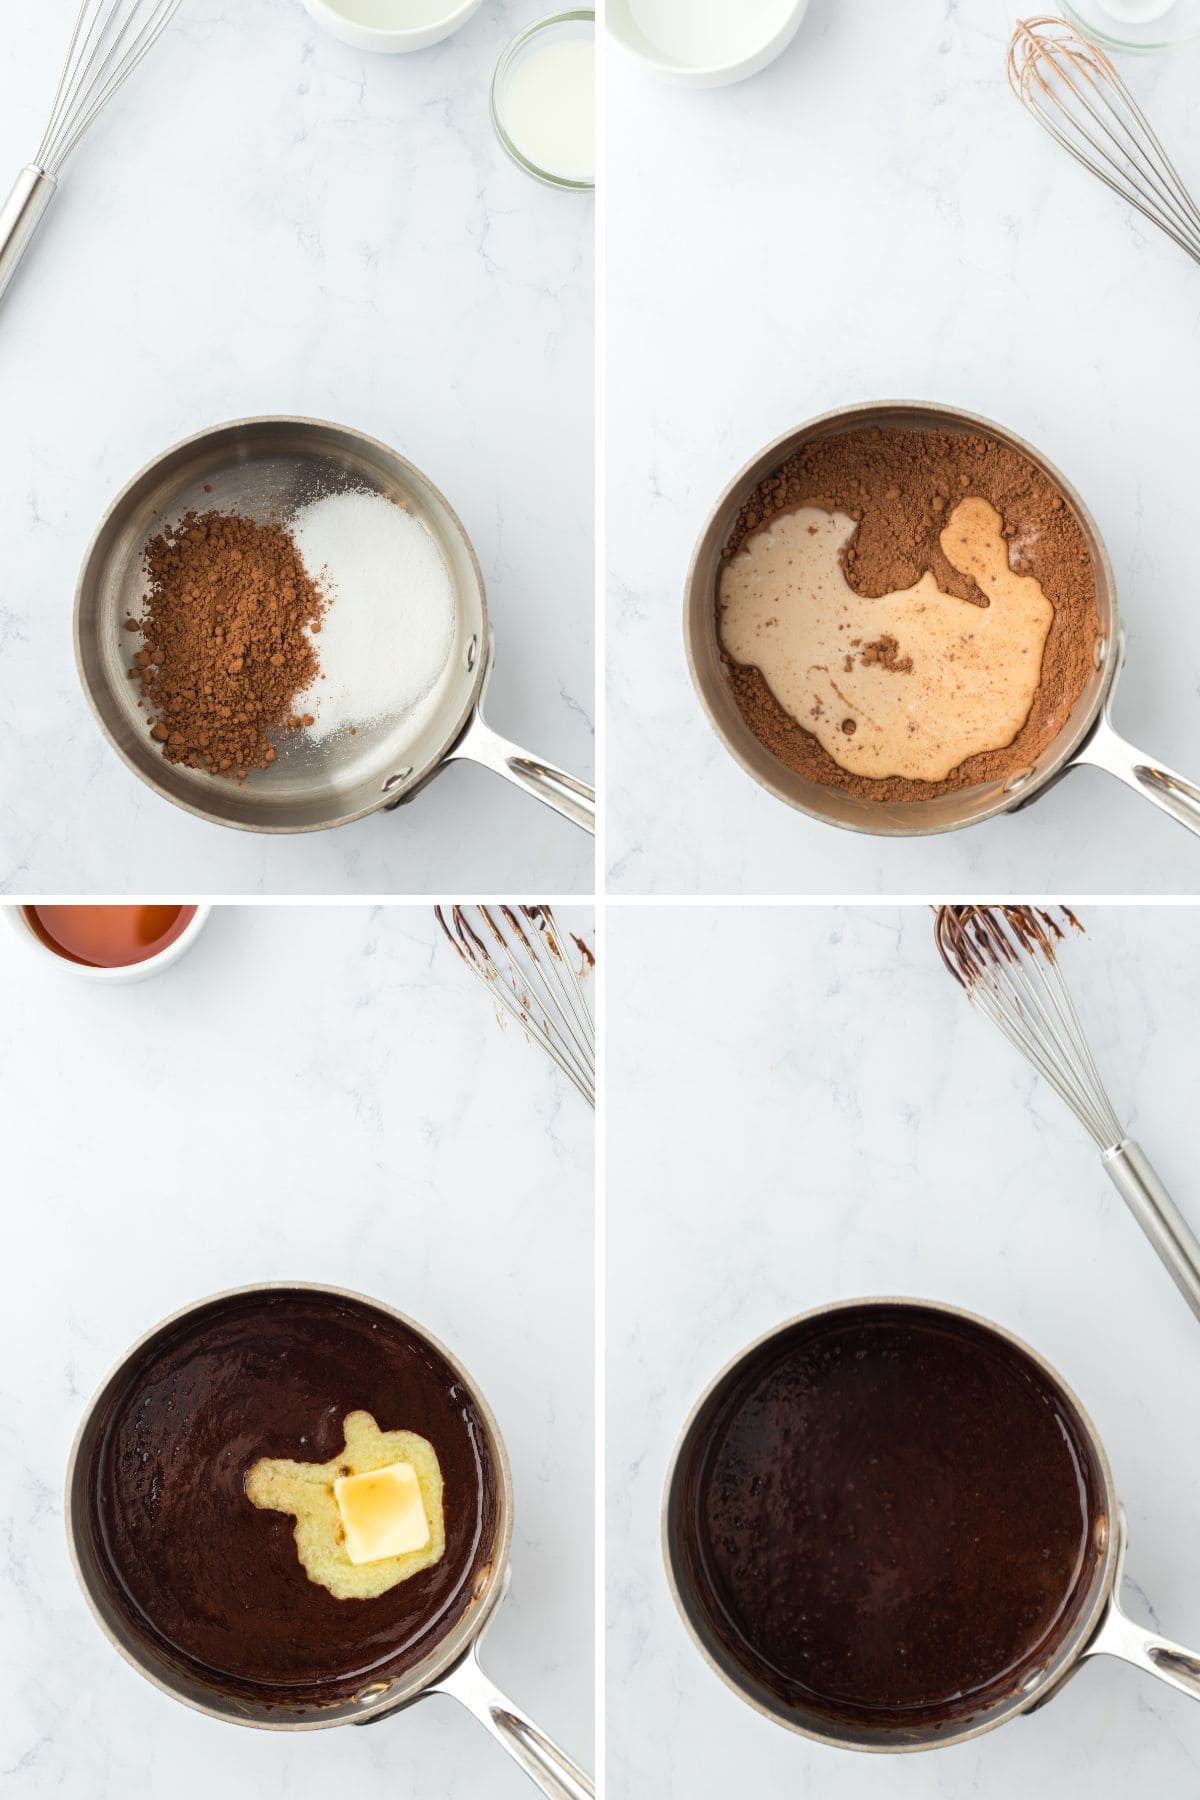
Step 2: Make the Chocolate Sauce:
- Add the sugar and cocoa powder to a small saucepan.
- Whisk in the corn syrup and milk and heat over medium heat.
- Reduce the heat to a low simmer once it boils, and add the butter and vanilla extract.
- Whisk until smooth then set aside to completely cool.
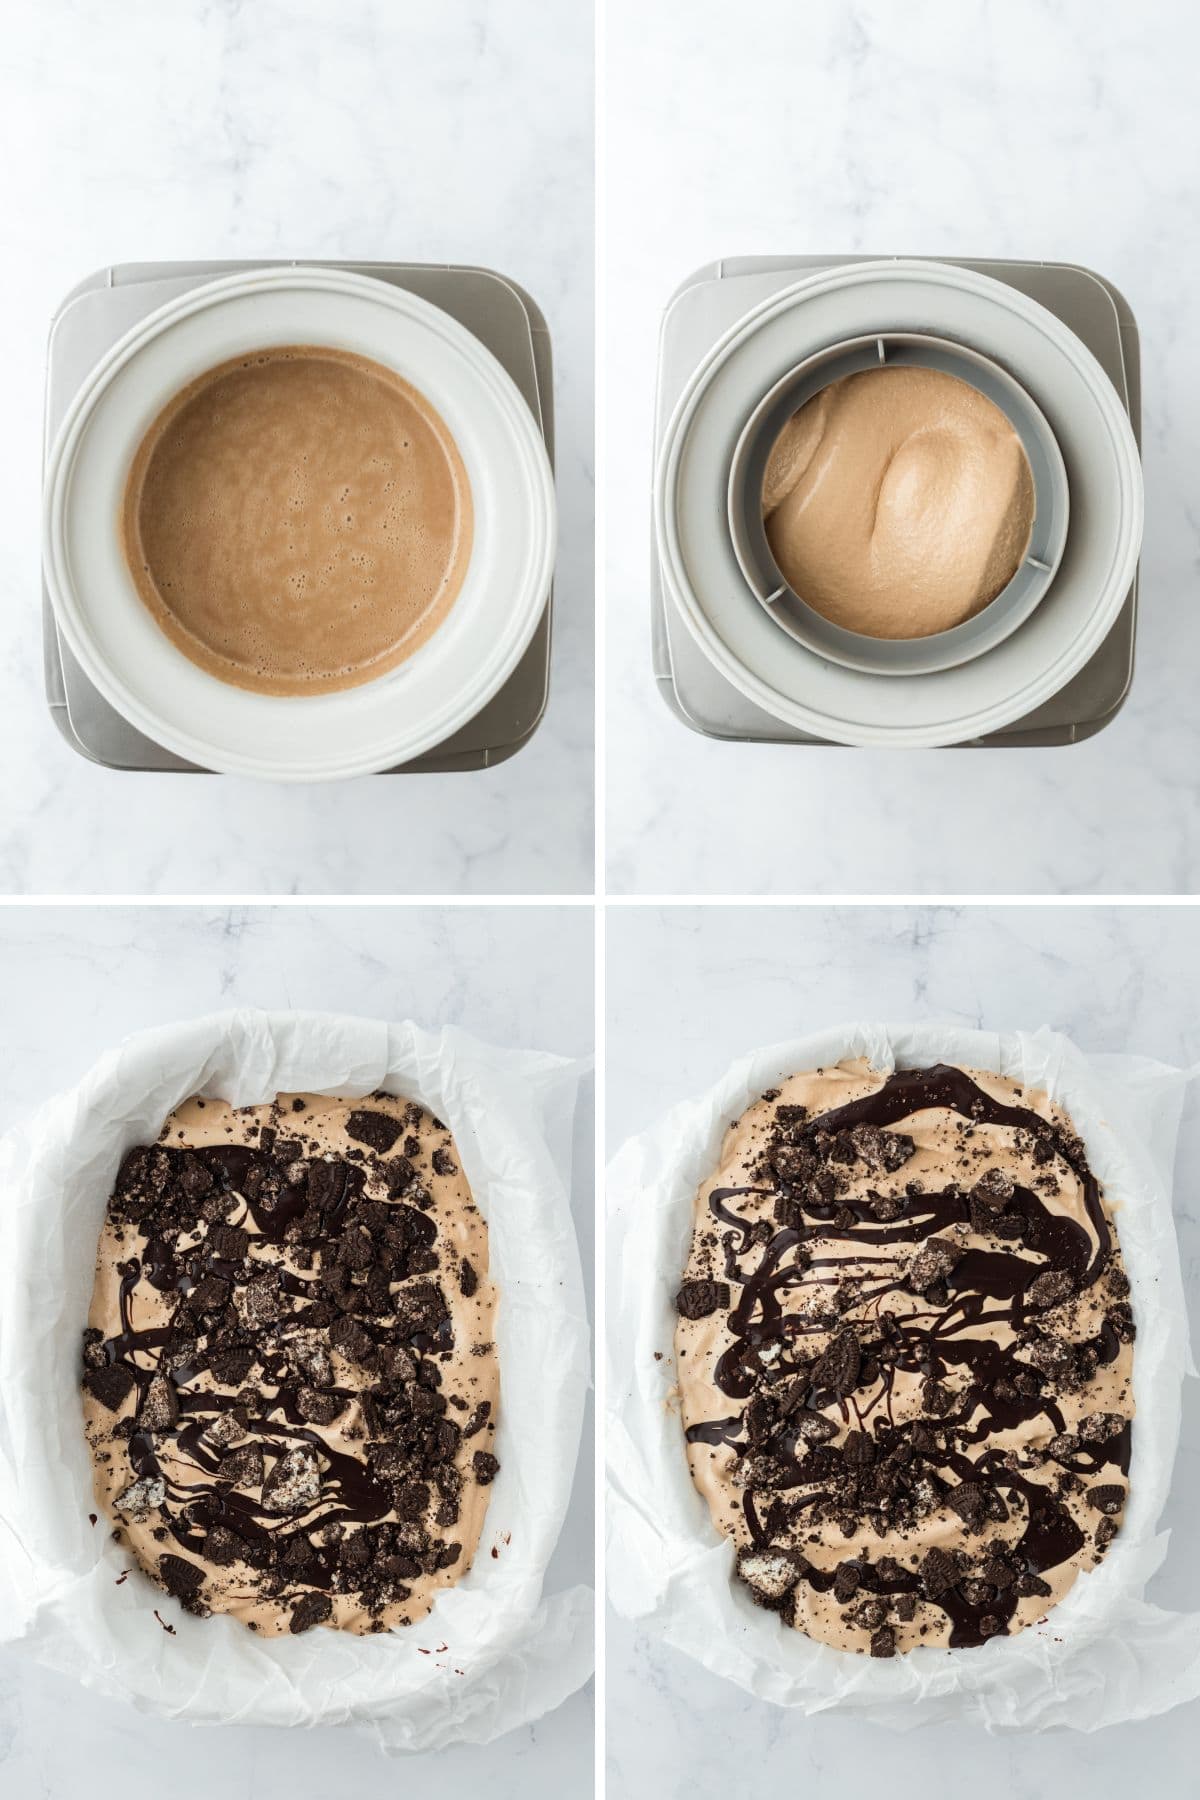
Step 3: Freeze the Ice Cream and Assemble
- Add the ice cream base mixture to an ice cream maker.
- Follow the manufacturer’s instructions and freeze until it gets to the soft serve stage.
- Spread a layer of ice cream in a freezer-safe container, top with chocolate sauce, then with crumbled cookies.
- Repeat making layers until all the ingredients are gone. Freeze it.
Want to Save This Recipe, Boo?
Mocha Ice Cream Recipe
Want to Save This Recipe, Boo?
Equipment
Ingredients
For the Ice Cream:
- 3 large large eggs
- 2 large egg yolks
- 1 ½ cups granulated sugar
- 2 tablespoons cocoa powder
- 2 tablespoons instant coffee
- 2 cups heavy whipping cream
- 2 cups half and half
- 2 tablespoons pure vanilla extract
For the Chocolate Sauce:
- 2 tablespoons granulated sugar
- 2 tablespoons unsweetened cocoa
- ¼ cup light corn syrup
- 2 tablespoons milk
- 1 tablespoon unsalted butter
- 1 teaspoon pure vanilla extract
- 5 crushed cookies and cream
Instructions
- Whisk eggs and egg yolks in a medium sized bowl. Next add sugar, cocoa powder, and instant coffee to the bowl and whisk together.
- Add heavy cream and half and half to a large saucepan and heat gently; do not let come to a boil.
- Temper eggs by slowly pour 1 cup of hot heavy cream mixture into egg mixture while whisking quickly. This will raise the temperature of the eggs carefully without scrambling them. Then while stirring, pour the tempered egg mixture slowly into the remaining heavy cream mixture in the saucepan.
- Gently heat ice cream base over medium low heat, stirring constantly (especially the corners of the pot), until thickened and reaches 170F on a digital thermometer. The mixture should look silky and coat the back of a spoon so when you run your finger through it, it doesn’t come back together.
- Remove from heat and add vanilla. Strain through a fine-mesh sieve (to catch any cooked egg pieces) and chill in an ice bath (a bowl set inside of a bowl of ice water) until it’s cooled to room temperature. Then cover with plastic wrap and move into the refrigerator until completely cold, about 2-3 hours.
For the Chocolate Sauce:
- Add sugar and cocoa powder to a small saucer then whisk in corn syrup and milk and heat over medium heat.
- Once everything comes to a boil, reduce heat to low to simmer.
- Add butter and vanilla extract and whisk until smooth then set aside to completely cool.
To assemble:
- Add your mixture to an ice cream maker according to the manufacturer’s instructions and freeze until it gets to soft serve stage.
- Alternate layering ice cream, chocolate sauce and crumbled cookies to freezer safe container until all ingredients are gone and freeze.
Notes
How to Store
Transfer the ice cream into an airtight, freezer-safe container and smooth the top. Seal it tightly and stash it in the coldest part of your freezer. When you are ready to serve, allow it to sit on the counter for 5-10 minutes to soften up before scooping it up and serving it. Store it in the coldest part of your freeze to keep it fresh and scoopable for up to 2 months! However, I have to say in all honesty that the ice cream doesn’t taste as fantastic when being stored that long. It’s best to enjoy it freshly made and within a week or so of making it!Nutrition
Recipe Tips
- Give It Some Time. Let your ice cream set up a while in the freezer before serving it. Usually an hour or so will do the trick.
- Don’t Swap the Dairy. Use full-fat dairy gives the best flavor and texture.
- Refer to Your Ice Cream Maker’s Instructions. They will all freeze at slightly different times so the best bet is to check them for the length of time it takes to freeze your ice cream.
- Temper the Egg Mixture. By adding it slowly you prevent the eggs from curdling or scrambling when adding the heated milk.
- Plan Ahead. There are multiple steps in this recipe and periods of time for cooling. You can’t rush things along if you want your ice cream to freeze properly. Make the chocolate sauce while the ice cream mixture is in the fridge so it has time to cool down to add to your ice cream.

Serving Suggestions
- Ice Cream Sundae: Serve it up as an ice cream sundae or banana split with homemade whipped cream, caramel sauce, and all your favorite ice cream toppings!
- Ice Cream Cookie Sandwiches: Spread it in between two brown butter chocolate chip cookies or use it to make these brownie ice cream sandwiches.
Recipe Help
Unfortunately, this particular recipe needs to be made with an ice cream maker. If you’re looking for a no-churn ice cream I highly recommend my strawberry cheesecake ice cream or banana pudding ice cream.
In order to get the marbled chocolate and cookie ribbons throughout the ice cream try to aim for 3-4 layers of ice cream separated with the cookies and sauce.
 pinterest
I am confessing that I am a coffee lover and love this ice cream more than anything else! This is what I am making with my boys over the weekend. Thank you for your detailed instructions.
WoooW, this looks soooo delicious and you have explained the recipe so well. Super easy to follow and i’m saving to try this soon.
I like coffee icecream as well as icecream with cookies in it and appreciate how this recipe combines both.
A very rich and silky ice cream. Though a bit time consuming it was worth every bite. I would love to try other flavors!
Forget your diet, this ice cream is worth every calorie! It comes out rich, sweet, creamy, and delicious. Loved it.
A super simple, easy, yet delicious ice cream to make. Mocha is one of my favorite ice cream flavors and I can’t wait to try this! Yum!
Ilove ice cream the combination of mocha with chocolate makes it more flavor full my friends also like mocha ice cream might do this excellent recipe thank you for sharing
We are still in a bit of cold, but I would not turn down this icecream! Two of our favorites. Chocolate and coffee. Incredible. We agree on using the full milk. Makes it so rich and creamy.
Well done!
Perfect recipe to plan my next dessert for my next party. Thanks for this delicious treat.