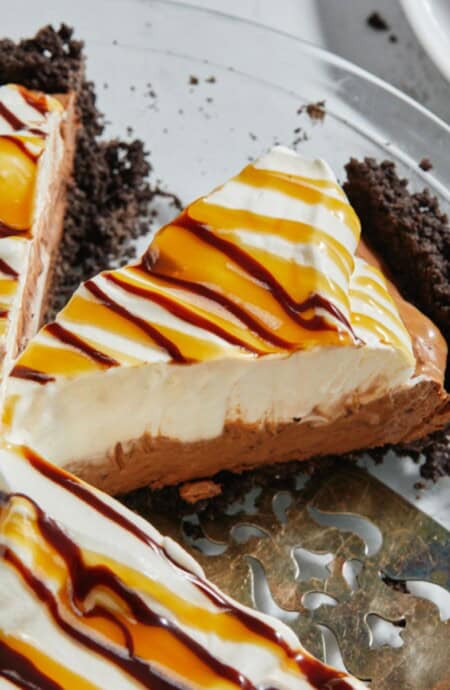
Chocolate Mousse Pie

This chocolate mousse pie is the perfect no-bake recipe made with chocolate pudding and whipped cream. It's a great option for when you want chocolate mousse!
Jump to Recipe

This Chocolate Mousse Pie is gonna knock your socks off!! It’s got a crunchy chocolate cookie crust, a smooth and creamy chocolate mousse in the middle, some whipped cream on top, and a drizzle of caramel and chocolate sauce for extra goodness. The chocolate mousse is the best part, yโ€™all โ€“ it’s really smooth and packed with chocolatey flavor! I mean, every layer of this chocolate mousse pie brings it!

This post may contain affiliate links. Read our disclosure policy.
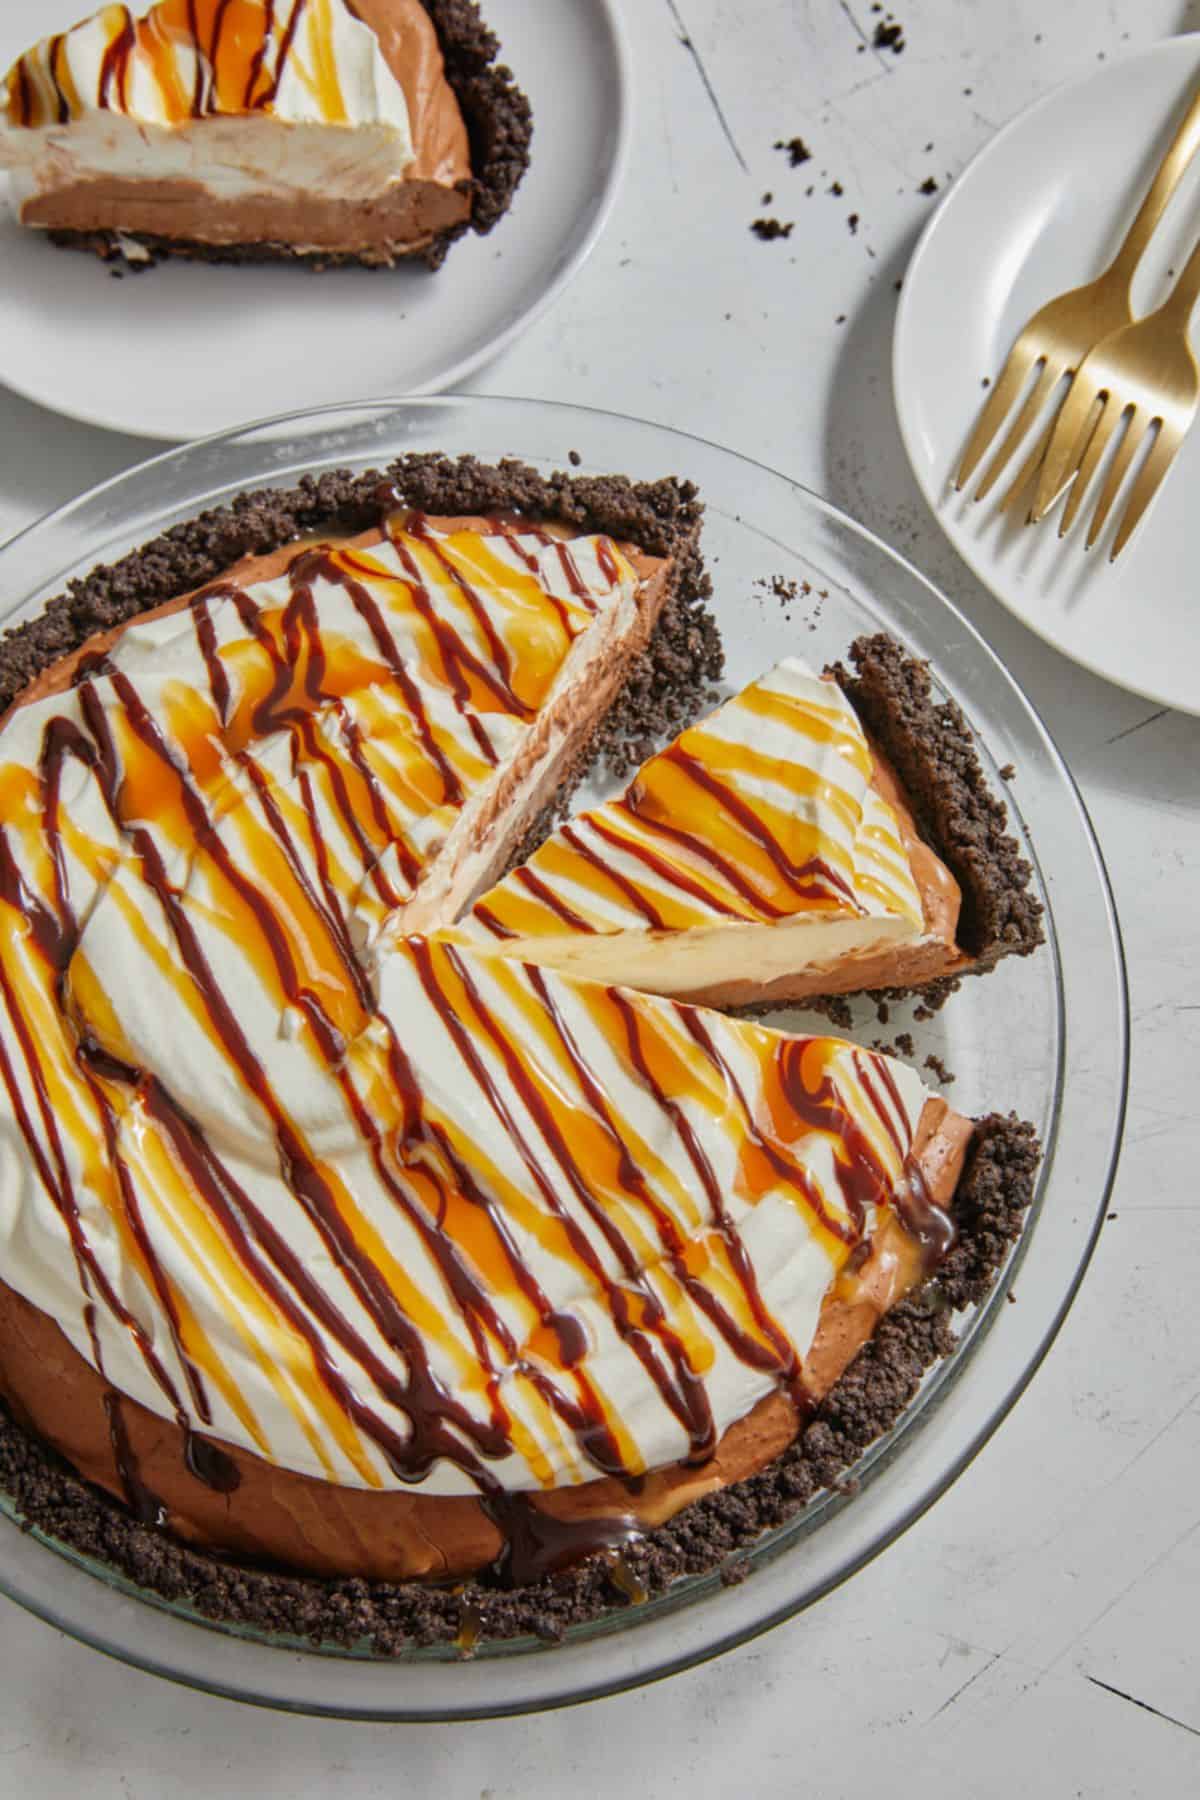
Overhead shot of chocolate mousse pie in a glass dish with two slices cut, one slice still on the glass dish, and one slice next to the glass dish in a white plate

Want to Save This Recipe, Boo?

I'll email this recipe to you, so you can come back to it later!

Whoever said pie is just for the holidays was definitely missing out!! In my book, every day is the perfect day for pie, especially when it’s this simple and no-bake. This easy chocolate mousse pie comes together effortlessly using a pudding mix, giving you that rich, decadent flavor in no time. It’s the ideal go-to for those chocoholic cravings when you want something special but without all the hassle. A quick, fancy treat that’s sure to satisfy!

The Heart & Soul Of Chocolate Mousse Pie

Cuisine Inspiration: American
Primary Cooking Method: No-Bake
Dietary Info: Vegetarian
Key Flavor: Rich, Decadent Chocolate
Skill Level: Beginner

Sweet Spots

  • Silky Smooth Delight: One bite, and you’ll be head over heels for the silky smooth texture of this chocolate mousse! Seriously, it’s so smooth it melts in your mouth with each forkful.
  • A Chocolate Lover’s Dream: For those who live and breathe chocolate, this pie is your soulmate. The rich chocolate flavor is deep, satisfying, and just plain heavenly, thanks to the cocoa and pudding mix. The best duo for chocolatey flavor!
  • Simple Elegance: Don’t let the fancy look fool you! This pie is as simple to make as it is impressive to serve. It’s the perfect go-to when you want to wow your guests without spending all day in the kitchen or rushing to the grocery store to get hard-to-find ingredients.
  • Quick and Easy: In a rush? No prob! This no-bake chocolate mousse pie comes together quicker than you can say “yum”, making it perfect for those last-minute dessert needs or sudden chocolate cravings.
  • Customizable Toppings: This pie is the perfect canvas to get creative with toppings! I love the classic look of the whipped cream and chocolate and caramel sauces, but you can add chocolate shavings, colorful sprinkles, and more!

Ingredients To Make Chocolate Mousse Pie

  • Instant Chocolate Pudding Mix: This little Jello packet is a magic maker, y’all. It gives you that rich, chocolatey flavor without all the work.
  • Unsweetened Cocoa Powder: If you want to amp up the chocolate flavor (and who doesn’t?), a touch of cocoa powder does the trick. It makes the mousse richer and more indulgent.
  • Milk: It helps everything blend together nice and smooth.
  • Heavy Cream: Here’s where we get that delightful creaminess from! Heavy cream whips up into a light, airy texture that makes the mousse filling SO dreamy and decadent.
  • Chocolate Sandwich Cookie Crust: You can pick up a store-bought one, but if you’re feeling adventurous, making it homemade adds a special touch. If you’ve never made a cookie crust before, no worries! It’s just like whipping up a graham cracker crust, but hold off on adding sugar โ€“ those chocolate sandwich cookies are sweet enough as is.
  • Whipped Cream: A dollop (or two, or three) of whipped cream is THE perfect topping! It adds a light, sweet touch that balances out the rich chocolate. You can use store-bought or homemade.
  • Caramel and Chocolate Sauce: The finishing touches that make your chocolate pudding mousse pie really stand out.
Ingredients to make chocolate mousse pie on a white surface before mixing

How To Make Chocolate Mousse Pie

Just a lil’ heads-up! Don’t forget to peek at the recipe card for all the detailed steps and exact quantities of ingredients needed. It’s your handy guide to ensure your chocolate pudding mousse pie turns out perfect.

Step 1: Mixing And Pouring The Pudding Filling

  1. Add pudding mix and cocoa powder to a mixing bowl. Cocoa powder is optional, but I highly suggest using it!
  2. Mix the two ingredients together until combined with no lumps.
  3. Add part of the milk to the pudding mixture and mix on medium until thick and smooth.
  4. Once smooth, add the remaining milk and mix until incorporated.
  5. Add heavy cream to the pudding mix in two intervals and mix on high speed until smooth and fluffy but still pourable.
  6. Pour the prepared chocolate filling into the pie crust and spread with a spatula until even.
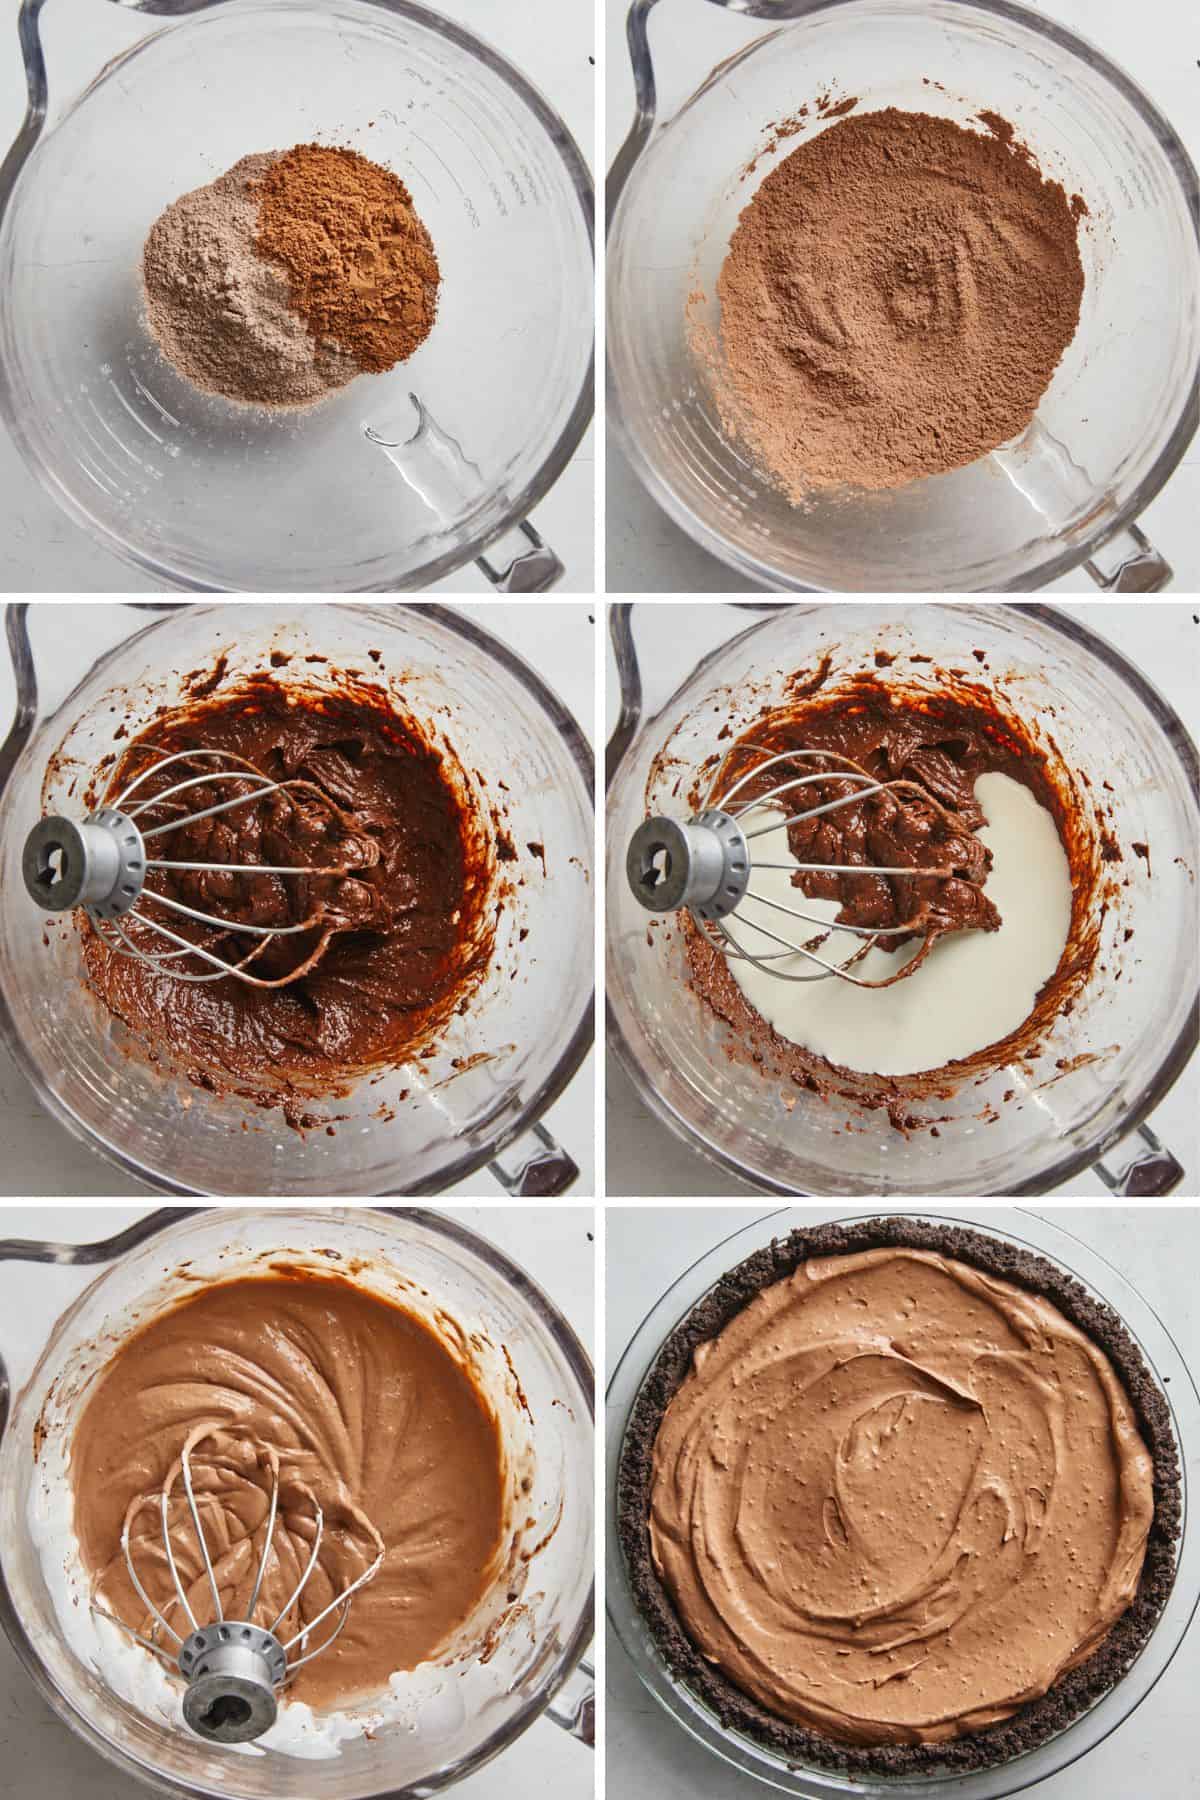
Collage of images showing the steps to make chocolate mousse pie, including mixing the chocolate mousse filling and pouring the filling into the pie crust

Step 2: Adding The Toppings

  1. Top the pie generously with whipped cream. If it’s homemade, even better!
  2. Garnish with caramel and chocolate sauce, refrigerate, and enjoy!
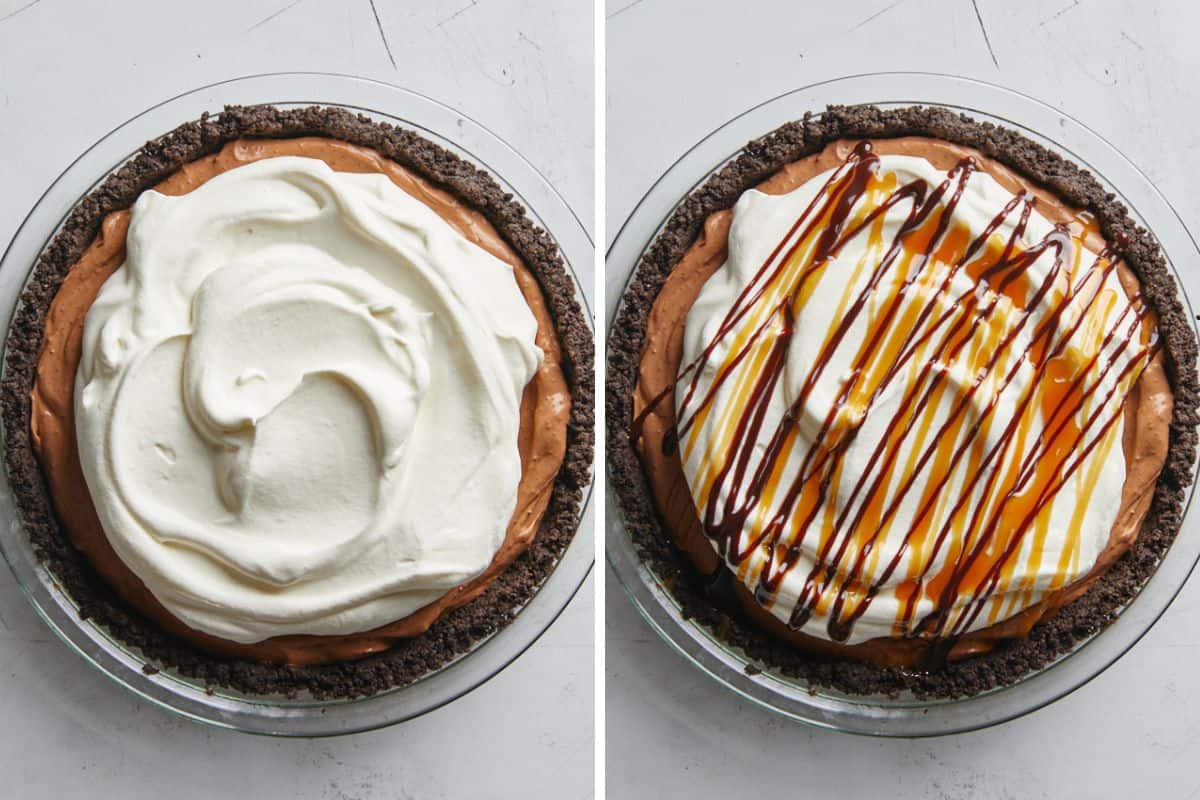
Collage of images showing the steps to make chocolate mousse pie, including topping it with whipped cream and drizzling caramel and chocolate sauce

Tips For Making The Best No Bake Chocolate Mousse Pie

  1. Mind Your Whipping: When you’re whipping up that heavy cream, keep an eye out not to overdo it. You’re aiming for a smooth, creamy texture, not butter! Stop when it’s still a bit soft and fluffy.
  2. Give It Time to Set: Patience, y’all. You have to let this chocolate mousse pie set in the fridge for some time before serving, so it’s best if you start to make it at least an hour before you plan to enjoy it. This ensures everything firms up just right, making for neater slices and a perfectly set mousse.
  3. Even Crust: When pressing your cookie crust into the pie dish, aim for an even thickness all around. A uniform crust means each slice is just as good as the last!
  4. Chill Your Mixing Bowl and Whisk: Before whipping up the heavy cream, give your mixing bowl and whisk a lil’ chill time in the fridge. It can help the cream whip up quicker and stay fluffy.
  • Add Dutch Cocoa Powder: If you really, REALLY love chocolate, swap the regular unsweetened cocoa powder for Dutch-processed cocoa powder. This variety offers a deeper, more intense chocolate flavor.
  • Coffee Infusion: Mix a teaspoon of instant coffee or espresso powder into the pudding mixture. It’ll give your chocolate mousse a subtle mocha flavor that’s simply delicious.
  • Cheesecake Layer: For an extra layer of decadence, add a thin layer of no-bake cheesecake under the chocolate mousse. This may be too sweet for some, but c’mon – sometimes we need that extra sweetness in our lives!
  • Salted Caramel Drizzle: Instead of regular caramel sauce, go for a salted caramel topping. The salty-sweet combo really brings out the richness of the chocolate!
  • Berry Topping: Top your pie with fresh strawberries, raspberries, or blueberries for a burst of fruity flavor and color.
A slice of chocolate mousse pie and a golden fork piercing a piece of the pie on a white plate

What To Serve With This Easy Chocolate Mousse Pie

  • Balance the richness of your pie with some light and tangy fruit-based desserts. Think along the lines of a zesty lemon pound cake or a fresh berry salad.
  • This chocolate mousse pie recipe pairs beautifully with a variety of coffees and teas. On a hot summer day, a glass of sweet iced tea makes a refreshing companion. And when the weather turns cooler, cozy up with a mug of rich, hot coffee or a soothing hot white chocolate hot cocoa.
  • For those who adore layers upon layers of decadence, why not offer extra whipped cream, chocolate sauce, or even a salted caramel sauce on the side? Guests can add as much or as little as they like!
  • If you’re celebrating a special occasion, why not pop open a bottle of sparkling wine or champagne? The bubbles and lightness of these drinks are a great match for the dense, creamy texture of the pie.

How To Store Chocolate Mousse Pie

After you’ve enjoyed that first heavenly slice (or two), you’ll want to keep your chocolate mousse pie in the fridge. Just cover it gently with some plastic wrap or a pie cover. This will help keep all that chocolatey goodness fresh and the crust crisp.

How Long Will Chocolate Mousse Pie Last In The Fridge?

In the fridge, your pie will stay fresh and tasty for about 3 to 4 days. Actually, the flavors meld a little more the first two days, making each slice just as yummy as the first. Just remember to cover it back up after each sneaky midnight snack!

Can I Freeze Chocolate Pudding Mousse Pie?

If you got more pie than you can handle, you can freeze it! Just wrap it up tightly with some plastic wrap and then a layer of aluminum foil. In the freezer, it’ll stay good for about a month. When you’re ready to enjoy it again, simply thaw it in the fridge overnight.

Chocolate mousse pie in a glass dish with two slices cut, one slice still on the glass dish, and one slice next to the glass dish in a white plate

Frequently Asked Questions

Can I make this pie ahead of time?

Sure can! In fact, it’s even better if you do. Making this pie ahead and letting it rest for a whole day in the fridge not only makes it easier to serve, but also deepens the chocolate experience.

Why is my mousse soupy?

If your mousse is more like a chocolate soup, it might be because the heavy cream wasn’t whipped enough, or the mixture didn’t get enough chill time in the fridge. Make sure to whip that cream to soft peaks, and don’t rush the chillin’ process!

Is there a non-dairy alternative for the heavy cream?

Absolutely! You can use coconut cream as a non-dairy alternative. It whips up nicely, just like heavy cream, and adds a subtle coconut flavor, which pairs surprisingly well with the chocolate.

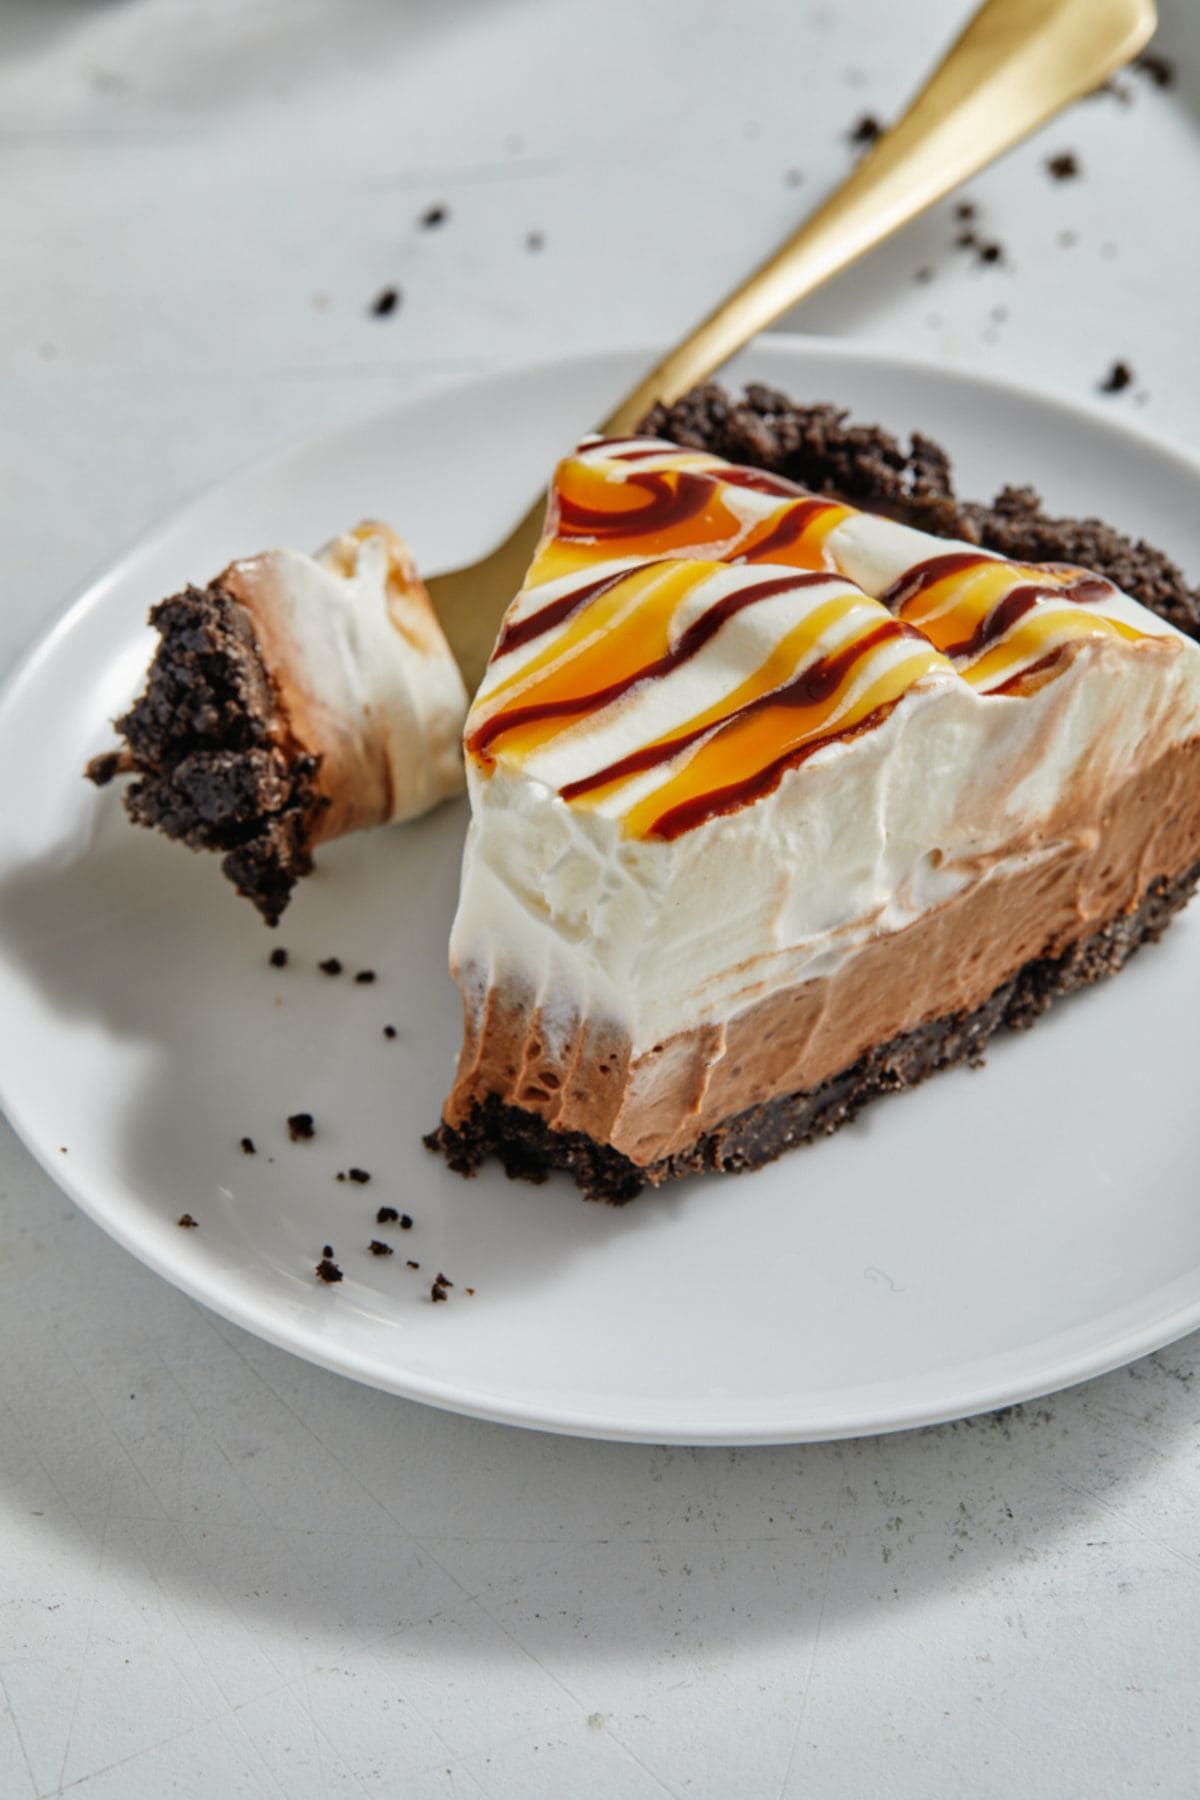
Close up of a slice of chocolate mousse pie on a white plate with a forkful taken out

This easy Chocolate Mousse Pie ain’t just any old pie – it’s a symphony of creamy mousse, smooth whipped cream, and a crumbly crust that sings with every bite! Perfect for any occasion, or just because you deserve a chocolatey, decadent treat. Can’t wait to hear all about how yours turned out!

More Chocolate Pie Recipes

*Did you make this recipe? Please give it a star rating and leave comments below!* Post a photo of how your version of the recipe came out on Instagram (using #grandbabycakes)!!

A slice of chocolate mousse pie drizzled with caramel and chocolate sauce being lifted off the pie, showing the creamy texture and the crumbly chocolate crust

Chocolate Mousse Pie

This chocolate mousse pie is the perfect no-bake recipe made with chocolate pudding and whipped cream. It's a great option for when you want chocolate mousse!
5 from 8 votes
Prep Time 5 minutes
Chill Time 1 hour
Total Time 1 hour 5 minutes
Course: Dessert
Servings: 8 slices

Equipment

Ingredients

  • 1-3.9 oz. box instant chocolate pudding
  • 1 cup milk divided
  • 1 ยฝ cups heavy cream
  • 1 chocolate sandwich cookie crust homemade or store bought
  • 1-2 cups whipped cream
  • Caramel and chocolate sauce for garnish

Instructions

  • Add pudding mix to the stand mixer. Add 1/4 cup of milk to the pudding mixture and mix on medium until thick and smooth. Once smooth, add the remaining milk and mix until incorporated.
  • Add heavy cream to the pudding mix in two intervals and mix on high speed until smooth and fluffy but still pourable, about 1-2 minutes.
  • Pour the prepared chocolate filling into pie crust and spread with spatula until even. Top with whipped cream and garnish with caramel and chocolate sauce then refrigerate for 60 to 90 minutes then serve.

Notes

  1. Mind Your Whipping: When you’re whipping up that heavy cream, keep an eye out not to overdo it. You’re aiming for a smooth, creamy texture, not butter! Stop when it’s still a bit soft and fluffy.
  2. Give It Time to Set: Patience, y’all. You have to let this chocolate mousse pie set in the fridge for some time before serving, so it’s best if you start to make it at least an hour before you plan to enjoy it. This ensures everything firms up just right, making for neater slices and a perfectly set mousse.
  3. Even Crust: When pressing your cookie crust into the pie dish, aim for an even thickness all around. A uniform crust means each slice is just as good as the last!
  4. Chill Your Mixing Bowl and Whisk: Before whipping up the heavy cream, give your mixing bowl and whisk a lil’ chill time in the fridge. It can help the cream whip up quicker and stay fluffy.

Nutrition

Serving: 1 slice | Calories: 206kcal | Carbohydrates: 8g | Protein: 3g | Fat: 19g | Saturated Fat: 12g | Polyunsaturated Fat: 1g | Monounsaturated Fat: 5g | Trans Fat: 0.01g | Cholesterol: 60mg | Sodium: 76mg | Potassium: 127mg | Fiber: 1g | Sugar: 6g | Vitamin A: 757IU | Vitamin C: 0.3mg | Calcium: 77mg | Iron: 0.3mg
Tried this Recipe? Tag me Today!Mention @GrandbabyCakes or tag #grandbabycakes!
Filed Under:  Dessert and Baking, No-Cook, Pies

Comments

  1. Your cake is a showstopper! I am a newbie and don’t bake often. I loved this cake the minute you published it and wanted to make it, so I followed your detailed instructions and pulled it off! It looks amazing, a little untidy but still! and tastes so good! Thanks so much for this!

  2. My friends and family immensely enjoyed this chocolate mousse pie. Such a great recipe for chocolate lovers.

  3. Easy to make and scrumptious, this no bake chocolate mousse pie was the perfect dessert to serve to our guests. Everyone loved it!

  4. The smoothness and creaminess of this cake looks so tasty and I appreciate the answers to FAQs that you provided.

  5. There is nothing more satisfying than this!! This was absolutely the perfect dessert to make for friends! LOVE!!

  6. Our dinner guests were so impressed with this dessert. It looked and tasted amazing, and everyone wanted the recipe. Thank you!

  7. This is so quick and easy and delicious too. Perfect recipe for a quick dessert. I have to give this a go.

5 from 8 votes

Leave a Reply

Your email address will not be published. Required fields are marked *

Recipe Rating