
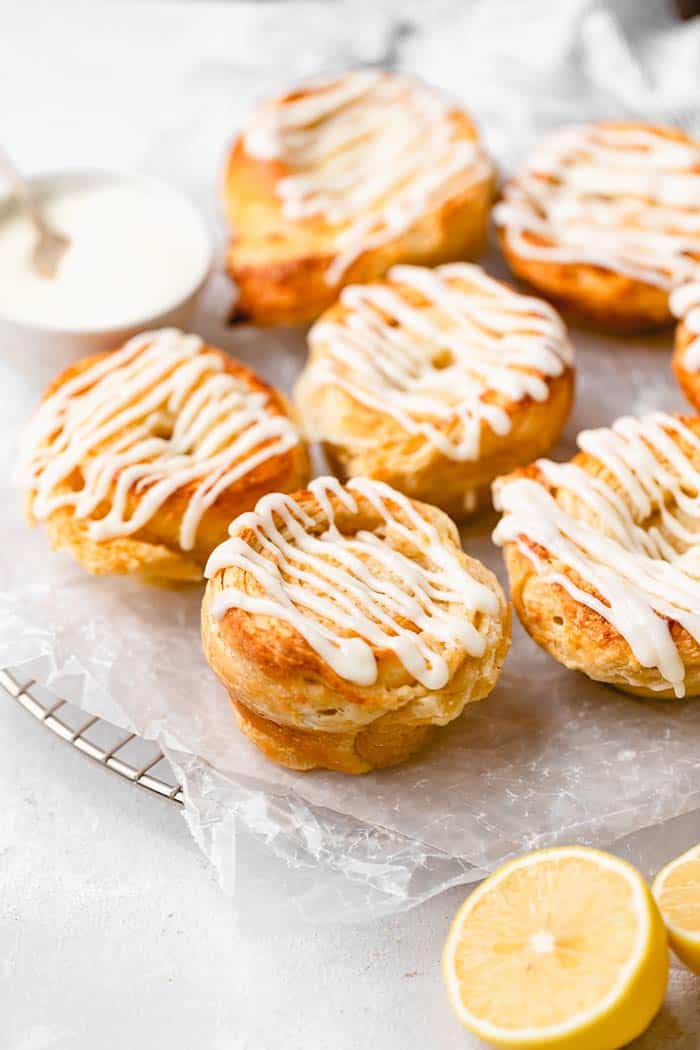
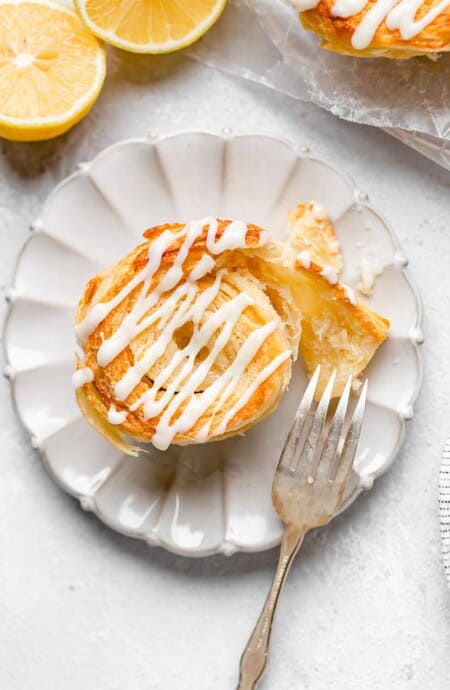
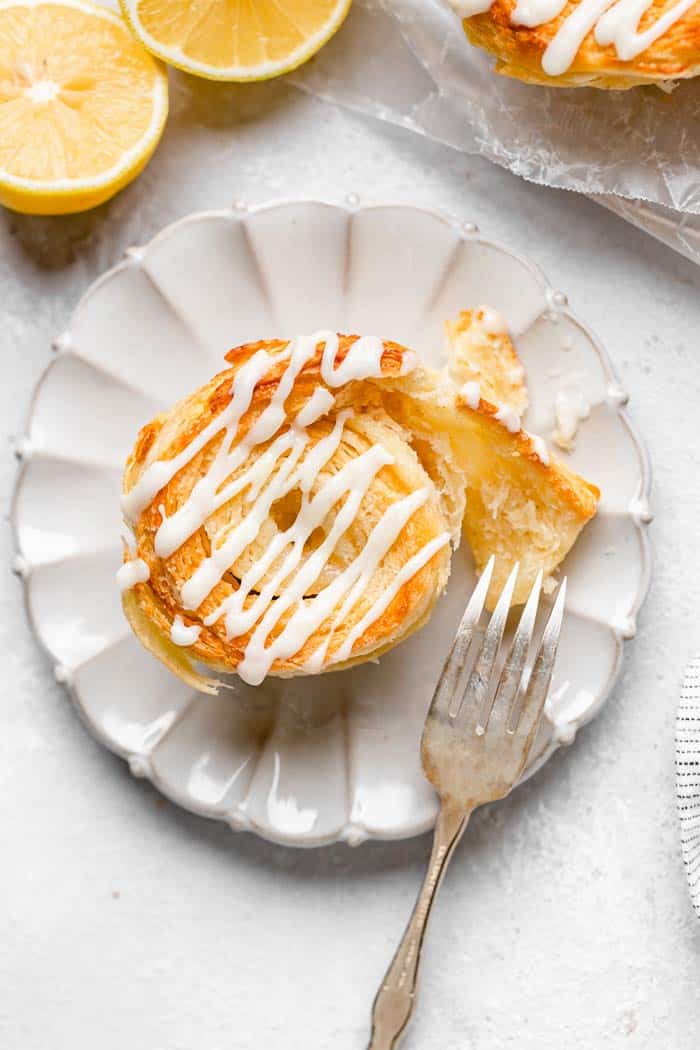
One of the top intimidating things my readers tell me is they are scared of working with dough. That’s why I love these lemon cinnamon rolls so much. I don’t use any yeast to make them! Instead I make the most flaky biscuit dough that’s a dream when you add in the lemon sugar filling, bake up and top with a lemon cream cheese drizzle. I swear, you may not even go back to OG rolls after these.
This post may contain affiliate links. Read our disclosure policy.
How to Make Lemon Cinnamon Rolls
For the dough
- Whisk flour, cornstarch, sugar, baking powder, ginger, salt, and lemon zest. Toss in 1 cup of the shredded butter. Add cold milk and knead just until dough forms.
- On a floured surface, fold dough 4 times, roll to a 12×8” rectangle. Shred ½ cup butter over ⅔ of surface, fold like a letter, roll out again, fold like a book, wrap, and chill for 1 hr. Repeat roll, fold, and chill 40–60 min (can do ahead).
For the lemon sugar filling
- Mix sugar, lemon zest, and cinnamon together then set aside.
To Assemble
- Preheat oven to 350°F. Grease muffin tin. Roll dough to 14×18”, spread butter, sprinkle filling, roll tightly then pinch the seam.
- Slice into 12, place in tin seam-side down. Bake 35 min until golden. Cool 10 min, then transfer to rack.
For the icing drizzle
- Beat the cream cheese with salt until smooth. Gradually add powdered sugar and whip until fluffy.
- Blend in lemon juice and zest. Drizzle over cooled biscuits (can make up to 3 days ahead).
Want to Save This Recipe, Boo?
Lemon Cinnamon Rolls Recipe
Made with a flaky biscuit dough, a sugary citrus filling and a zippy cream cheese drizzle, these Lemon Cinnamon Rolls are a deliciously perfect way to transition into Spring!
Want to Save This Recipe, Boo?
Servings: 12 servings
Ingredients
For the Laminated Dough
- 3 3/4 cup all-purpose flour
- 1/4 cup cornstarch
- 2 tbsp granulated sugar
- 3 tsp baking powder
- 1 tsp ground ginger
- 1 tsp salt
- 2 tsp lemon zest from 1 large lemon
- 1 1/2 cup unsalted butter 3 sticks/ Cold and separated
- 1 1/2 cup whole milk cold
For the Lemon Sugar Filling
- 1/2 cup granulated sugar
- 2 tbsp lemon zest from 2 lemons
- 1/2 tsp ground cinnamon
- 1/2 cup salted butter softened
For the Lemon Cream Cheese Icing
- 4 oz cream cheese room temperature (1/2 brick)
- pinch of salt
- 1 1/2 cup confectioner's sugar
- 2 tbsp lemon juice plus more to thin icing
- 1 1/2 tsp lemon zest from 1 lemon
Instructions
For the Laminated Biscuit Dough
- Sift the all-purpose flour, cornstarch, sugar, baking powder, ginger and salt together into a large mixing bowl. Add the lemon zest and toss with your hands. Make a well in the center of the dry mix.
- Shred 1 cup of unsalted butter (2 sticks) into the well you created in the dry ingredients. Use your hands to toss the flour and shredded butter together.
- Pour the cold milk into the butter-flour mixture and knead just until a thick dough forms.
- Turn the dough out onto a floured surface and fold the dough over itself four times to develop a stiff dough.
- Use a rolling pin to roll the dough out into a rectangle that’s approximately 12” long by 8” wide. Shred the remaining ½ cup of butter (1 stick) onto 2/3rds of the rectangle’s surface.
- To encase the butter in the dough, first fold the unbuttered third of dough over the centered third- as if you’re folding a letter- then, fold the exposed third over the middle fold. You should have a rectangle with no buttered parts exposed.
- Roll the dough out into a rectangle the same size as before. Fold the two short ends towards the center, then fold the dough over- as if you’re closing a book. Wrap the rectangle of dough in plastic wrap and chill the dough in the refrigerator for 60 minutes.
- Remove the dough from the plastic wrap and re-roll to a rectangle, once more. Fold the dough in four parts as before. Re-cover the dough and chill for 40-60 minutes. This step may be done a day ahead.
For the Lemon Sugar Filling
- In a small mixing bowl, stir together the sugar, lemon zest and ground cinnamon until well combined.
- Set the bowl aside. You will use the butter to spread over the dough in the assembly.
To Assemble the Biscuits
- Preheat your oven to 350°F. Grease a muffin tin with baking spray.
- Roll the dough out into a 14” x 18” rectangle. Spread the butter onto the dough surface.
- Sprinkle the lemon cinnamon-sugar mixture evenly over the buttered surface of the dough.
- Begin rolling the dough at the buttered edge. Roll the dough tightly- to prevent unrolling during baking- towards the unbuttered margin. Pinch the dough at the seam once you’ve rolled the dough completely. Roll the dough so the seam is on the bottom of the log.
- Use a sharp knife to cut the roll of dough into 12 slices of equal size.
- Press the circles of dough into the greased muffin cups. Pressing down lightly on the inner part will help them form a swirl when they’re baked.
- Bake the rolls for 35 minutes, or until they are golden brown and puffed up from the muffin cups.
- Remove the pan from the oven and allow the biscuits to cool in the pan for 10 minutes. Remove the biscuits from the pan and allow them to cool completely on a cooling rack while you make the frosting.
- For extra lemony flavor, brush a thin layer of lemon juice on the tops of each muffin right after removing them from the pan.
For the Lemon-Cream Cheese Drizzle
- While the biscuits are cooling, use an electric hand mixer to blend the cream cheese, and salt together on low speed until smooth.
- Gradually add the confectioner’s sugar to the cream cheese, blending on low, until all of the sugar has been added. Scrape down the bowl and beater and increase the mixer’s speed to medium to whip until light and fluffy.
- Add the lemon juice and zest to the mixture and blend on low speed until the juice is fully incorporated. The drizzle may be made 3 days in advance.
- Pipe a thin drizzle over the baked and slightly cooled lemon-ginger roll biscuits.
Video
Notes
Storage: The biscuits may be stored at room temperature for 2 days. Reheat in the microwave for 15 seconds, or in a 200°F oven for 5 minutes. Any longer and pop in the fridge for storing for up to 7 days.
Nutrition
Calories: 576kcal | Carbohydrates: 60g | Protein: 6g | Fat: 35g | Saturated Fat: 22g | Trans Fat: 1g | Cholesterol: 95mg | Sodium: 310mg | Potassium: 213mg | Fiber: 1g | Sugar: 27g | Vitamin A: 1123IU | Vitamin C: 3mg | Calcium: 105mg | Iron: 2mg
Tried this Recipe? Tag me Today!Mention @GrandbabyCakes or tag #grandbabycakes!
Recipe Tips
- Keep the Biscuit Dough Cold: Cold butter will create the layers in the laminated dough and make these absolutely delish. I recommend freezing your sticks of butter about 20 minutes before grating them then chilling after the dough is ready to keep those layers.
- Fill the Rolls Edge to Edge: Cover every square inch of the dough with cinnamon-sugar filling. You’ll only need to leave a small section along one edge bare so you’re able to pinch and seal the seam closed once you’ve rolled the dough.
- Roll Tightly: The tighter you’re able to roll, the more buttery layers you’ll get. This will also ensure that the rolls keep their shape during baking.
- Use Floss: If your knife isn’t sharp enough, it will squish the rolls and ruin their shape. Instead, loop a piece of dental floss around the dough and cut through the cinnamon rolls. Make sure it is unflavored.
- Cool a Bit: Before icing. I like to wait at least 10 minutes for adding the icing.
 pinterest
Can I use ginger paste instead of fresh ginger?
Yes you can.
I would LIKE TO make these cinnamon rolls but I don’t see cinnamon as an ingredient. What am I missING?
Yep a 1/2 teaspoon of cinnamon to the lemon sugar mixture.
Thanks!
These are so wonderful. The lemon flavor is just right and the texture is incredible. I had my doubts because I love yeasted cinnamon rolls and I was proven very wrong! And a big plus is that they are gorgeous. I just can’t say enough good things about these rolls! Thank you!
I just bought a bag of Meyer lemons so will try them! Would it be ok to use buttermilk instead of whole? I always have buttermilk in the house, but not whole…thanks.
I love cinnamon rolls but hate working with yeast with a passion so this recipe sounds perfect for me! The combination of cinnamon and lemon also sounds interesting. Going to try this recipe and let you know how it goes!
I’m a huge lemon fan and the combination with cinnamon sounds amazing. I’m excited and look forward to making these rolls and I love your dental floss tip 🙂 Very nice!
Never thought of adding lemon – what a great idea!
Such a bright and delicious biscuit roll with a punchy lemon cream cheese frosting! So delicious!
Ohhhh I love the addition of lemon with these cinnamon rolls. Perfect combination!