
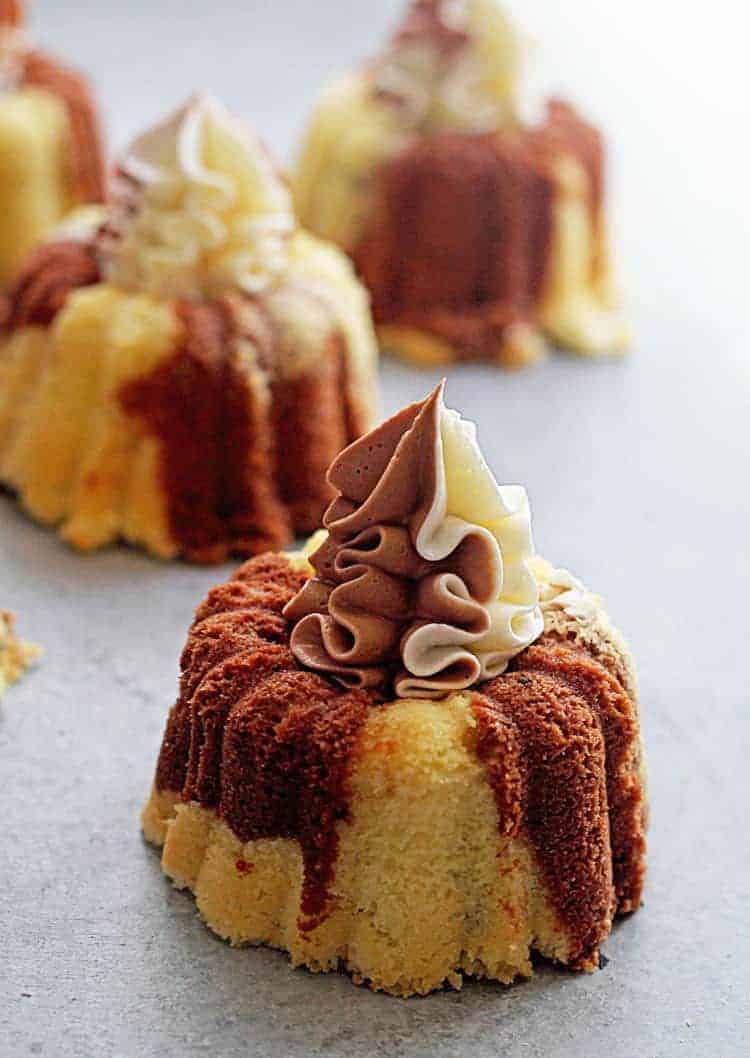
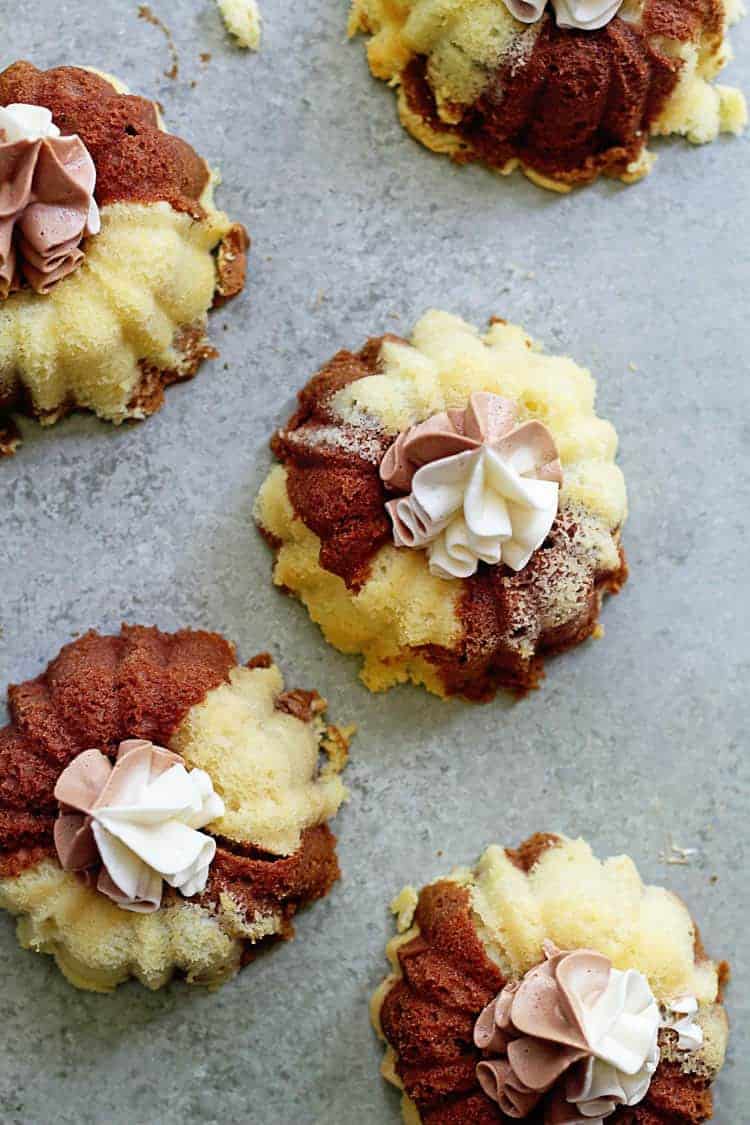
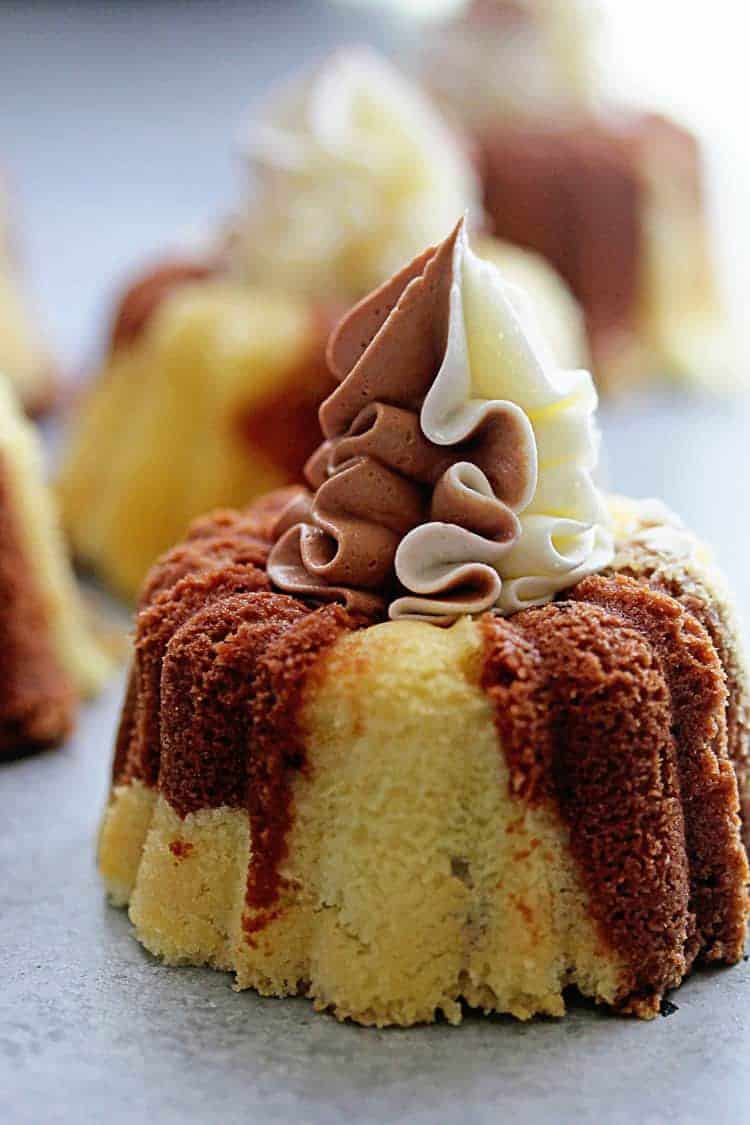
Why choose between chocolate and vanilla flavors when you can have Marble Cupcakes with a matching chocolate and vanilla buttercream.when you can have both in this perfect recipe with matching marbled buttercream!
This post may contain affiliate links. Read our disclosure policy.
Want to Save This Recipe, Boo?
The Heart and Soul of the Best Marble Cupcakes
Cuisine Inspiration: American desserts
Primary Cooking Method: Baking
Dietary Info: Vegetarian-friendly
Key Flavor: The classic comfort of vanilla meets the rich indulgence of chocolate
Skill Level Required: It’s simple enough for beginners but fun for the pros.
Sweet Highlights:
Perk 1: Texture Town – These cupcakes bring you the moist and tender crumb of cake dreams, with a surprise chocolate streak for an extra delight.
Perk 2: Frosting on Point – A silky buttercream hat that’s as light as a cloud but rich as a chocolate bar, it’s the crowning glory of these treats.
Perk 3: Versatile Vibes – Dress ’em up for a party or down for a cozy night in; these cupcakes are perfect for any occasion.
Ingredients
For the Cupcakes:
- Butter: Room-temp unsalted butter ensures your cupcake game is as smooth as a Barry White track.
- Sugar: Granulated sugar to sweeten the deal—just the right amount to make you swoon.
- Eggs: Three eggs to bind the joy, room temperature to blend in seamlessly with our sweet symphony.
- Flour Sifted cake flour for cupcakes that rise like a soulful chorus.
- Salt: A pinch of salt to balance the sweetness, and a dash of baking soda to get the fluff factor on point.
- Sour Cream: Sour cream for a rich, decadent texture that’ll make you close your eyes with each bite.
- Oil: A tablespoon of vegetable oil for that moist magic in every crumb.
- Vanilla: Pure vanilla extract to set the flavor stage.
- Chocolate: Unsweetened cocoa powder to bring the chocolatey zing.
And for the Buttercream
- Butter: Room-temp unsalted butter for a frosting so silky, it’ll slide its way into your heart.
- Sweet Snow: Confectioners’ sugar to whip up a cloud of creamy perfection.
- Creamy Cascade: Heavy cream to give the swirl its crowning glory.
- Cocoa Couture: More cocoa powder because too much of a good thing can be wonderful.
How to Make Marble Cupcakes
For the Cupcakes:
- Preheat your oven to 325°F. Liberally prepare 2 mini Bundt pans with 5-cup or 6-cup capacity with the nonstick method of your choice. You can also use muffin pans for these.
- In the bowl of your stand mixer fitted with the whisk attachment, beat the butter on high speed for 1 minute. Slowly add the granulated sugar. Cream together for an additional 5 minutes, until very pale yellow and fluffy. Add the eggs 1 at a time, combining well after each addition and scraping down the sides and bottom of the bowl as needed.
- Turn your mixer down to its lowest speed and slowly add the flour in 2 batches. Add the salt and baking soda. Be careful not to overbeat. Add the sour cream, oil, and vanilla extract. Scrape down the sides and bottom of the bowl and mix the batter until just combined. Be careful not to overmix.
- Evenly separate the batter into 2 medium bowls. Set 1 bowl aside.
- Whisk the cocoa powder into the second bowl and set aside.
- Place alternating tablespoons of both batters into each cavity of your prepared pans, until each cavity is ⅔ full. Start with the vanilla, adding a tablespoon to each cavity, then add the chocolate. Start again with the batters until each cavity is ⅔ full. Be careful not to overfill. Bake for 24 to 28 minutes, or until a toothpick inserted into the center of a cakelette comes out mostly clean but still moist.
- Let the cakelettes cool in the pan for 10 minutes, then invert onto a serving plate. Let cool to room temperature. Lightly cover the cakelettes with foil or plastic wrap so they not dry out.
For the Frosting:
- In your stand mixer, add butter and salt at medium low speed.
- Next turn the mixer down to low and slowly add powdered sugar in small portions until all is added then turn the speed to medium high to combine. Mix until fluffy.
- Separate half of buttercream into a medium bowl and stir in cocoa powder.
- Add both buttercreams to separate piping bags then place both side by side into piping tip. Pipe frosting on each cakelette in the center hole and serve.
How to Store
To keep your marble cupcakes tasting like they’re straight from the bakery, store them in an airtight container at room temperature for up to three days. If you’re looking to extend their encore, pop them in the fridge for up to a week, but let them warm up a bit before serving for that just-baked tenderness.
Favorite Cupcake Recipes to Try
- Gingerbread Cupcakes
- Best Chocolate Cupcakes
- Pineapple Cupcakes
- Carrot Cake Cupcakes
- Coca Cola Chocolate Cupcakes

Marble Cakelettes
Want to Save This Recipe, Boo?
Ingredients
For the Cakelettes:
- ¾ cup unsalted butter, room temperature 1 1/2 sticks
- 1¼ cups granulated sugar
- 3 large eggs room temperature
- 1½ cups sifted cake flour
- ½ teaspoon salt
- ¼ teaspoon baking soda
- ½ cup sour cream room temperature
- 1 tablespoon vegetable oil
- 1 teaspoon vanilla extract
- 2 tablespoons unsweetened cocoa powder
For the Buttercream:
- 1 cup unsalted butter room temperature
- Pinch salt
- 3 cups confectioners’ sugar
- 2 tablespoons heavy cream
- 2 tablespoons unsweetened cocoa powder
Instructions
For the Cakelettes:
- Preheat your oven to 325°F. Liberally prepare 2 mini Bundt pans with 5-cup or 6-cup capacity with the nonstick method of your choice.
- In the bowl of your stand mixer fitted with the whisk attachment, beat the butter on high speed for 1 minute. Slowly add the granulated sugar. Cream together for an additional 5 minutes, until very pale yellow and fluffy. Add the eggs 1 at a time, combining well after each addition and scraping down the sides and bottom of the bowl as needed.
- Turn your mixer down to its lowest speed and slowly add the flour in 2 batches. Add the salt and baking soda. Be careful not to overbeat. Add the sour cream, oil, and vanilla extract. Scrape down the sides and bottom of the bowl and mix the batter until just combined. Be careful not to overmix.
- Evenly separate the batter into 2 medium bowls. Set 1 bowl aside.
- Whisk the cocoa powder into the second bowl and set aside.
- Place alternating tablespoons of both batters into each cavity of your prepared pans, until each cavity is ⅔ full. Start with the vanilla, adding a tablespoon to each cavity, then add the chocolate. Start again with the batters until each cavity is ⅔ full. Be careful not to overfill. Bake for 24 to 28 minutes, or until a toothpick inserted into the center of a cakelette comes out mostly clean but still moist.
- Let the cakelettes cool in the pan for 10 minutes, then invert onto a serving plate. Let cool to room temperature. Lightly cover the cakelettes with foil or plastic wrap so they not dry out.
For the Frosting:
- In your stand mixer, add butter and salt at medium low speed.
- Next turn the mixer down to low and slowly add powdered sugar in small portions until all is added then turn the speed to medium high to combine. Mix until fluffy.
- Separate half of buttercream into a medium bowl and stir in cocoa powder.
- Add both buttercreams to separate piping bags then place both side by side into piping tip. Pipe frosting on each cakelette in the center hole and serve.
 pinterest
I was looking for marble cake recipe and made these but made vanilla frosting instead and they were a hit. I also made the no bake orange creamsicle cheesecake but instead made them in parfait cups and they too were a hit!
Hello Mam, just wanted to know, can I make this in a bundt pan if I don’t have those mini bundt pans? Do I need to double the recipe for a normal size bundt pan which says 12.5 cup capacity?
these are oh sooo pretty and cute!
These look amazing!!!
Your class sounds awesome, everything is better mini!
Oh my, these cakelettes look divine! Your class sounds so awesome!
These look down right amazing! Yum!
Thank you so much doll!
Those look so awesome and congrats on your Craftsy class!