
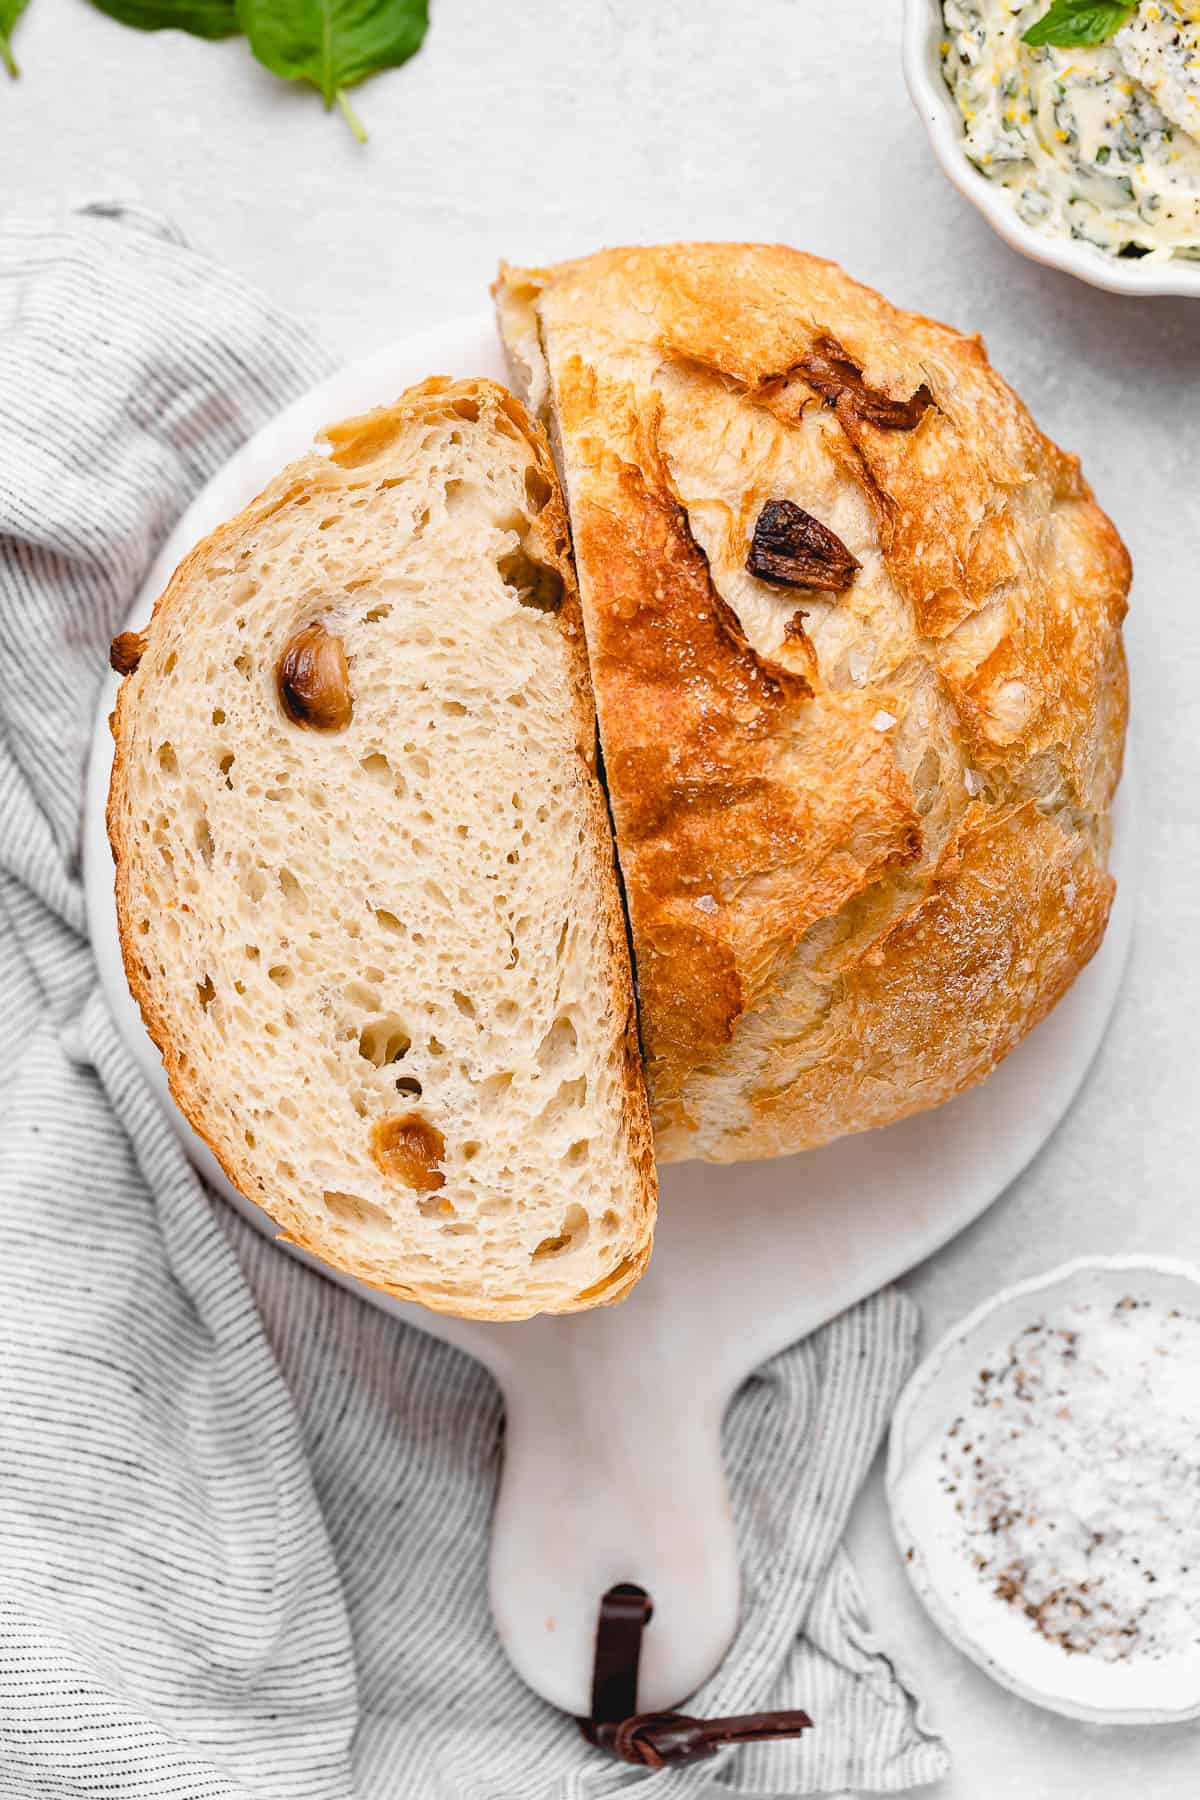
Today’s no-knead roasted garlic bread is for when you want homemade bread without all the elbow grease. The yeast does the heavy lifting boos, you just gotta give it some time. What you end up with is a crusty loaf with garlic baked right in. And because I like to go the extra mile (y’all know me!), I threw in an easy basil butter to slather on top. This bread deserves it.
This post may contain affiliate links. Read our disclosure policy.
How to Make Roasted Garlic No-Knead Bread
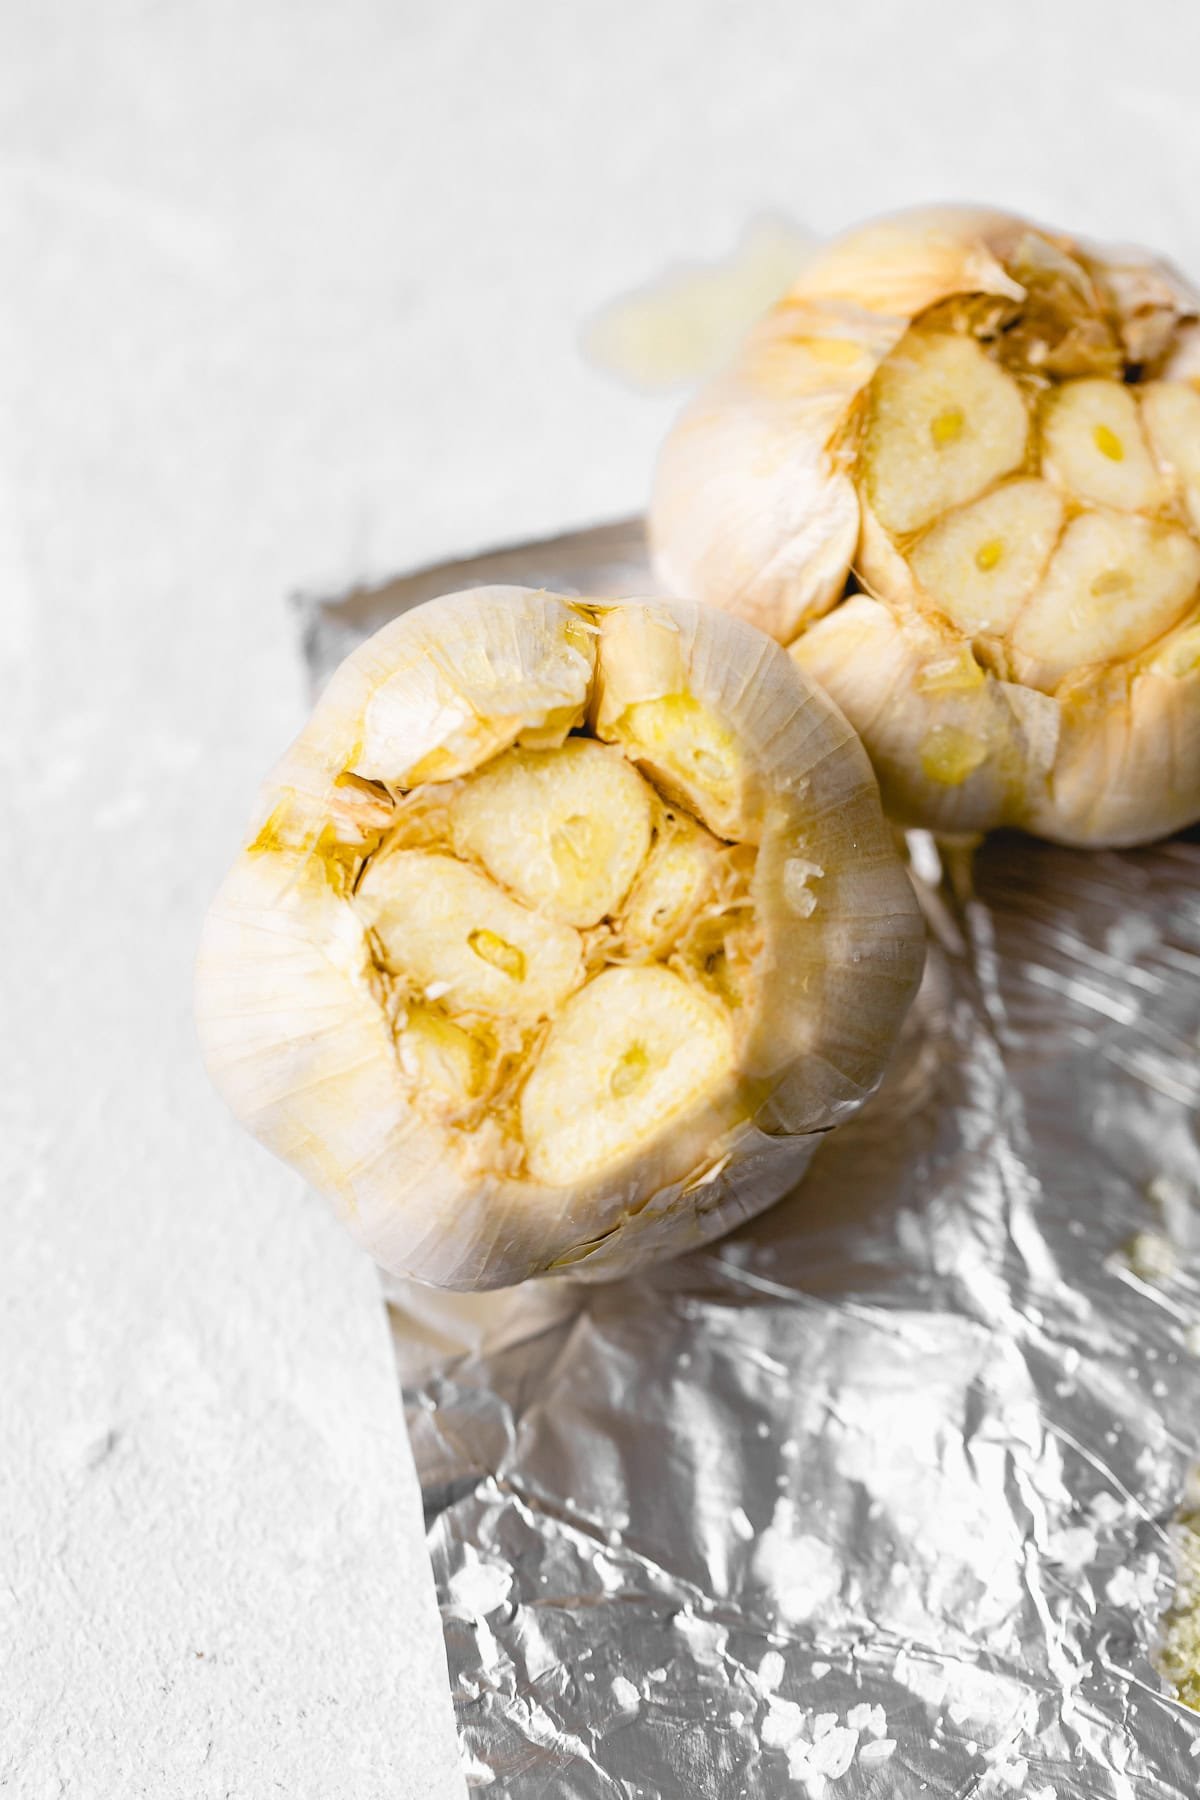
Step 1: Slice the tops off the garlic heads, drizzle with oil, wrap in foil, and bake until soft and fragrant. Let them cool, then squeeze out the cloves into a bowl and set aside.
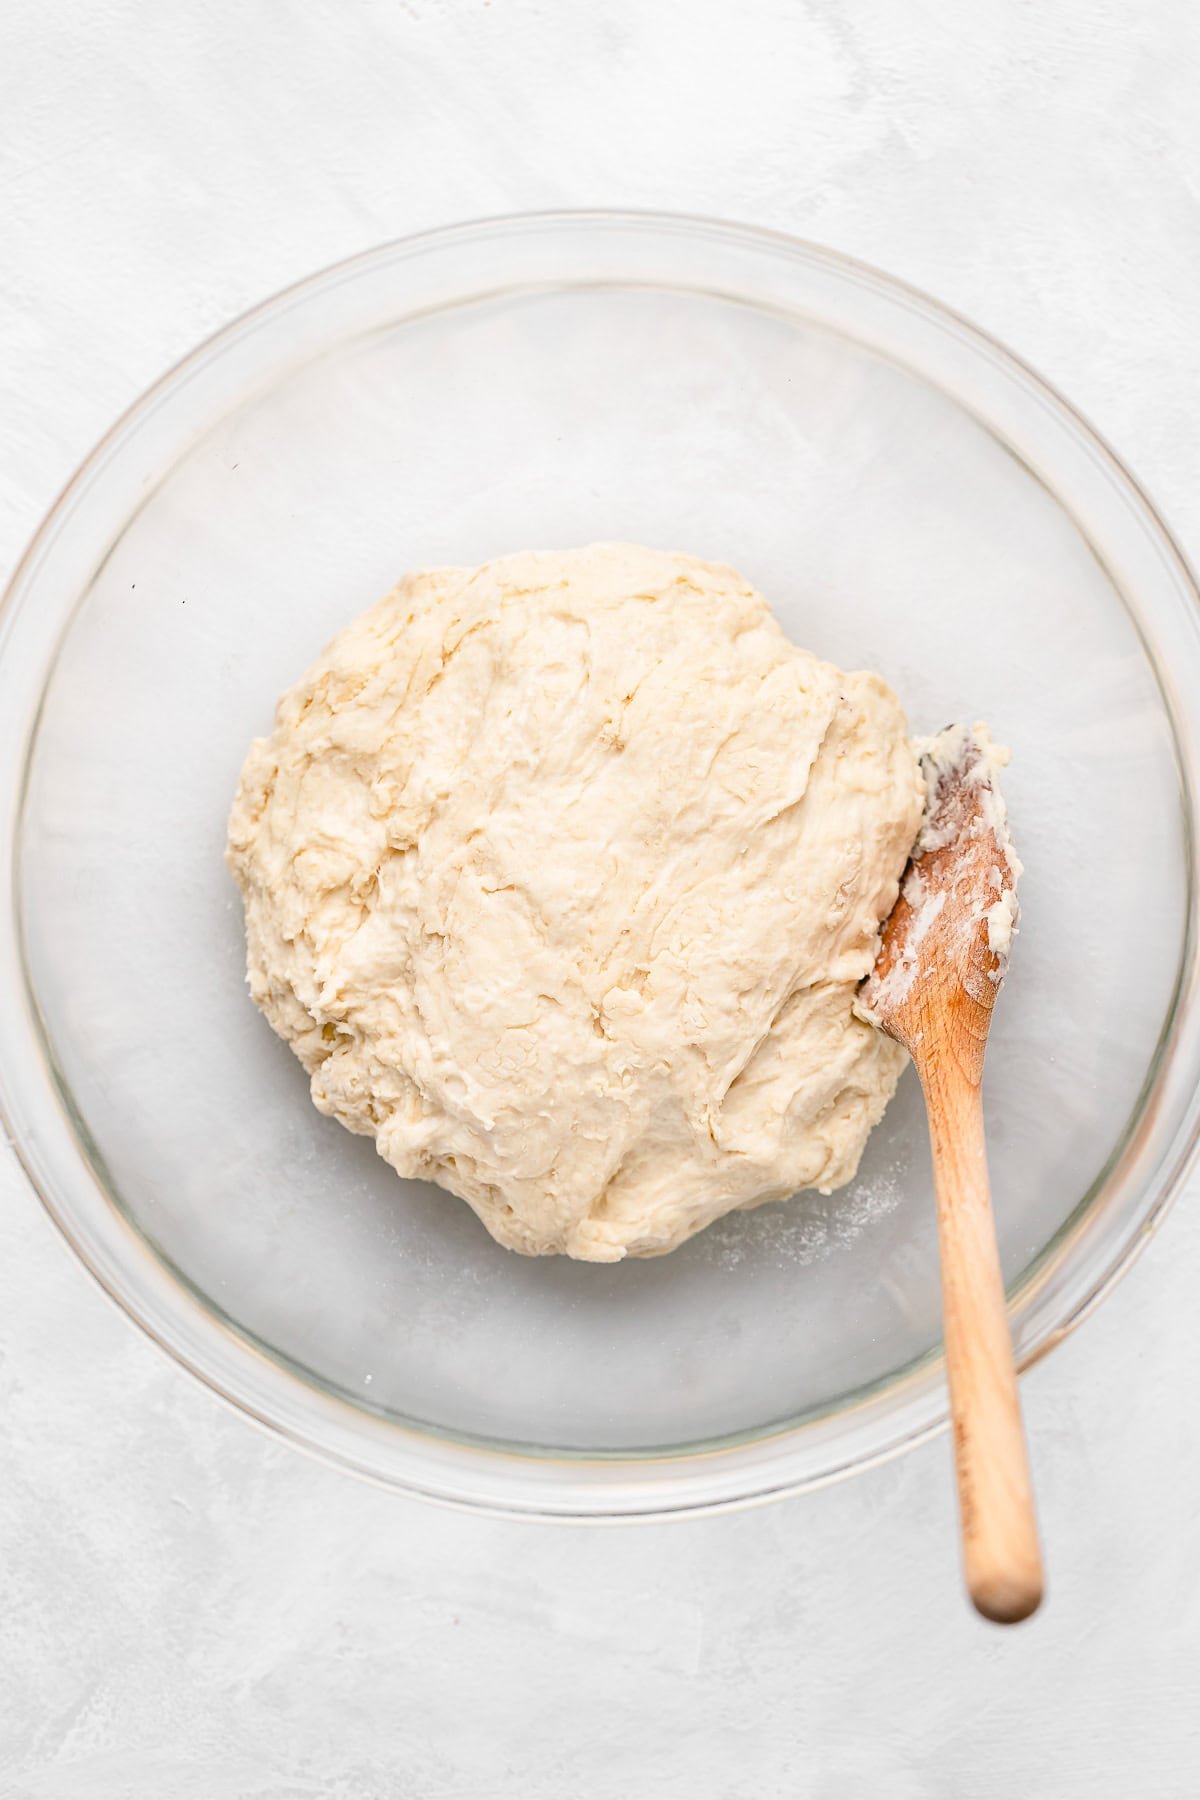
Step 2: Combine the yeast, sugar, and warm water in a small bowl, stir until dissolved, and let it get foamy. In a large bowl, whisk together flour, salt, the yeast mixture, and more warm water until a shaggy dough forms, then cover and let rise until doubled. Turn the dough out onto a floured surface, punch it down, press in the roasted garlic cloves, fold until smooth, and place on parchment. Cover and let rise again.
PRO TIP: Proof your yeast to find out if it’s still active by adding 1 teaspoon of sugar and 2 1/4 teaspoons of yeast (one envelope) to 1/4 cup of warm water. Then, wait 10 minutes. If the mixture bubbles and develops a yeasty aroma, the yeast is still good.
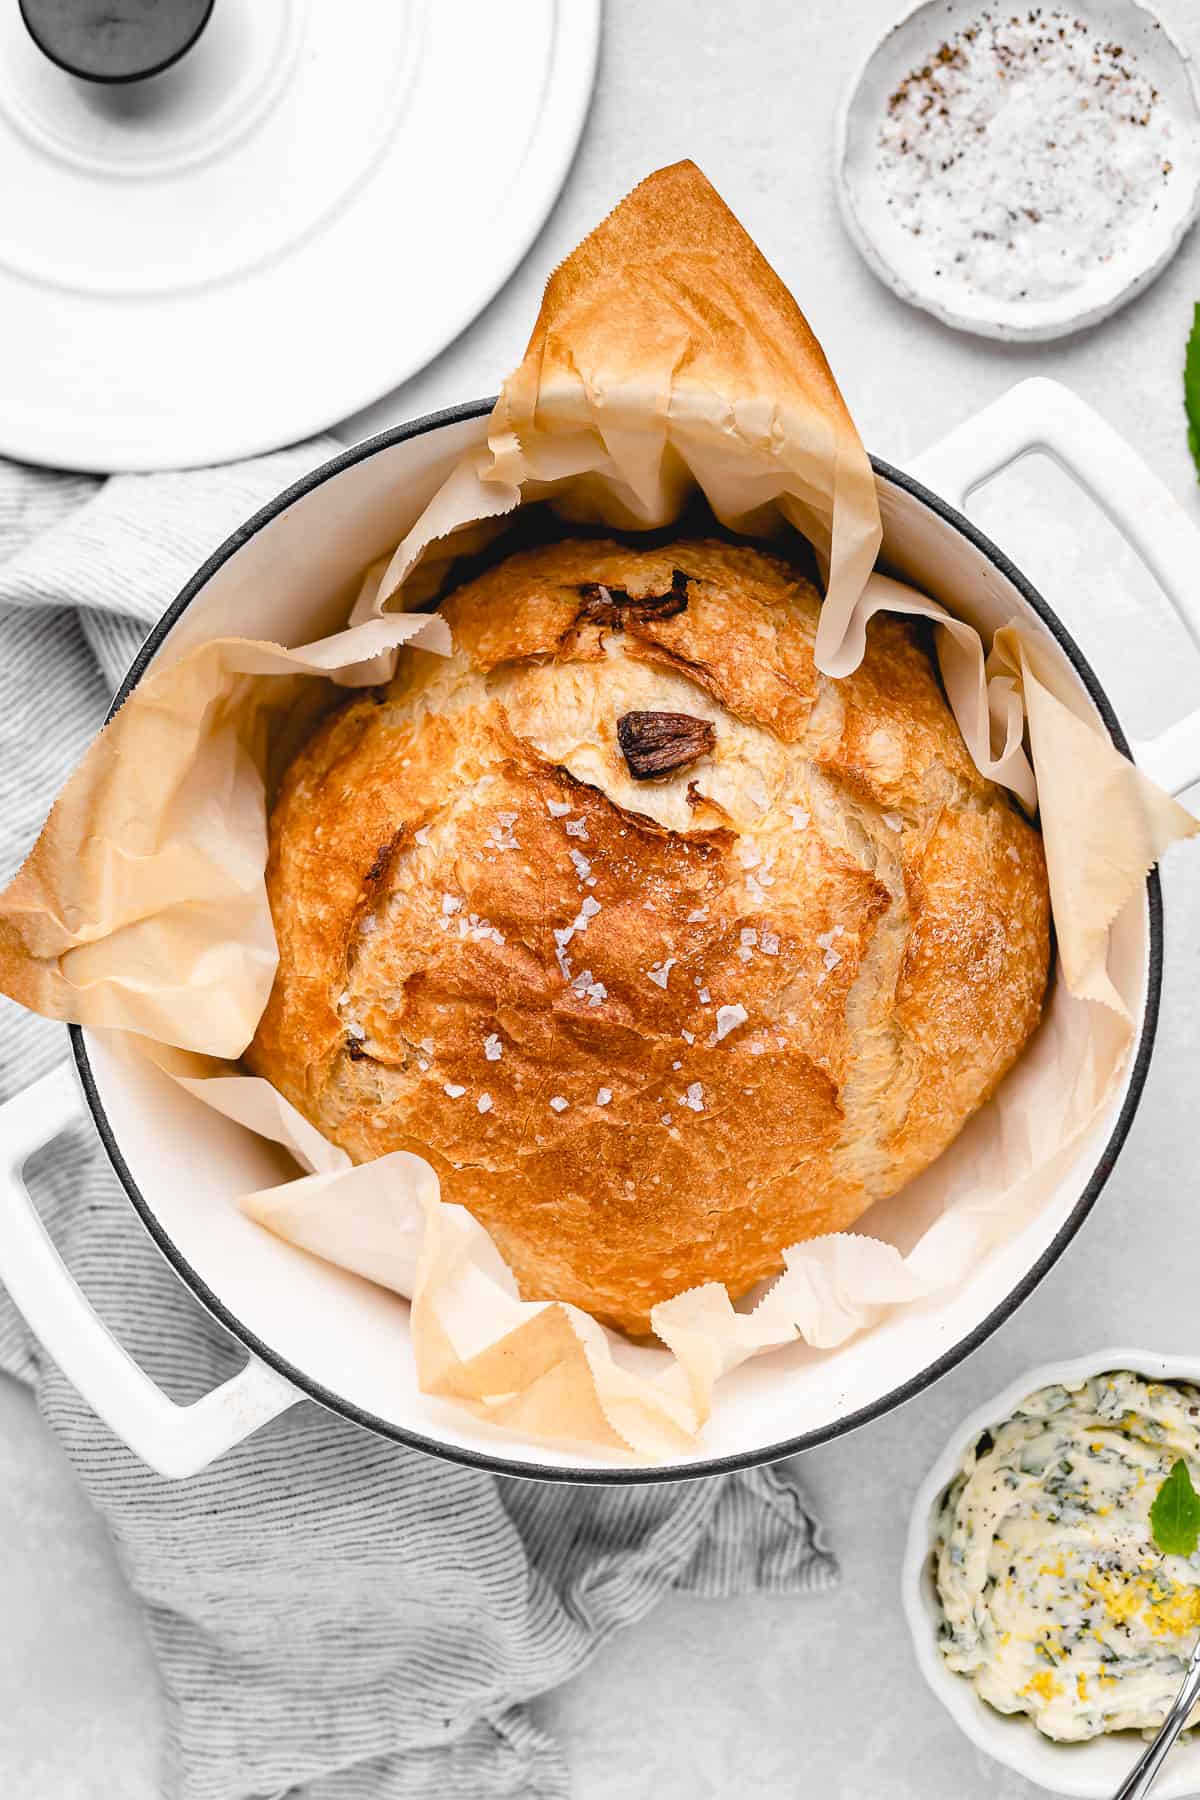
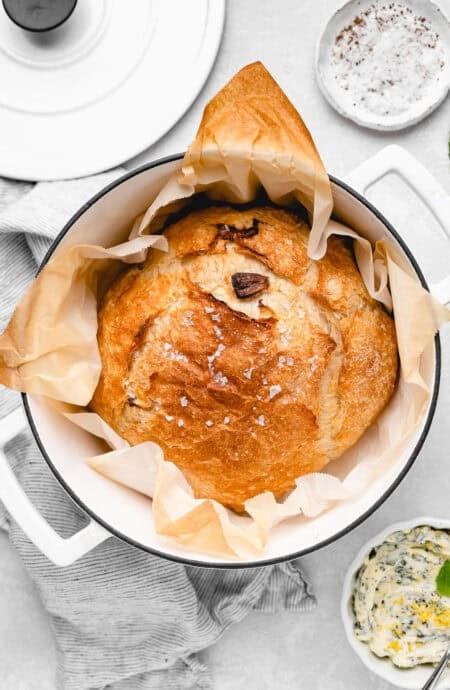
Step 3: Preheat a Dutch oven in the oven, then carefully transfer the dough inside using the parchment as a sling. Drizzle with olive oil, sprinkle with flaky sea salt, cover with the lid, and bake. Uncover and continue baking until the top is golden and crusty. Remove the bread, transfer to a rack, and let it cool before slicing and serving.
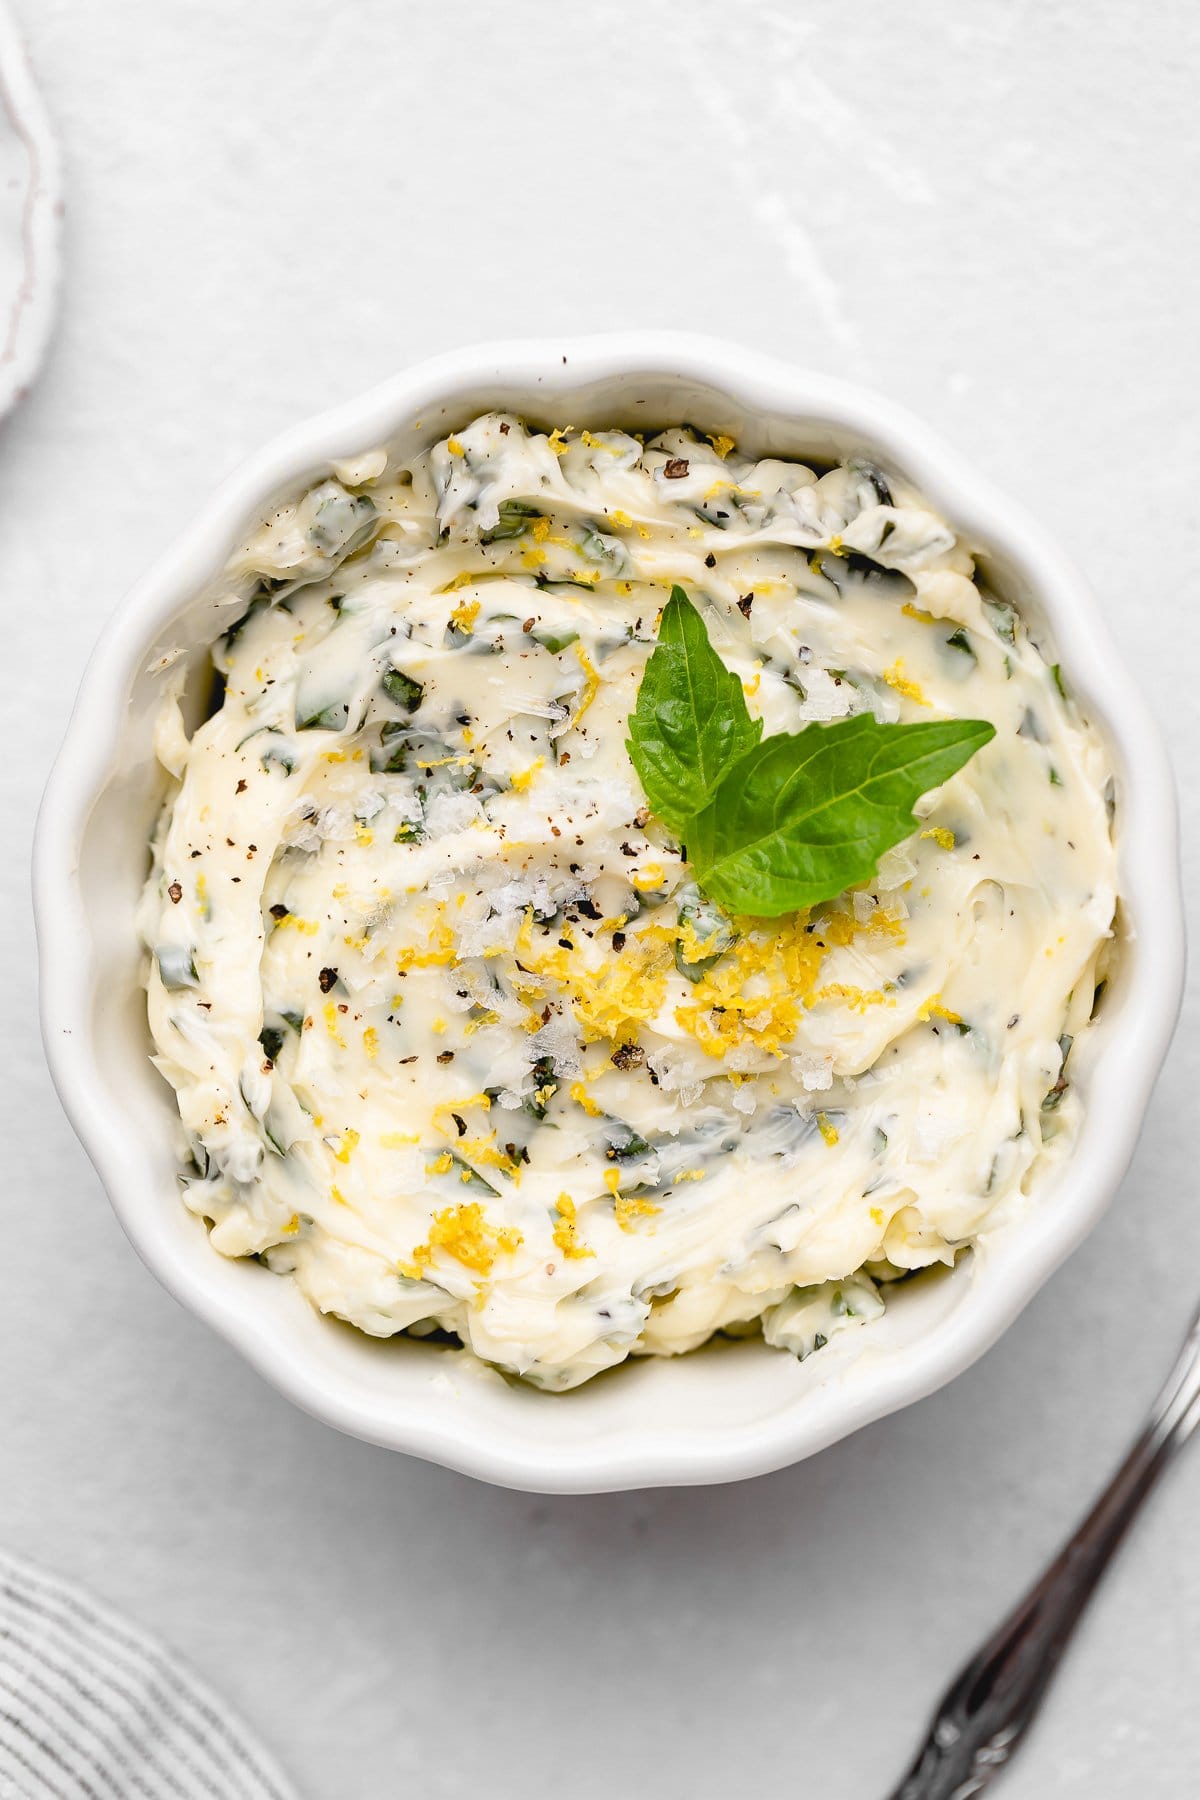
Step 4: Mash the butter, basil, and zest together in a small bowl, seasoning with salt and pepper. Roll into a log with parchment or cover with plastic wrap, then refrigerate until ready to serve.
Roasted Garlic No Knead Bread Recipe
Want to Save This Recipe, Boo?
Ingredients
For the Yeast Mixture
- 2 1/4 tsp active dry yeast
- 1 tsp granulated sugar
- 1/4 cup warm water
For the Roasted Garlic Bread
- 3 cups all purpose flour
- 2 tsp kosher salt
- 1 1/4 cup warm water
- 2 garlic heads
- 3 tbsp olive oil
- 2 tsp flaky sea salt I used Maldon
For the Basil Butter
- 1/2 cup salted butter room temperature
- 1/2 cup fresh basil chopped
- 1/2 tsp lemon or orange zest optional
- kosher salt and fresh cracked black pepper
Instructions
For the Roasted Garlic Bread
- In a small bowl, combine active dry yeast, sugar, and ¼ cup warm water. Stir together until sugar and yeast have dissolved. Let sit until foamy and bubbly, about 5-6 minutes.
- In a large bowl, whisk together flour, salt, yeast mixture and 1 ¼ cup warm water until a shaggy dough forms. Cover the bowl with a dish towel and set in a warm place and allow to rest until doubled in size, about 3 hours.
- While dough rests, roast the garlic. Preheat the oven to 400F. Rub off excess layers of papery skin from each garlic head, and slice off top 1 inch to expose the cloves. Place each head on a small square of foil, then divide and drizzle 1 tablespoon of oil over top of each garlic head. Wrap the garlic tightly in the foil and bake until fragrant and tender, about 45 minutes. Remove from oven and allow to cool completely.
- Once cool, carefully squeeze the bottom of each garlic head to remove each clove from their individual pockets. Place in a small bowl and set aside.
- Flour a clean surface, turn out dough, and gently punch it down. Push each clove into the bread, making sure to space them out. Fold over the dough until the garlic has fully incorporated and the dough is smooth, about 4-6 times. Sprinkle on extra flour as needed. Place the dough onto a sheet of parchment, place a clean bowl, cover with a dish cloth, and allow to rise again for about 1 hour, or until doubled in size again.
- Place a large Dutch oven in the oven (with racks arranged in the middle, then preheat to 450F. Once preheated, remove the pot from the oven and using the parchment paper as a sling, carefully transfer dough into the pot. Quickly drizzle remaining tablespoon of olive oil, sprinkle with flaky sea salt, then replace the lid.
- Place Dutch oven back into oven and bake for 30 minutes, without removing the lid. Uncover and bake for an additional 10-12 minutes, until the top is crusty and golden brown.
- Remove from the oven and transfer bread to a cooling rack. Wait for at least 20 minutes before slicing and serving.
For the Basil Butter
- In a small bowl, combine butter, basil, and zest. Use a fork to mash/combine the ingredients. Season with salt and pepper.
- Use parchment paper to tightly roll the butter in a log or cover the bowl with plastic wrap. Refrigerate until serving with bread.
Notes
- Bread: Wrap leftover bread in plastic wrap or beeswax wrap and keep it on the counter for up to 3 days.
- Butter: Your herb butter will last several days in the fridge when sealed in a container, or keep the parchment-wrapped log tucked inside a zip-top bag.
Nutrition
Recipe Tips
- Make sure your water is the right temp. Too hot kills the yeast, too cold and the dough won’t rise. Aim for 100-110°F, or just test it on your wrist. It should feel warm but not hot.
- If your dough feels off, adjust it. Add a sprinkle of flour if it’s too wet or a splash of warm water if it’s too dry.
- Don’t stress if you’re not big on garlic, boos. You can cut it back, leave it out, or swap in fresh herbs, seeds, or dried fruit. That’s the beauty of this no knead garlic bread!
- Mix up the basil butter while the bread bakes. Pop it in the fridge while the loaf cools so it firms up but stays spreadable.

Want to Save This Recipe, Boo?
Serving Suggestions
- Pasta: Roasted garlic bread is perfect with spaghetti and meatballs, Cajun jambalaya pasta, lasagna, or a simple shrimp scampi.
- Stews: Pair it with beef stew, catfish stew, or gumbo to soak up all that flavor!
- Soups: This roasted garlic no-knead bread works with tomato soup (my favorite!), carrot ginger soup, sweet potato soup, or tomato basil soup.
- Casseroles: Try it alongside baked ziti, baked spaghetti, or a cheesy broccoli cheese casserole.
Recipe Help
Bread baking HEAVILY relies on the quality and texture of flour. A higher-end bread flour will give you a softer, more tender loaf, but don’t stress if all you have is all-purpose. I’ve made this with everyday brands like King Arthur or Gold Medal and it still comes out tasty.
Yes! You can swap in instant yeast for active dry. Skip the step of blooming it in warm water and mix it straight into the flour.
Use a heavy oven-safe pot with a lid, like enamel or cast iron. If you don’t have that, place the dough on a baking sheet, add a pan of water on the bottom rack, and bake.
 pinterest
How much water will I use if I am using instant yeast?
If you’re using instant yeast, you can keep the water amounts the same.
You don’t need to bloom instant yeast first, so you can skip the separate yeast mixture and just mix the 2¼ teaspoons instant yeast directly into the flour. Then add the full 1½ cups warm water (the ¼ cup + 1¼ cups combined) when you mix the dough.
Everything else in the recipe can stay the same. The rise time should be very similar.
Is there a gram version of this recipe because it’s way more accurate way to measure your ingredients and be consistency?
Hi Jeff, I do not cook in grams so I don’t include measurements just in case they are off.
This recipe is a game changer! The garlic aroma while it’s baking is absolutely mouthwatering, and I love how easy it is with no kneading involved. I can’t wait to pair it with some homemade soups this fall! Thanks for sharing!
I have no words!!! This is my go to for roasted garlic bread now!!!
Yay!! So happy you liked it!
Please add when to incorporate the yeast mixture. It’s completely missing. Hopefully I did it right.
Sorry about that! It’s when you mix all the things together.
The instructions say to mix in 1 1/4 cup warm water. Does that include the 1/4 cup of the yeast mixture or in addition to?
The 1 1/4 cups is for the bread dough, so in addition.
Amazing! A family favorite now!
This looks so good! What a great combination of flavors!
So good! Is there a way to make this using loaf pans rather than a dutch oven? Want to make mulriples and this involves quite a bit of wait time for the dough to do it’s thing.
You can make this in loaf pans, but I’ll be honest I haven’t tested it that way, so it will be a little more of an experiment. The Dutch oven is what gives you that really good rise and crust. If you want to try loaf pans, I’d divide the dough between two greased 9×5 loaf pans, let it do the second rise in the pans, then bake at 425°F. Cover loosely with foil for the first 25–30 minutes, then uncover and bake another 10–15 minutes until golden and cooked through. The texture will be softer and more bread-like (less crusty than the Dutch oven), but it’s a good option if you’re making multiples and need to save time.