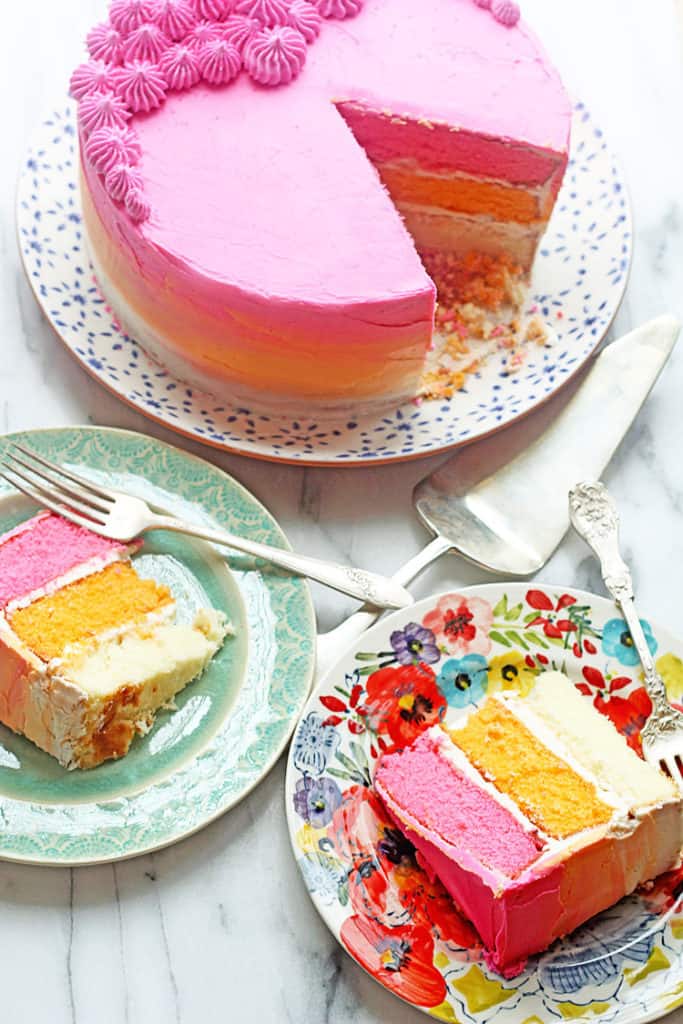
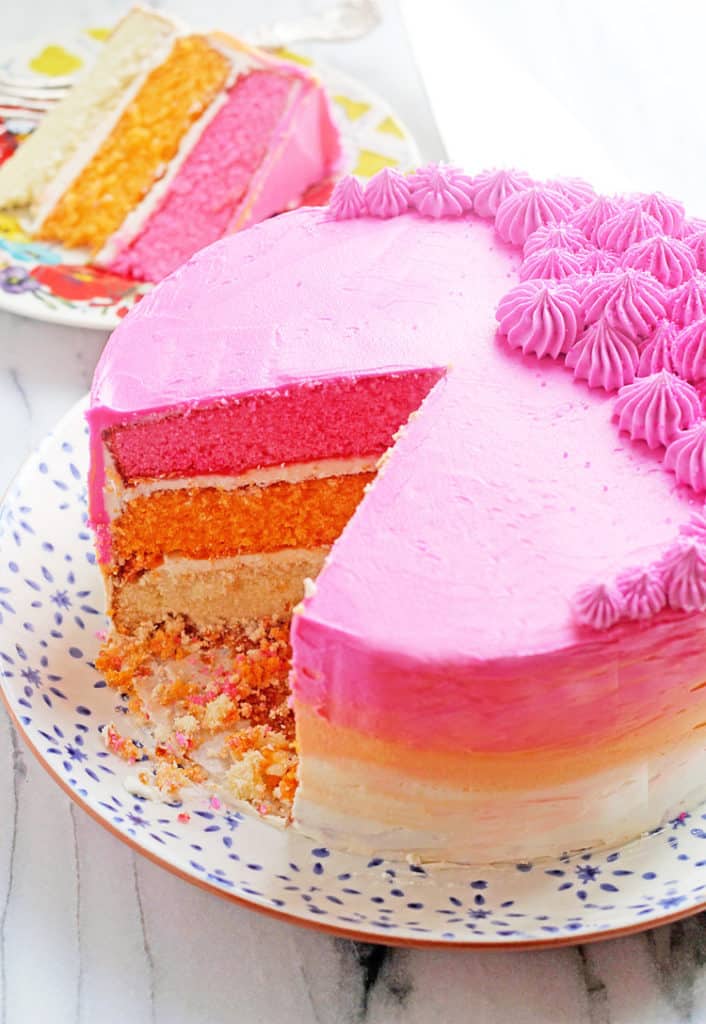
Learn how to make an ombre cake using my classic vanilla cake recipe! Choose 3 fun colors and start making your baking even more exciting!
This post may contain affiliate links. Read our disclosure policy.

Want to Save This Recipe, Boo?
The Heart and Soul of an Amazing Ombre Cake
Cuisine Inspiration: Classic American with a Whimsical Twist
Primary Cooking Method: Baking
Dietary Info: Rich, buttery, and oh-so-decadent, this is the cake for when you’re feeling extra.
Key Flavor: Vanilla Heaven
Skill Level: Adventurous Baker with Intermediate Skills
Sweet Highlights:
Perk 1: Gradient Glory
Three tiers of color that flow like a dream, making each slice a work of art.
Perk 2: Centerpiece Worthy
It’s not just a cake, it’s a statement piece that’ll have your guests snapping pics before they take a bite.
Perk 3: Customizable Colors
Match the vibe of any occasion, season, or reason—this cake caters to your color scheme cravings.
Key Ingredients
- Cake Flour: Soft as a cloud, fine as a powder, it’s the secret to our cake’s delicate crumb.
- Baking Powder & Soda: The dynamic duo giving rise to our cake’s aspirations – literally.
- Fine Sea Salt: Just a smidge to enhance the sweetness and add depth to every bite.
- Unsalted Butter: Softened to perfection, ready to cream into the smoothest, richest base.
- Granulated Sugar: Sweet, sweet love that turns our butter into a fluffy, white cloud of yum.
- Vanilla Extract: The classic, aromatic essence that whispers sweet nothings to your cake.
- Almond Extract: The enigmatic twist that adds an almost-magical, nutty charm.
- Egg Whites: The lean, mean, fluffing machine providing structure and sass to the batter.
- Sour Cream: Tangy, creamy, and oh-so-dreamy, it’s the moisture maven of the mix.
- Whole Milk: The liquid lullaby that smooths everything out for that perfectly sippable batter.
- Unsalted Butter: Room temp and ready to rumble, this is the creamy canvas for our color splash.
- Salt: Just a pinch to cut through the sweet and make those flavors pop.
- Confectioner’s Sugar: Sifted to perfection, it’s the sweet cloud that fluffs up our frosting.
- Heavy Cream: Pour in a little luxe with cream that whips the frosting into silky peaks.
- Vanilla Extract: A splash of classic essence that whispers pure, sweet love into the mix.
- Food Colorings: The trio of tint that turns our buttercream into a gradient masterpiece.
How to Make an Ombre Cake
- Room Temp Rules: Start with butter, eggs, milk, and sour cream at room temperature for that perfect batter consistency.
- Oven Ready: Preheat to 350°F and prep those pans with non-stick spray and parchment or liners for cupcakes.
- Sift and Whisk: Combine your dry ingredients like a pro—cake flour, leavening agents, and salt—for a lump-free mix.
- Creamy and Dreamy: Whip butter and sugar to a fluffy lightness, then enter vanilla and almond extracts for that flavor kick.
- Egg White Cascade: Gradually add egg whites with the mixer on a low setting for a silky-smooth incorporation.
- Alternate Act: Play the mix-master by alternating dry ingredients with the milk/sour cream blend for a perfectly balanced batter.
- Bake it Beautiful: Fill pans and bake until the cake is springy and a tester comes out clean. Cool those cakes completely before the big reveal.
- Frosting Beatdown: Get that butter and salt fluffy, then rain in confectioner’s sugar and splash in cream and vanilla for a cloud-like frosting.
- Color Divide: Split that buttercream and tint for the ombre magic, keeping a bit more white for the base layer.
- Layer and Level: Stack those cake layers with buttercream bliss, then crumb coat and chill to set the stage for the color gradient.
- Ombre On Point: Apply tinted frosting in layers, then smooth with an offset spatula for that seamless color transition.
- Decorate & Serve: Add personal flair with piping or sprinkles, then slice into your masterpiece and take a well-deserved bow.

How to Store
As with most cakes, Ombre Cake is best when stored at room temperature. Simply place your cake on a plate or cake stand and cover with a cake lid or an overturned bowl. Keep your covered cake on your counter away from heat and direct sunlight for 4-5 days.
To freeze, wrap it tightly with plastic wrap in two layers and then wrap the exterior completely in aluminum foil. I’d recommend doing this in large pieces/slices. Place the wrapped cake in a freezer-safe zip top bag (or a freezer safe container) and store it directly in the freezer for 2-3 months. Thaw overnight in the refrigerator and bring to room temperature before serving.
Favorite Unique Celebration Cake Recipes
- Funfetti Cake
- German Chocolate Cake
- Best Chocolate Cake with Blackberry Frosting
- Mint Chocolate Cake
- Chocolate Turtle Cake
- Milky Way Cake
- Italian Cream Cake

How to Make an Ombre’ Cake
Want to Save This Recipe, Boo?
Ingredients
For the Cake
- 3 cups cake flour 345 grams
- 2 tsp baking powder 7 grams
- 1/2 tsp baking soda
- 1/2 tsp fine sea salt 2 grams
- 8 oz unsalted butter, softened 226 grams/ 2 sticks
- 2 cups granulated sugar 400 grams
- 2 tsp vanilla extract
- 1 tsp almond extract
- 2/3 cup egg whites about 5 large egg whites/ 160 grams
- 3/4 cup whole milk 170 grams
- 3/4 cup sour cream 180 grams
For the Buttercream
- 2 cups unsalted butter room temperature
- 1 tsp salt
- 6 cups confectioners' sugar
- 1/4 cup heavy cream
- 1 tsp vanilla extract
- 3 different food colors
Instructions
- At least 30 minutes before mixing, take the butter, eggs, milk and sour cream out of the refrigerator to come to room temperature. Separate the eggs. Measure out the rest of the ingredients.
- Position the oven rack to the center position. Preheat the oven to 350°F/175°C. Prepare your baking pan(s) with non-stick spray and parchment paper or with paper liners if making cupcakes.
To make the cake
- Sift together the cake flour, baking powder, and baking soda. Add the salt, whisk together, and set aside.
- In the bowl of a stand mixer fitted with the paddle attachment, or in a large bowl with a hand mixer, combine the butter and sugar. Cream together on medium speed until very light and fluffy, about 5 minutes. Stop the mixer and scrape down the sides and bottom of the bowl halfway through mixing. The mixture should be very pale yellow after mixing.
- With the mixer running on medium/low speed add the vanilla and almond extracts. Next, slowly add in the egg whites while the mixer continues running. Scrape down the sides of the bowl periodically as you slowly incorporate the egg whites.
- Mix the milk and sour cream together. Alternate adding the dry ingredients into the bowl in three additions with the milk/sour cream mixture in two additions, starting and stopping with the dry ingredients. Mix on medium speed in between each addition until fully incorporated.
- Transfer the batter into the prepared pan(s). Bake at 350°F/175°C. A sheet cake will take about 35-45 minutes. Layer cakes will take 22-26 minutes, and cupcakes will take 18-25 minutes. Pull out of the oven when the cake is firm but springs back when gently pressed in on the center, or when a cake tester comes out clean.
- Cool the cakes in their pan completely on a cooling rack before turning out of the pan and frosting.
For the Frosting
- In your stand mixer, beat butter and salt at medium low speed.
- Next turn the mixer down to low and slowly add confectioner’s sugar in small portions until all is added then turn the speed to medium high to combine.
- Add heavy cream then vanilla extract and mix until nice and fluffy.
- Equally divide buttercream into three separate bowls but add ⅓ more buttercream to one bowl and set aside.
- To the remaining bowls, tint with food coloring to match the other two colored layers of cake.
To assemble
- Begin by placing the lighter (or darker) layer of cake on a cake decorating turntable then filling with plain white buttercream. Repeat with all layers ending with the darker layer (or the lighter layer if you started with the darker layer) then apply a thin coating of the plain buttercream to the outside of the entire cake to create a crumb coat. Place the cake in the refrigerator for 20-30 minutes or until the icing is set.
- Now for the ombre effect: Carefully add icing in corresponding colors to the layers on the sides of the cake with an offset spatula. Add the top layer’s colored buttercream to the top of the cake as well. This process doesn’t have to be perfect.
- Once all colors are on the cake, you can begin smoothing out the icing. Using your offset spatula, hold it perpendicular to the turntable and go around the sides of the cake while spinning your turntable. Continue to do this until the sides of your cake are as smooth as you would like. Make sure you also use your spatula to smooth the top of your cake as well.
- Have fun with this. Pipe designs on the top of your cake or use sprinkles to add more color then serve and enjoy.
Such a cute cake and great recipe
Thank you hon!
LOVE! My daughter would probably request this as her birthday cake. And since I love baking, I would have no issues fulfilling that desire 🙂
What a beautiful Spring cake!! The colors make this so perfect!
Thank you doll!
This is super gorgeous! I wanna make rainbows out of all of my desserts now 🙂
You deserve to do it babe!
I bake my own birthday cakes a lot because I’m picky. haha This would be an amazing birthday or special occasion cake — I love the colors!
Aren’t the colors so fun? I love that you bake your own cakes!
This looks fantastic! I love, love the colours… they make me so happy! This would make the perfect birthday cake, I wish I could order one for mine. 🙂
It does make me happy!
It’s your birthday? We should celebrate! Happy birthday, friend!
Nope not yet, not until June but I’m getting ready early haha.
This is such a lovely cake! So colorful!! It’s is definitely fitting for a birthday party!!
Hooray!!! Thanks hon!
What a fun recipe! I love the fun, bright colors you chose – they definitely make me happy so I hope they made you smile too. 🙂
Yes it totally made me smile!