
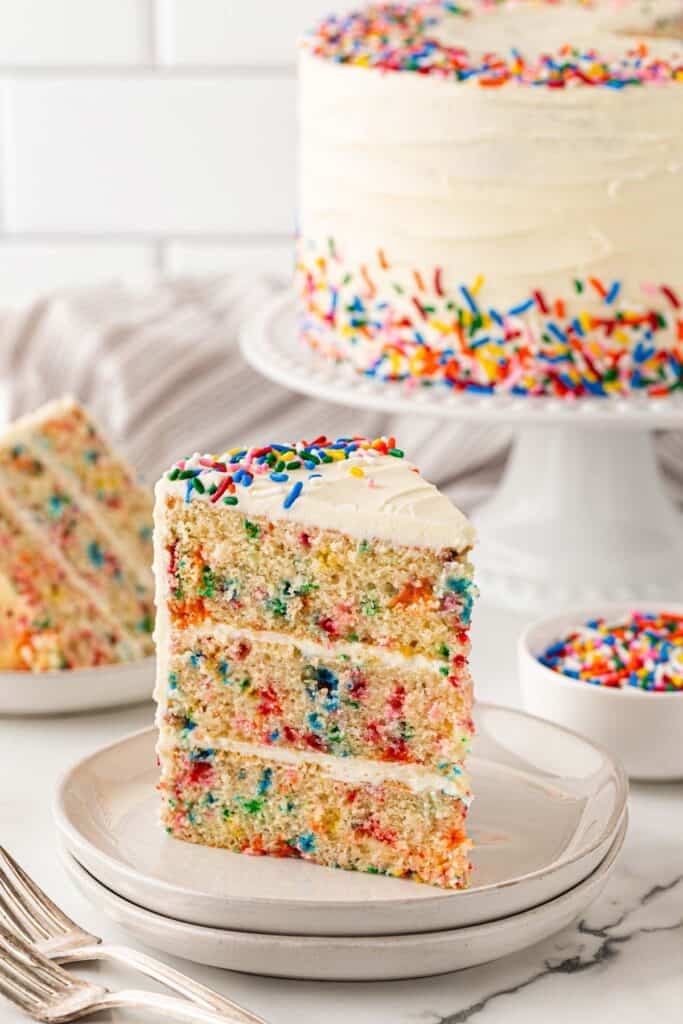
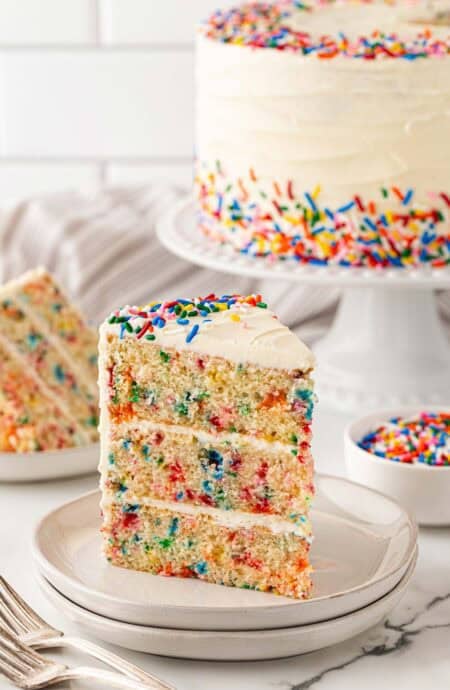
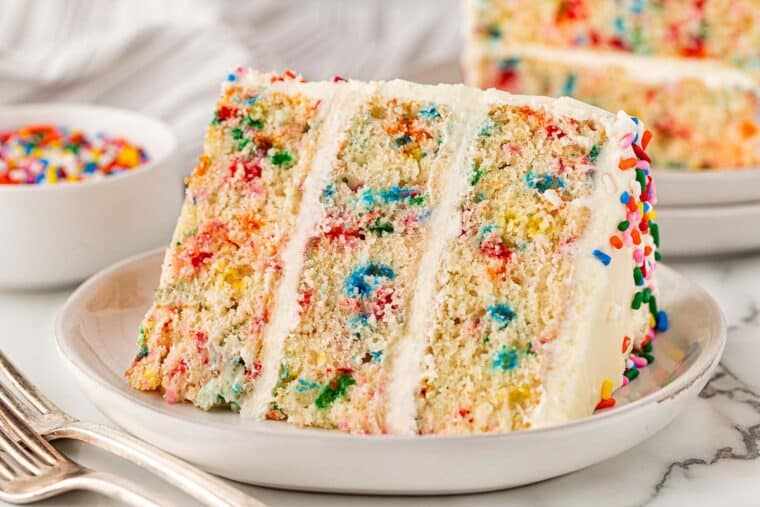
I can’t think of a more fun birthday cake than funfetti cake y’all. And I have the very best recipe for it. I kept testing the cake until I nailed that fluffy moist texture a vanilla based cake should have (my trick is using oil and butter!) plus I jazzed it up with colorful sprinkles throughout. Then I keep it simple with a classic vanilla American buttercream that pairs perfectly for it. Every time I make it, it reminds me of my childhood, and I seriously get a kick out of it.
This post may contain affiliate links. Read our disclosure policy.
How to Make Funfetti Cake
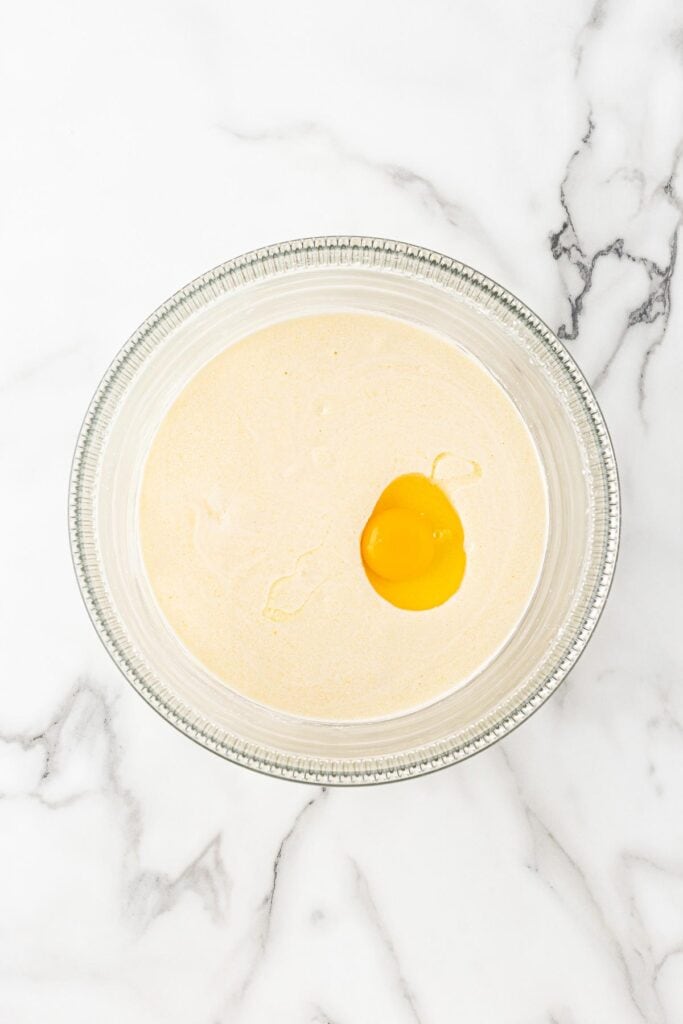
Step 1: In the bowl of your stand mixer, fitted with the whisk attachment, place oil and butter and mix on high for 2 minutes. Reduce the speed to medium and slowly add in sugar. Then return speed to high and mix for an additional 4-5 minutes, until very pale yellow and fluffy. Next, add eggs one at a time, combining well after each addition, and scraping down the bowl as needed.
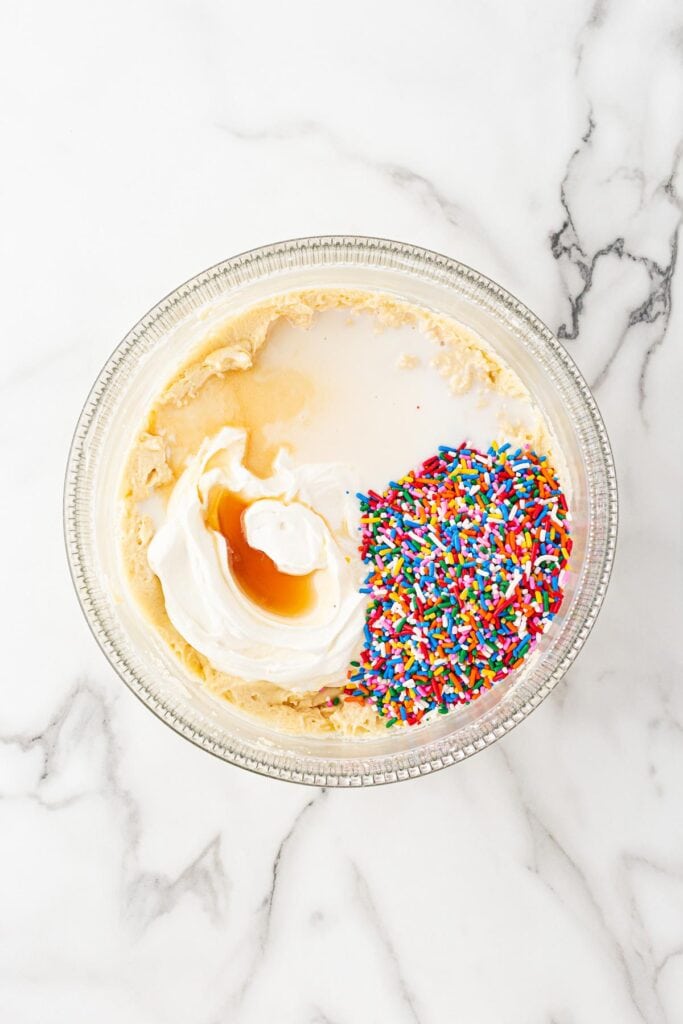
Step 2: Reduce your mixer speed to low and slowly add in flour, baking powder, salt, and baking soda. Mix until just combined, being careful not to overmix. Lastly, add in sour cream, milk, vanilla, and sprinkles and mix on low until just combined. Turn off mixer.
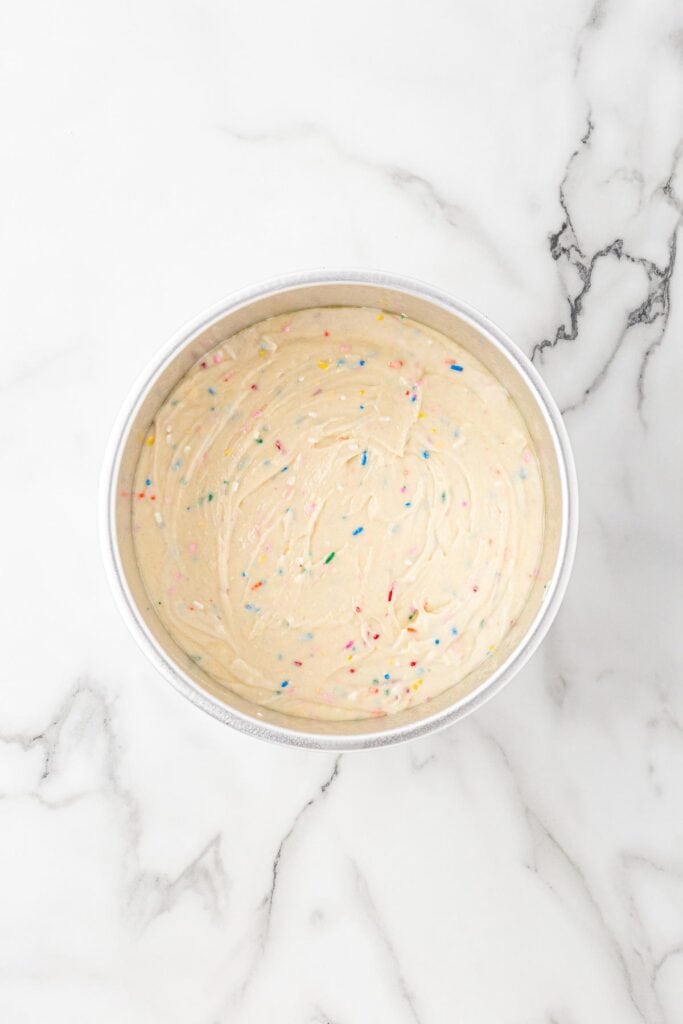
Step 3: Evenly divide batter among three 8-inch non-stick baking sprayed then parchment paper lined round pans.
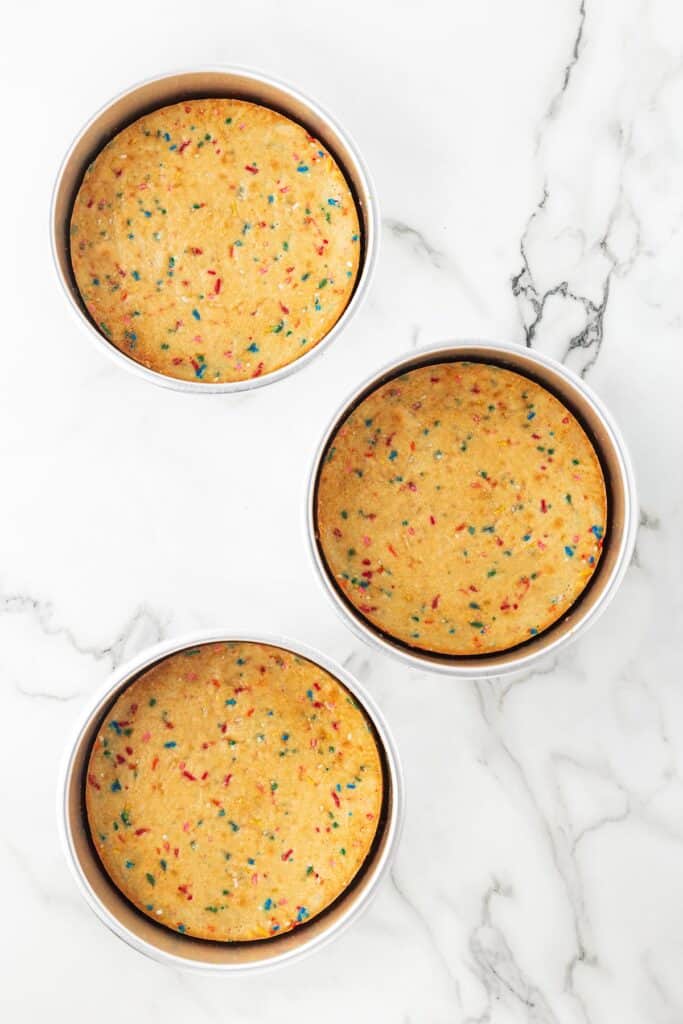
Step 4: Place in a preheated 325°F oven to bake for 18-25 minutes or until a toothpick inserted into the center of the cake comes out just barely clean. Switch the racks the pans are on halfway through baking. Be careful not to over bake! Remove the cakes from the oven and cool in the pans for 10 minutes. Then remove cakes from the pan and set on wire racks to cool completely, for about 20 more minutes.
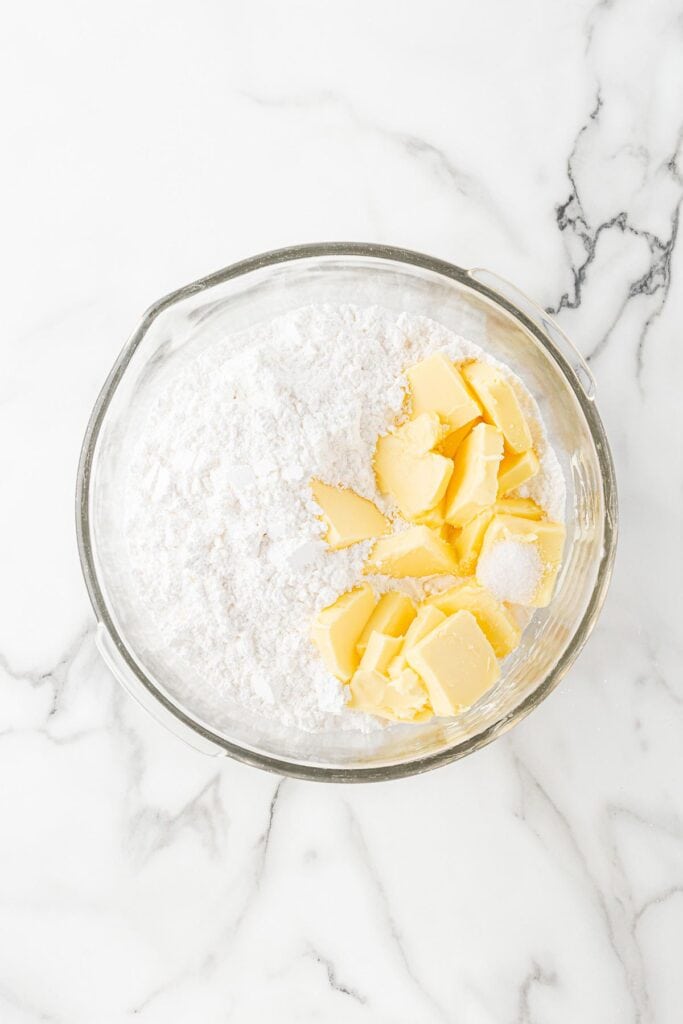
Step 5: While the cakes are cooling, add butter, powdered sugar, and salt in the bowl of your stand mixer, fitted with the whisk attachment. Mix on low until the powdered sugar is incorporated.
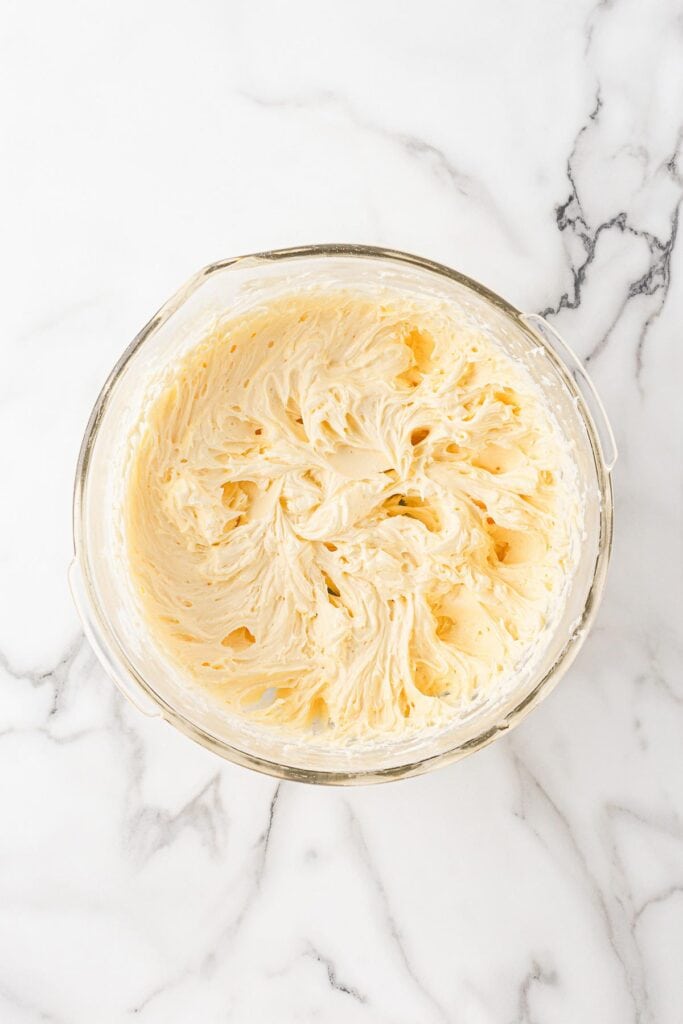
Step 6: Then, increase the mixer speed to high until the mixture turns light fluffy. Add the heavy cream and vanilla and mix until smooth and fragrant.
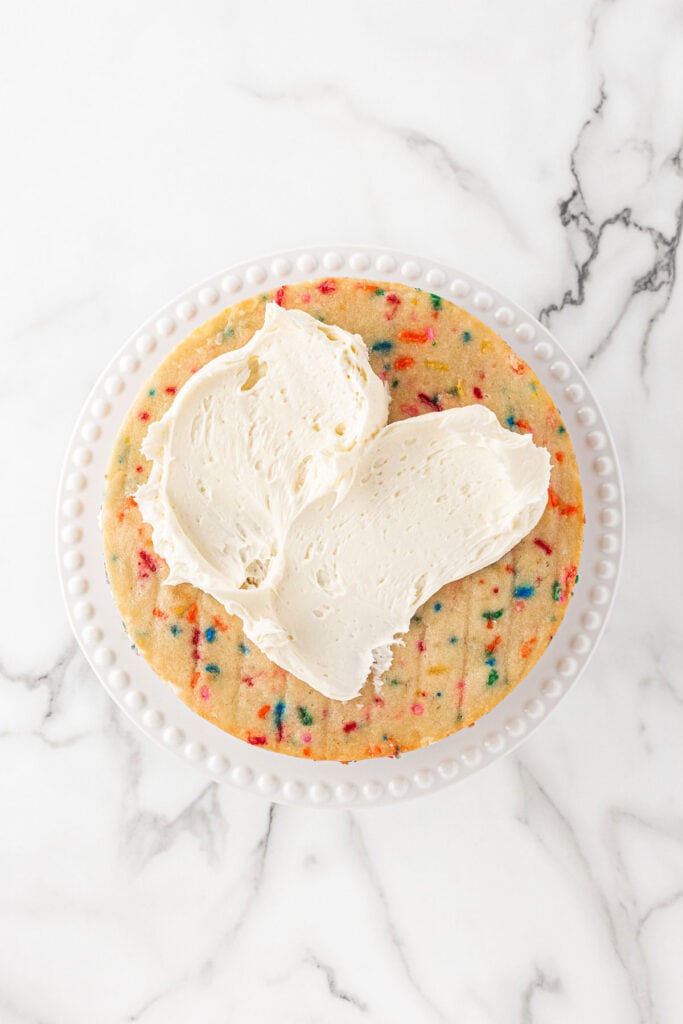
Step 7: Place the first layer of cake in the center of your cake plate/stand. Spread ¼ of the buttercream on top and smooth with an offset spatula. Place the second layer of cake and ¼ of the buttercream.

Step 8: Place the final layer of cake on top and spread ¼ of the buttercream on top of the cake, allowing a little to hang over the edge.
Want to Save This Recipe, Boo?
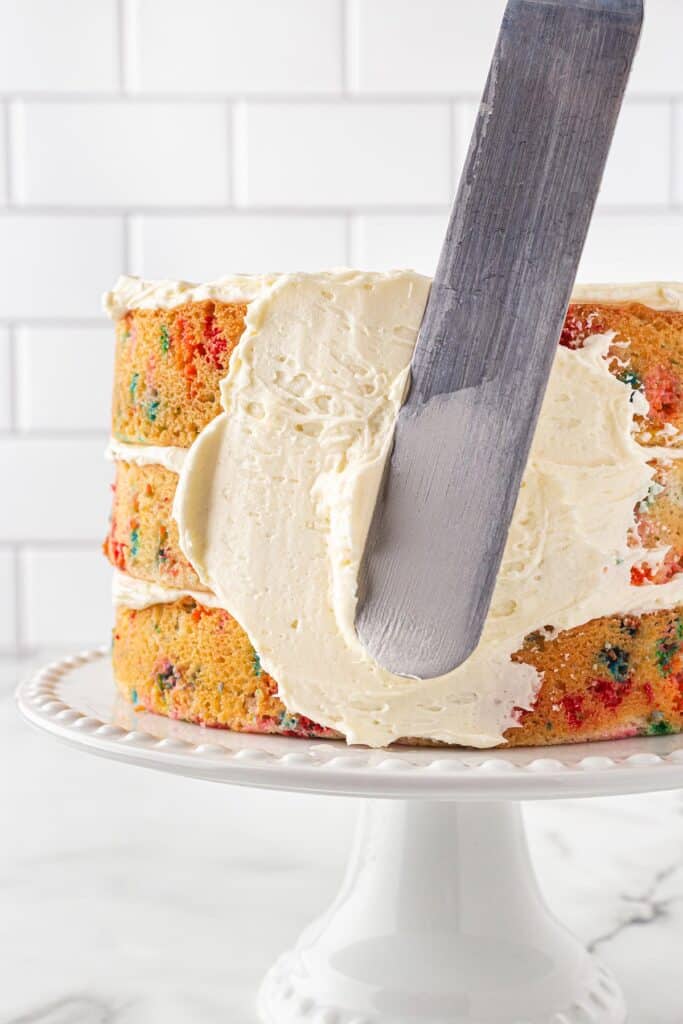
Step 9: Spread the remaining ¼ of the buttercream around the sides of the cake.
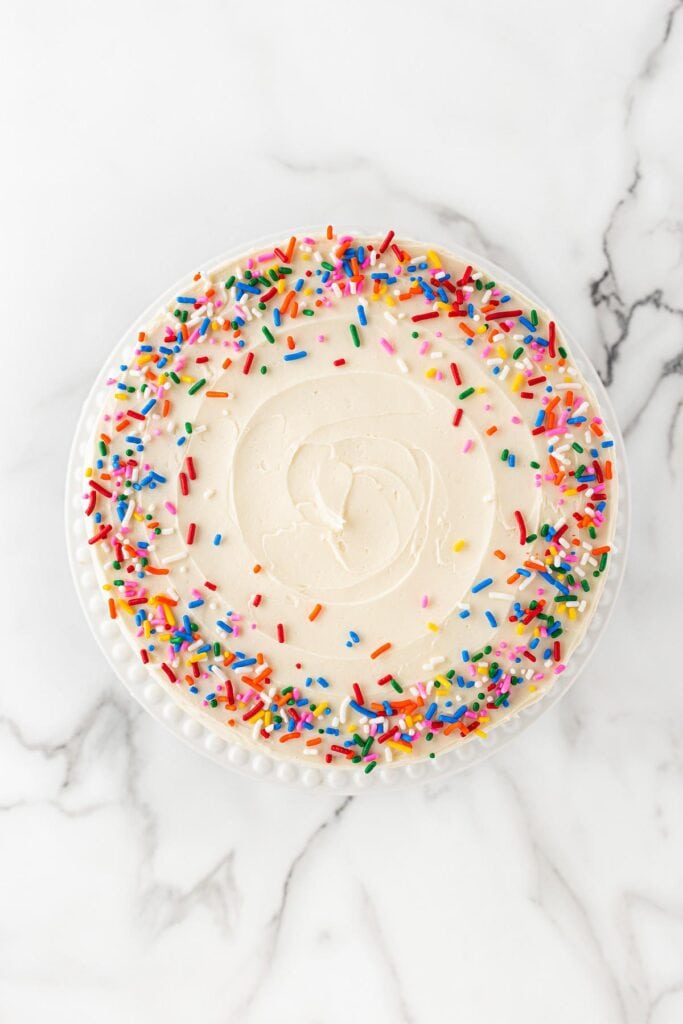
Step 10: Smooth evenly, then sprinkle the top with sprinkles. Slice and enjoy!
Funfetti Cake Recipe
Want to Save This Recipe, Boo?
Ingredients
For Cake
- 2/3 cup vegetable oil
- 1/3 cup unsalted butter, room temperature
- 1 ½ cup granulated sugar
- 3 large eggs room temperature
- 2 ¾ cups all-purpose flour sifted
- 1 ½ teaspoon baking powder
- 1 teaspoon kosher salt
- ½ teaspoon baking soda
- 1 ¼ cup sour cream room temperature
- 1/3 cup whole milk room temperature
- 1 tablespoon vanilla extract
- ¾ cup sprinkles*
For Buttercream
- 2 cups unsalted butter softened
- 1 teaspoon kosher salt
- 5 3/4 cups powdered sugar
- 4 1/2 tablespoons heavy cream
- 1 tablespoon vanilla extract
- Additional sprinkles for garnish
Instructions
For the Cake
- Preheat your oven to 325°F and place racks in the two middle positions. Prepare three 8-inch round cake pans with nonstick baking spray, then a round of parchment paper, and another layer of spray.
- In the bowl of your stand mixer, fitted with the whisk attachment, place oil and butter and mix on high for 2 minutes. Reduce the speed to medium and slowly add in sugar. Then return speed to high and mix for an additional 4-5 minutes, until very pale yellow and fluffy.
- Next, add eggs one at a time, combining well after each addition, and scraping down the bowl as needed.
- Reduce your mixer speed to low and slowly add in flour, baking powder, salt, and baking soda. Mix until just combined, being careful not to overmix.
- Lastly, add in sour cream, milk, vanilla, and sprinkles and mix on low until just combined. Turn off mixer.
- Evenly divide batter among the three prepared pans. Place in the oven to bake for 18-25 minutes, or until a toothpick inserted into the center of the cake comes out just barely clean. Switch the racks the pans are on halfway through baking. Be careful not to over bake! (Begin checking for doneness around 16 minutes, because everyone’s oven is different.)
- Remove the cakes from the oven and cool in the pans for 10 minutes. Then remove cakes from the pan and set on wire racks to cool completely, for about 20 more minutes.
For the Buttercream
- While the cakes are cooling, add butter, powdered sugar, and salt in the bowl of your stand mixer, fitted with the whisk attachment. Mix on low until the powdered sugar is incorporated.
- Then, increase the mixer speed to high until the mixture turns light fluffy. Add the heavy cream and vanilla and mix until smooth and fragrant.
To Assemble
- Place the first layer of cake in the center of your cake plate/stand. Spread ¼ of the buttercream on top and smooth with an offset spatula. Place the second layer of cake and ¼ of the buttercream.
- Place the final layer of cake on top and spread ¼ of the buttercream on top of the cake, allowing a little to hang over the edge. Spread the remaining ¼ of the buttercream around the sides of the cake. Smooth evenly, then sprinkle the top with sprinkles. Slice and enjoy!
Notes
How to Store
-
- Room Temp: Keep it in a cake cover. They will last for up to 3 days.
-
- Fridge: You can refrigerate the cake up to 5 days but cut slices and serve at room temp.
-
- Freezer: Freeze layers unfrosted for the best results. Wrap with plastic wrap then cover in foil. They will last for up to 3 months.
Recipe Tips
- Pick the right sprinkles: I love using the long, skinny rainbow sprinkles (aka jimmies) you find in the baking aisle of just about any grocery store. The texture and colors are perfect for this cake. Don’t grab the nonpareils for this.
- Prevent color bleeding: Sometimes, the color coating on the sprinkles can bleed into the cake. To prevent this, very gently folding in the sprinkles. If you overmix the batter after adding them, it will change the batter color.
- Be patient: If you don’t wait until the cake is completely cool, the frosting will run right off. You need a healthy layer of frosting for those extra sprinkles to sit on.
 pinterest
I made this recipe into 24 cupcakes using ¼ cup of batter per muffin tin, and they came out perfectly moist! My oven isn’t the best, so I baked them at 325°F for 22 minutes (checked at 16 minutes). The timing was spot on for me.
If you love wedding cake flavor like my family does, here’s a little tweak that worked beautifully: when measuring out the tablespoon of vanilla, I topped it off with just a splash of almond extract. The flavor was incredible!
I also loved the tip about bringing ingredients to room temperature,I’d never tried that before, and I truly think it made a difference in how soft and moist the cupcakes turned out. I’ll definitely be doing that from now on.
This was the very first recipe I’ve tried from Grandbaby Cakes, and I’m already excited to bake more from the site. Such a wonderful recipe!
Hi Ruth! So glad the recipe worked well for cupcakes for you! Love the tweak idea of adding a little almond extract, thank you for sharing! Room temperature ingredients make such a difference when blending everything together. Can’t wait for you to try more recipes, if you like pound cake and almond, I’d love for you to try my Almond Pound Cake.
The recipe says 1/3 c 5 1/3 tablespoons of butter.
Is it both or just one?
It’s just 1/3 cup of butter.
How would I adjust it to make a 2 layer 5
Inch cake?
This recipe can be made in 2 9 inch round cake pans.
This sprinkle cake is delicious! It’s the first homemade cake I’ve made and everyone loved it! Moist, flavorful, and beautiful. My oven seemed to cook at the upper end of the bake time (26-27 minutes) but they turned out perfectly. Thanks for a wonderful recipe! Will definitely be using it again.
Recipe is only for a 2 layer cake but picture has 3 layers. Do you have recipe for 3 layers?
Hey there, there are instructions for how to make it for 2 layer, 3 layer, sheet cake and also cupcakes.
Not only did this cake turn out beautifully, it was hands down delicious! Was the perfect centerpiece for my husband’s birthday; my whole family loved it!
This is such a fun party cake! Not sure who likes it more…the kids or adults.
This cake is so absolutely gorgeous!! My nephew’s birthday is coming up and I can’t wait to make this for him!!
Oh my gosh!! This was so moist and fluffy!! We loved it. The colors are bright and fun. My kid loved this and the recipe was easy to follow. We will make this again!
This looks like such a fun cake! I can’t wait to make it for my family!