Red Velvet Lava Cake

This decadent and festive red velvet lava cake bakes up as a tender red velvet cake with an oozing chocolate center! Made with Red Velvet Liqueur, these cakes are mouth-wateringly moist and delicious and perfect for a special occasion dessert.  

This post may contain affiliate links. Read our disclosure policy.
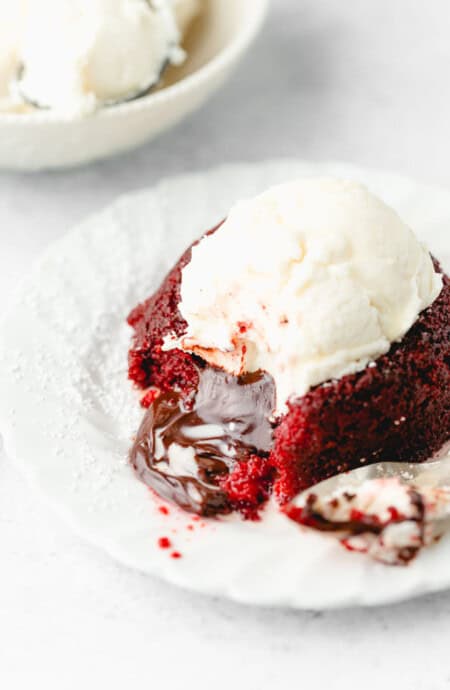
Two red velvet molten lava cakes on white plates topped with vanilla ice cream melting down

Want to Save This Recipe, Boo?

I'll email this recipe to you, so you can come back to it later!

Happy Holidays yโ€™all! โ€˜Tis the season for tasty treats and ill-fitting clothes. Am I right? This time of year I spend about 80% of my time in the kitchen whipping up my favorite baked goods of the season. Winter cobblers, cakes and cookies come flying out of my oven at a rate that you just wouldnโ€™t believe.

I mean, every weekend there seems to be a function that requires some sort of tasty contribution. And, letโ€™s be honest, who doesnโ€™t expect the grandbaby of Grandbaby Cakes to show up with something? If thereโ€™s one thing you should know about me, itโ€™s that I donโ€™t like to disappoint.

Perks and Highlights of Red Velvet Lava Cakes

Cuisine Inspiration: American
With a nod to the classic Southern charm, this Red Velvet Lava Cake brings the traditional flavors of red velvet cake to an all-American favorite dessert. It’s a love letter to comfort food enthusiasts who adore a good surprise inside!

Primary Cooking Method: Baking
This dessert requires the art of baking to achieve that perfect balance between the tender cake exterior and the gooey, molten center. It’s all about timing and precision, darlings!

Dietary Info: Vegetarian
Calling all dessert-loving vegetarians! While this recipe isn’t vegan or gluten-free, it’s completely meat-free. However, it does contain dairy products and eggs, so it’s not suitable for vegans or those with specific dairy allergies.

Key Flavor: Chocolatey Velvet
Imagine the iconic, mild cocoa flavor of a traditional red velvet cake, paired with the decadent, rich surprise of melted chocolate at its heart. This dessert isn’t just a treat; it’s an experience for your taste buds!

Skill Level: Intermediate
While you don’t need to be a professional pastry chef to make this luscious treat, a bit of experience in the kitchen is helpful. The process involves multiple steps that require careful attention to detail, especially when it comes to baking time and the lava center’s preparation.

Special Perks:

  1. Showstopper Dessert: This isnโ€™t just any dessert; itโ€™s the grand finale, perfect for special occasions or when you want to impress. It’s a true conversation starter!
  2. Surprise Inside: Each cake hides a secret molten center that will wow you and your guests. Cutting into the cake reveals a delightful, chocolatey surprise that’s absolutely Instagram-worthy.
  3. Flexible with Flavors: Feel free to get creative with the type of chocolate or even add a splash of different flavored liqueurs to the cake batter or the molten center for a unique twist.
  4. Perfect for Date Night: Nothing says romance like a red velvet lava cake. Its rich, decadent, and intimate serving size makes it ideal for a cozy dinner for two.
  5. Make-Ahead Magic: Short on time? No problem! Prepare the chocolate centers in advance and keep them chilled until youโ€™re ready to assemble and bake the cakes.
 
A red velvet lava cake on a white vintage plate with a spoon topped with vanilla ice cream

But, this year things are a little different. Instead of holiday gatherings, Iโ€™m sure weโ€™ll all be spending a bit more time with close family and friends and thatโ€™s why I developed this recipe. Molten Lava Cakes are decadent treats made to impress! Their individual portion size, impressive presentation and ooey-gooey middle make for an undeniably perfect dessert.

Looking to make your loved oneโ€™s feel a little extra special and warm this year? A boozy Red Velvet Molten Lava Cake is the way to go!

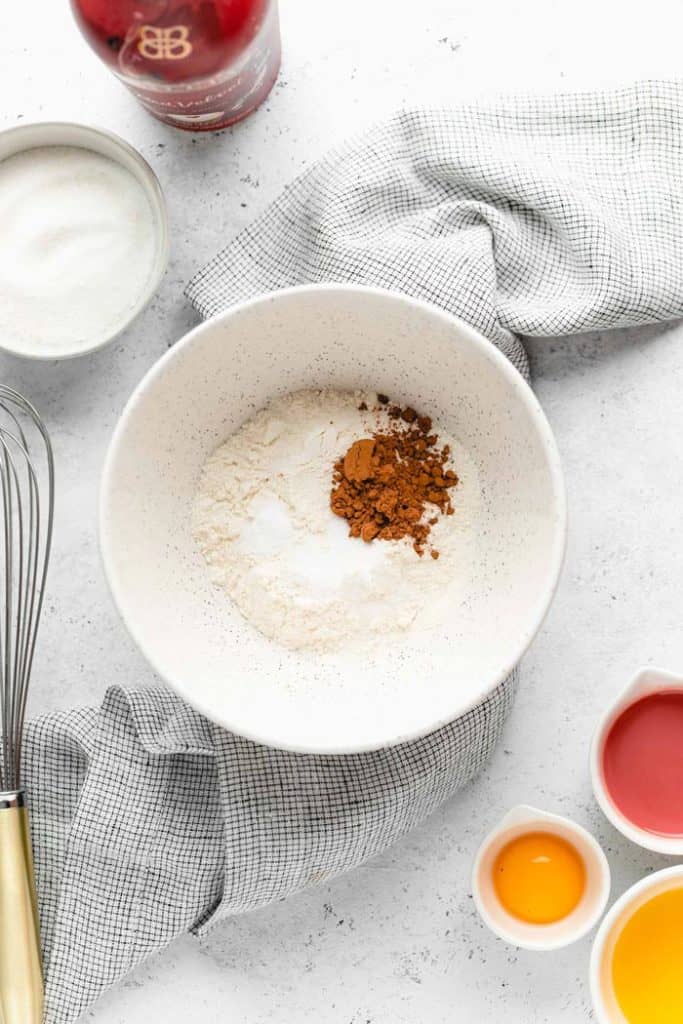
Ingredients for lava cakes ready to mix together

Ingredients

While developing this recipe I was under no impression that it wasnโ€™t one that hadnโ€™t been made a dozen times before. I asked myself, how can I make this different? Thatโ€™s when it hit me: booze! Lava cakes are quite rich and adding a bit of alcohol cuts through the chocolate and creates a more balanced experience.

These molten lava cakes are every chocolate loverโ€™s dream: fudgy, smooth, cakey, sweet and somehow delicate. Trust me, you need one of these in your life!

Letโ€™s talk about ingredients for a minute, shall we?

  • Red Velvet Liqueur – Sweet, smooth and creamy, this liqueur makes for the perfect grown-up baking boost! If you canโ€™t get your hands on this specific flavor, any Baileyโ€™s of your choice will work.
  • Bittersweet Baking Chocolate is what makes up our molten center. Be sure to use a high-quality baking chocolate for maximum results.
  • Heavy Whipping Cream helps to protect our chocolate from scalding and creates a meltier molten filling.
  • Unsalted Butter is what makes the world go โ€˜round! And itโ€™s also what makes lava cakes a buttery, melt-in-your-mouth experience.
  • Cake Flour is finely milled and very delicate. When used in cakes, it results in a super tender texture with a fine crumb and an incredible rise.
  • Unsweetened Cocoa Powder is at its best when dutch-processed. The powder itself should be darker, softer and more aromatic than a lower quality variation.
  • Granulated Sugar simply sweetens our cakes. Cane sugar works as well.
  • Apple Cider Vinegar reacts when combined with baking soda and helps the cakes to rise. This is a dense cake, it needs a little extra help. Distilled vinegar will also work.
  • Egg Yolk contains a high-concentration of fat which gives baked goods an extra-rich flavor and velvety texture. It also serves as a binder for our liquids.
  • Vanilla Extract adds aroma and heightens all the other flavors as well.
  • Baking Soda serves as a rising agent, be sure to use fresh, active baking soda.
  • Salt boosts all the other flavors to the next level! I recommend sticking to kosher salt.
  • Red Food Coloring is added to create a brighter red coloration. But, because the Baileyโ€™s Red Velvet is already a pinkish-red, the cake doesnโ€™t need much more coloring. I recommend using about a teaspoon or just omitting completely. Your choice!

How to Make Red Velvet Lava Cakes

  1. Show your four 8-ounce ramekins some love with a spritz of non-stick baking spray. Dress them up with a dusting of unsweetened cocoa, making sure to shake out any extra.
  2. Mix It Up: In a medium bowl, play matchmaker by whisking together your cocoa powder, flour, salt, and baking soda. Then, in another bowl, create a love potion with melted butter, granulated sugar, Baileyโ€™s Red Velvet, food coloring, vanilla, vinegar, and egg yolk. Unite the wet and dry ingredients until they’re a match made in heaven.
  3. Ramekin Romance: Divide your vibrant batter evenly among the ramekins, setting the stage for the main event.
  4. Chocolate Encore: Retrieve your cooled chocolate lovers from the fridge. With a 1 โ…“ inch cookie scoop, form chocolate balls and nestle one in the center of each ramekin, pressing down gently to set the scene.
  5. Bake and Awe: Place your ramekins on a baking sheet and bake for an enchanting 16-18 minutes, or until the tops spring back with a gentle touch.
  6. The Grand Reveal: Upon their exit from the oven, serenade the edges of your cakes with a thin knife to loosen, then flip them onto a serving plate with a dramatic flourish. Crown them with a snowfall of powdered sugar.
  7. Serve with Passion: Accompany your stunning lava cakes with a scoop of ice cream and dive into the indulgence!
A close up of a ramekin filled with red velvet cake batter with a ball of chocolate on top

How to Tell When it is done

Taking your lava cakes out of the oven at the correct moment is crucial for lava success! Youโ€™ll know when your cake is done when the edges are cooked all around and the center has risen but itโ€™s not too puffy. The center should also be slightly soft, yet not jiggly.

Before removing them from the oven, double check the doneness by inserting a toothpick into the sides of the cake; it should come back with a few moist crumbs. Like an undercooked brownie, the center should still be wet.

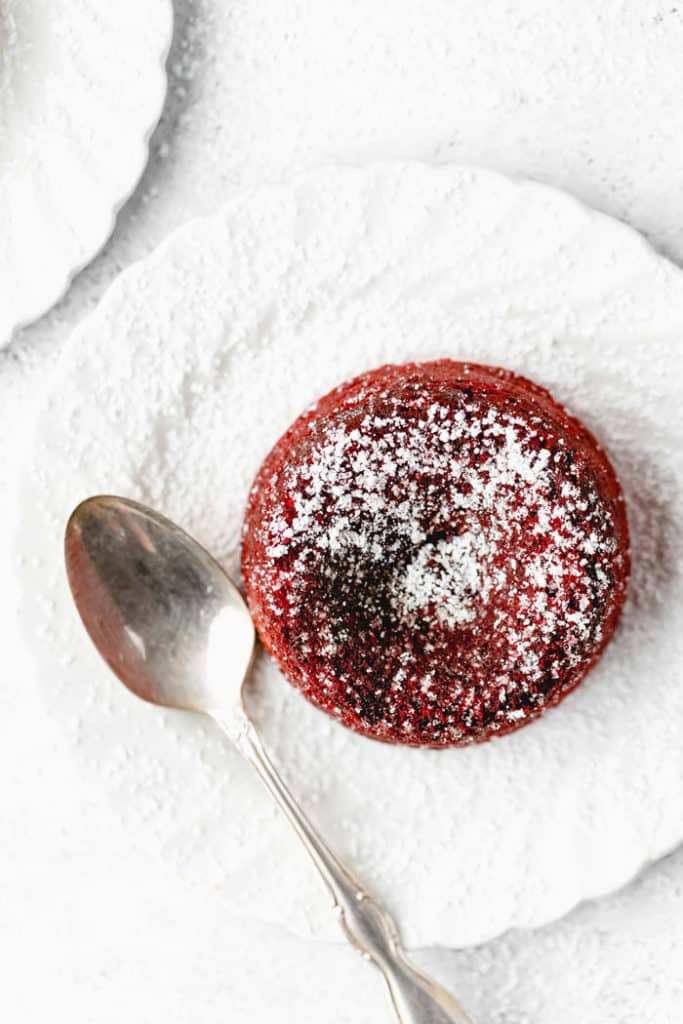
A red velvet molten cake out of the oven on a white plate topped with confectioner's sugar with a spoon nearby

How to Flip a Molten Lava Cake

This is arguably the hardest part of making a lava cake. Iโ€™ve had more than my fair share of messy molten disasters! This one moment of truth is what makes or breaks this recipe and Iโ€™m here to guide you through it.

Once removed from the oven, allow the lava cakes to sit in the ramekins for about 2-3 minutes. In the meantime, grab your small serving plate and place it on top of the ramekin. Place one hand on the plate and using the other hand (which should have an oven mitt on), quickly flip over the ramekin. Slowly pull up the ramekin and voila, youโ€™ve got a perfect lava cake!

And yaโ€™ll, even if it doesnโ€™t go perfectly, donโ€™t sweat it! Dust with powdered sugar or layer on a hefty scoop of vanilla ice cream. Flavor is what matters here.

Jocelyn Delk Adams eating one of her red velvet lava cakes

Preparing Ahead of Time

Yes! Molten Lava Cakes are prep-ahead friendly! If you have guests coming or youโ€™d like to surprise a loved one with a special dessert, you can refrigerate uncooked lava cake batter in ramekins for up to 24 hours.

If youโ€™re planning to do this, I highly recommend you place parchment paper (cut to size) at the button of each ramekin before spraying with non-stick spray. Doing this will ensure that the bottoms donโ€™t stick after having sat in there for a while. Cover the ramekins with plastic wrap and refrigerate.

Alternatively, you can keep the prepared batter in its mixing bowl, seal it with plastic wrap and refrigerate for up to 2 days.

Once ready to cook, be sure to allow the batter to sit out for at least 30 minutes. You want the batter to come to room temperature before baking.

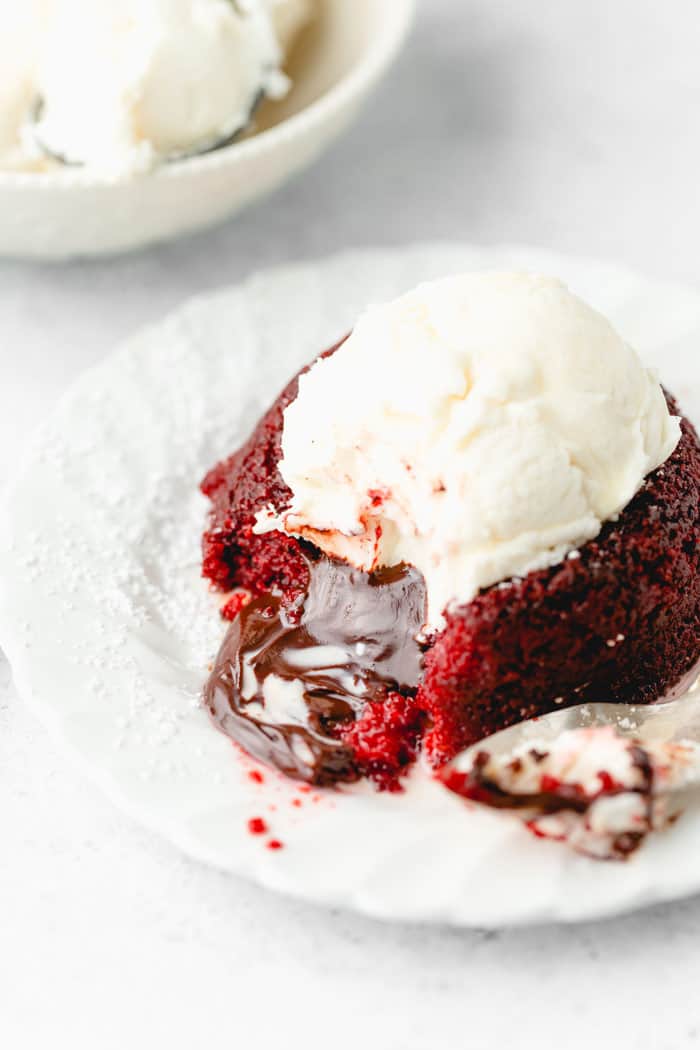
A close up of red velvet lava cake with inside spilling out and vanilla ice cream melting over it

Storage

Molten Lava Cakes are best eaten immediately. The longer a lava cake rests, the more time it has to continue cooking. That means your warm, melted chocolate lava in the center will soon disappear.

Although itโ€™s ideal to consume it shortly after it comes out of the oven, a lava cake can be stored in the refrigerator. Wrap the individual cakes in plastic wrap and store in the fridge for up to 3 days. Just know that your lava cake will most likely be a chocolate cake minus the molten center once reheated.

To reheat, unwrap the cake and place on a microwave-safe plate. Cover the cake with a damp paper towel and microwave on high for about 40 seconds. Enjoy!

Best Red Velvet Recipes

Looking for more decadent red velvet recipes? Youโ€™ve come to the right place. Go ahead and treat yourself to a few more of my devilishly delicious recipes:

A close up of red velvet lava cake with inside spilling out and vanilla ice cream melting over it

Red Velvet Lava Cake

A diabolically delicious yet festive red velvet molten lava cake with an oozing chocolate center!
4.79 from 14 votes
Prep Time 15 minutes
Cook Time 18 minutes
Chill Time for Chocolate 2 hours
Total Time 2 hours 33 minutes
Course: Dessert
Servings: 4 servings

Ingredients

  • 2 oz bittersweet chocolate baking bar finely chopped
  • 1/4 cup heavy whipping cream
  • 1 1/2 tsp unsweetened cocoa plus more for ramekins
  • 1 cup cake flour
  • 1/2 tsp salt
  • 1/4 tsp baking soda
  • 1/2 cup unsalted butter melted and cooled
  • 1/2 cup granulated sugar
  • 6 tbsp Baileyโ€™s Red Velvet
  • 2 tsp red food coloring
  • 1/2 tsp vanilla extract
  • 1/2 tsp apple cider vinegar
  • 1 large egg yolk
  • 1 tbsp powdered sugar

Instructions

  • Add bittersweet chocolate and heavy whipping cream in a small microwave-safe bowl. Microwave for 30 seconds then whisk ingredients together until completely smooth.
  • Add plastic wrap on top of the chocolate and refrigerate for 2 hours until firm.
  • Preheat the oven to 400ยฐF. Spray 4 (8-ounce) ramekins non stick baking spray then dust around all of them thoroughly with a little unsweetened cocoa, and tap out any excess.
  • In a medium sized bowl, whisk together cocoa powder, flour, salt and baking soda.
  • In another separate bowl, whisk together melted butter, granulated sugar, Baileyโ€™s Red Velvet, food coloring, vanilla, vinegar, and egg yolk. Pour wet ingredients into dry ingredients and whisk until combined. Evenly divide the batter among the 4 ramekins.
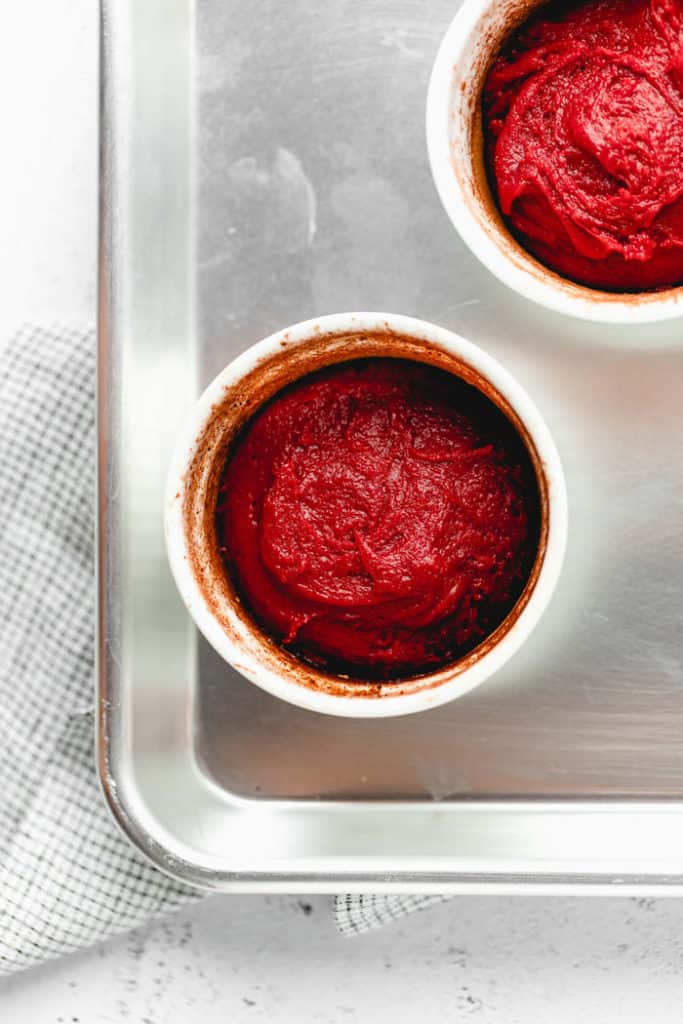
  • Remove cooled chocolate from the refrigerator. Using a 1 โ…“ inch cookie scoop, scoop chocolate balls and place in the center of each ramekin and press down lightly.
  • Add ramekins to a baking sheet and bake in preheated oven for about 16-18 minutes (or until the tops spring back when lightly pressed with a finger.
  • Once ready, remove cakes from the oven and use a thin knife to go around the outer edge of the cake and loosen then invert onto a serving plate. Dust the tops of the cakes with powdered sugar then serve with ice cream and enjoy!

Notes

Molten Lava Cakes are best eaten immediately. The longer a lava cake rests, the more time it has to continue cooking. That means your warm, melted chocolate lava in the center will soon disappear.
Although itโ€™s ideal to consume it shortly after it comes out of the oven, a lava cake can be stored in the refrigerator. Wrap the individual cakes in plastic wrap and store in the fridge for up to 3 days. Just know that your lava cake will most likely be a chocolate cake minus the molten center once reheated.
To reheat, unwrap the cake and place on a microwave-safe plate. Cover the cake with a damp paper towel and microwave on high for about 40 seconds. Enjoy!

Nutrition

Calories: 645kcal | Carbohydrates: 64g | Protein: 7g | Fat: 39g | Saturated Fat: 23g | Cholesterol: 131mg | Sodium: 383mg | Potassium: 123mg | Fiber: 2g | Sugar: 37g | Vitamin A: 993IU | Calcium: 36mg | Iron: 1mg
Tried this Recipe? Tag me Today!Mention @GrandbabyCakes or tag #grandbabycakes!
Filed Under:  Cake, Christmas, Dessert and Baking, Holidays, Oven, Valentine's Day

Comments

  1. Everything looks delicious, as always. Happy Birthday to your sweet daughter, Harmony. I love your site, you always put a smile on my face each time I read your posts. It is nice to see a beautiful smile. I hope you get your own food network show.

4.79 from 14 votes (7 ratings without comment)

Leave a Reply

Your email address will not be published. Required fields are marked *

Recipe Rating