
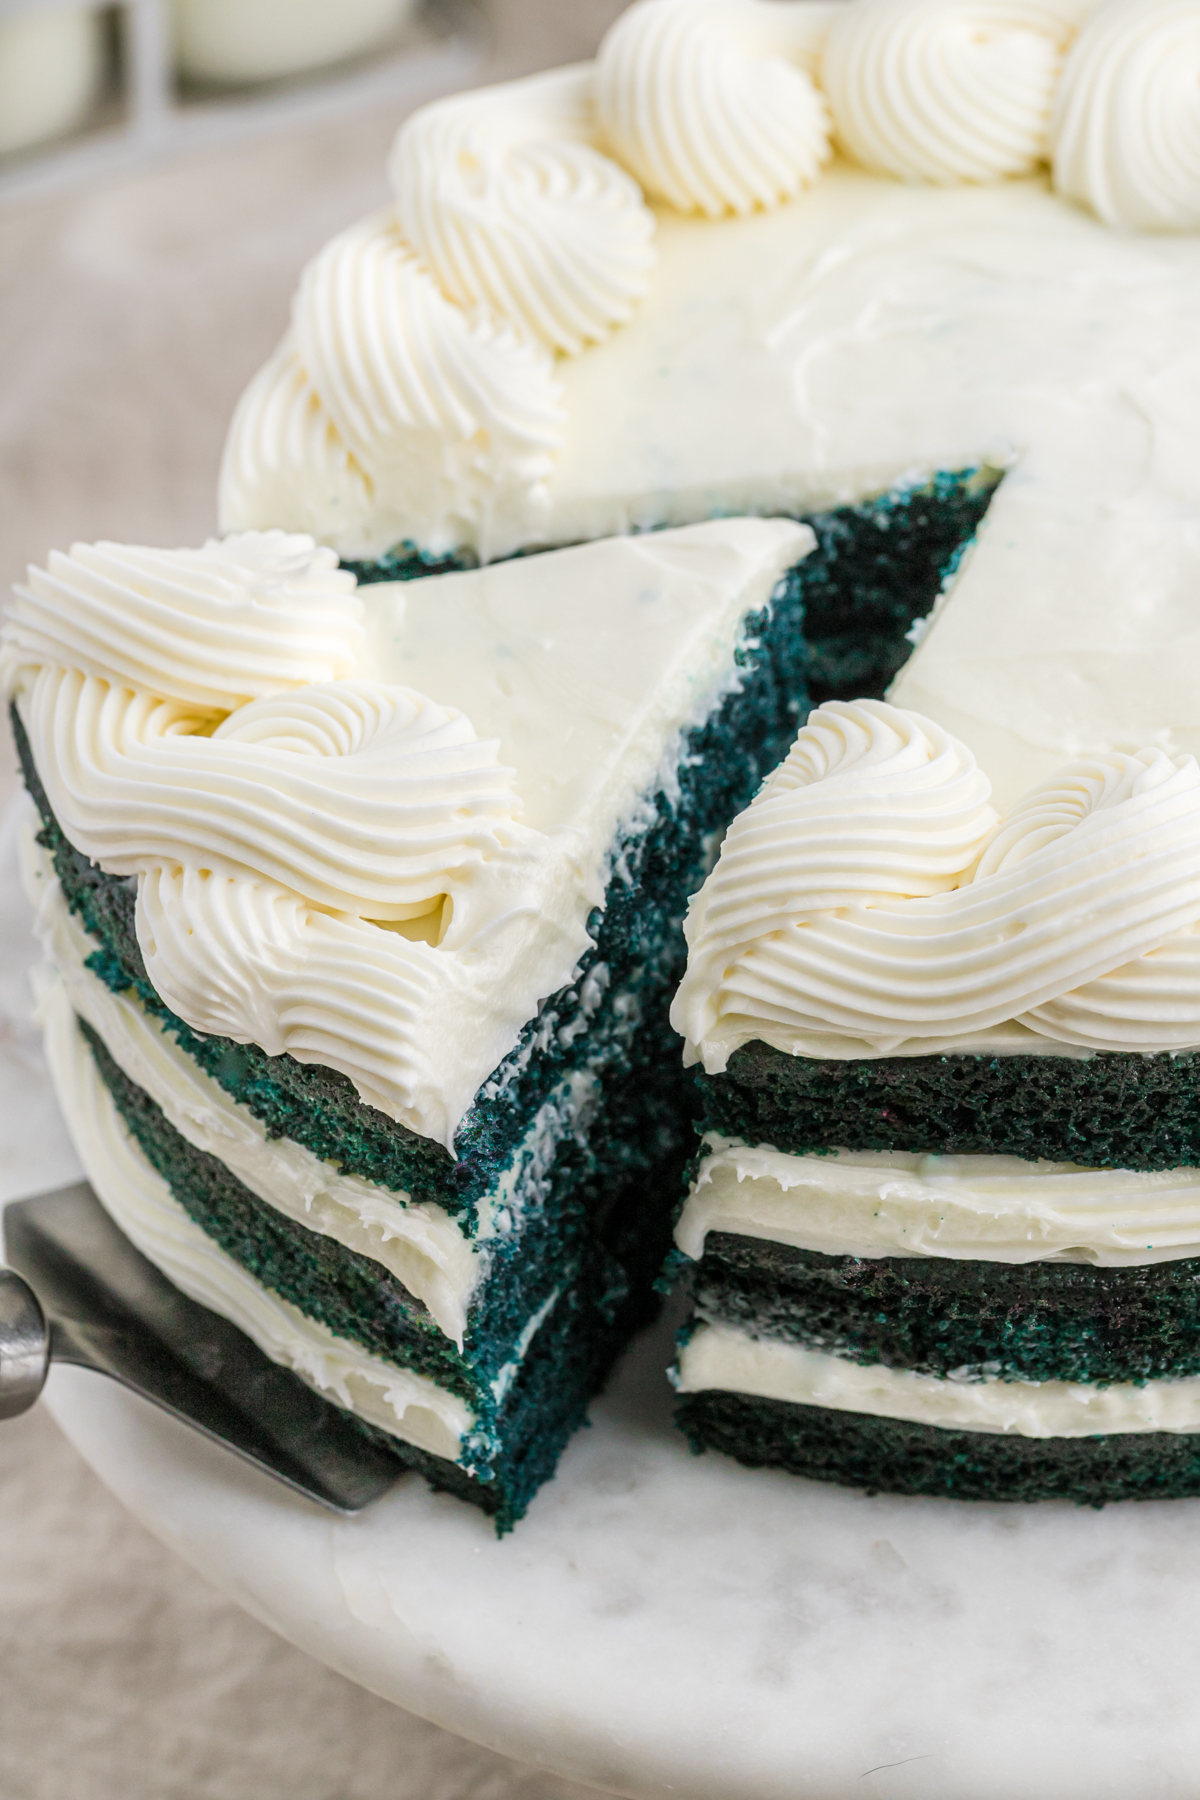
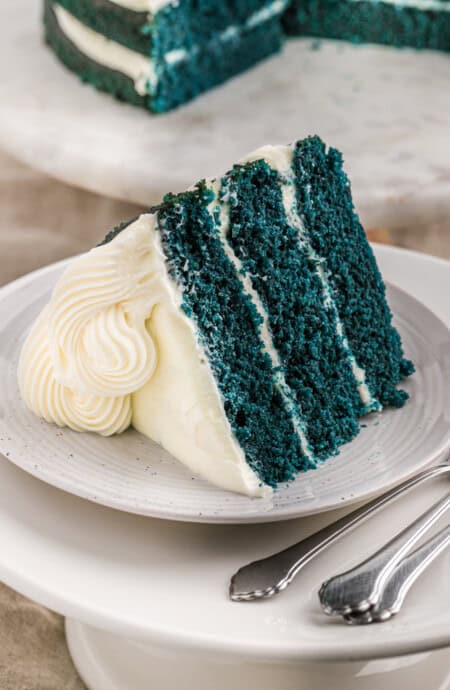
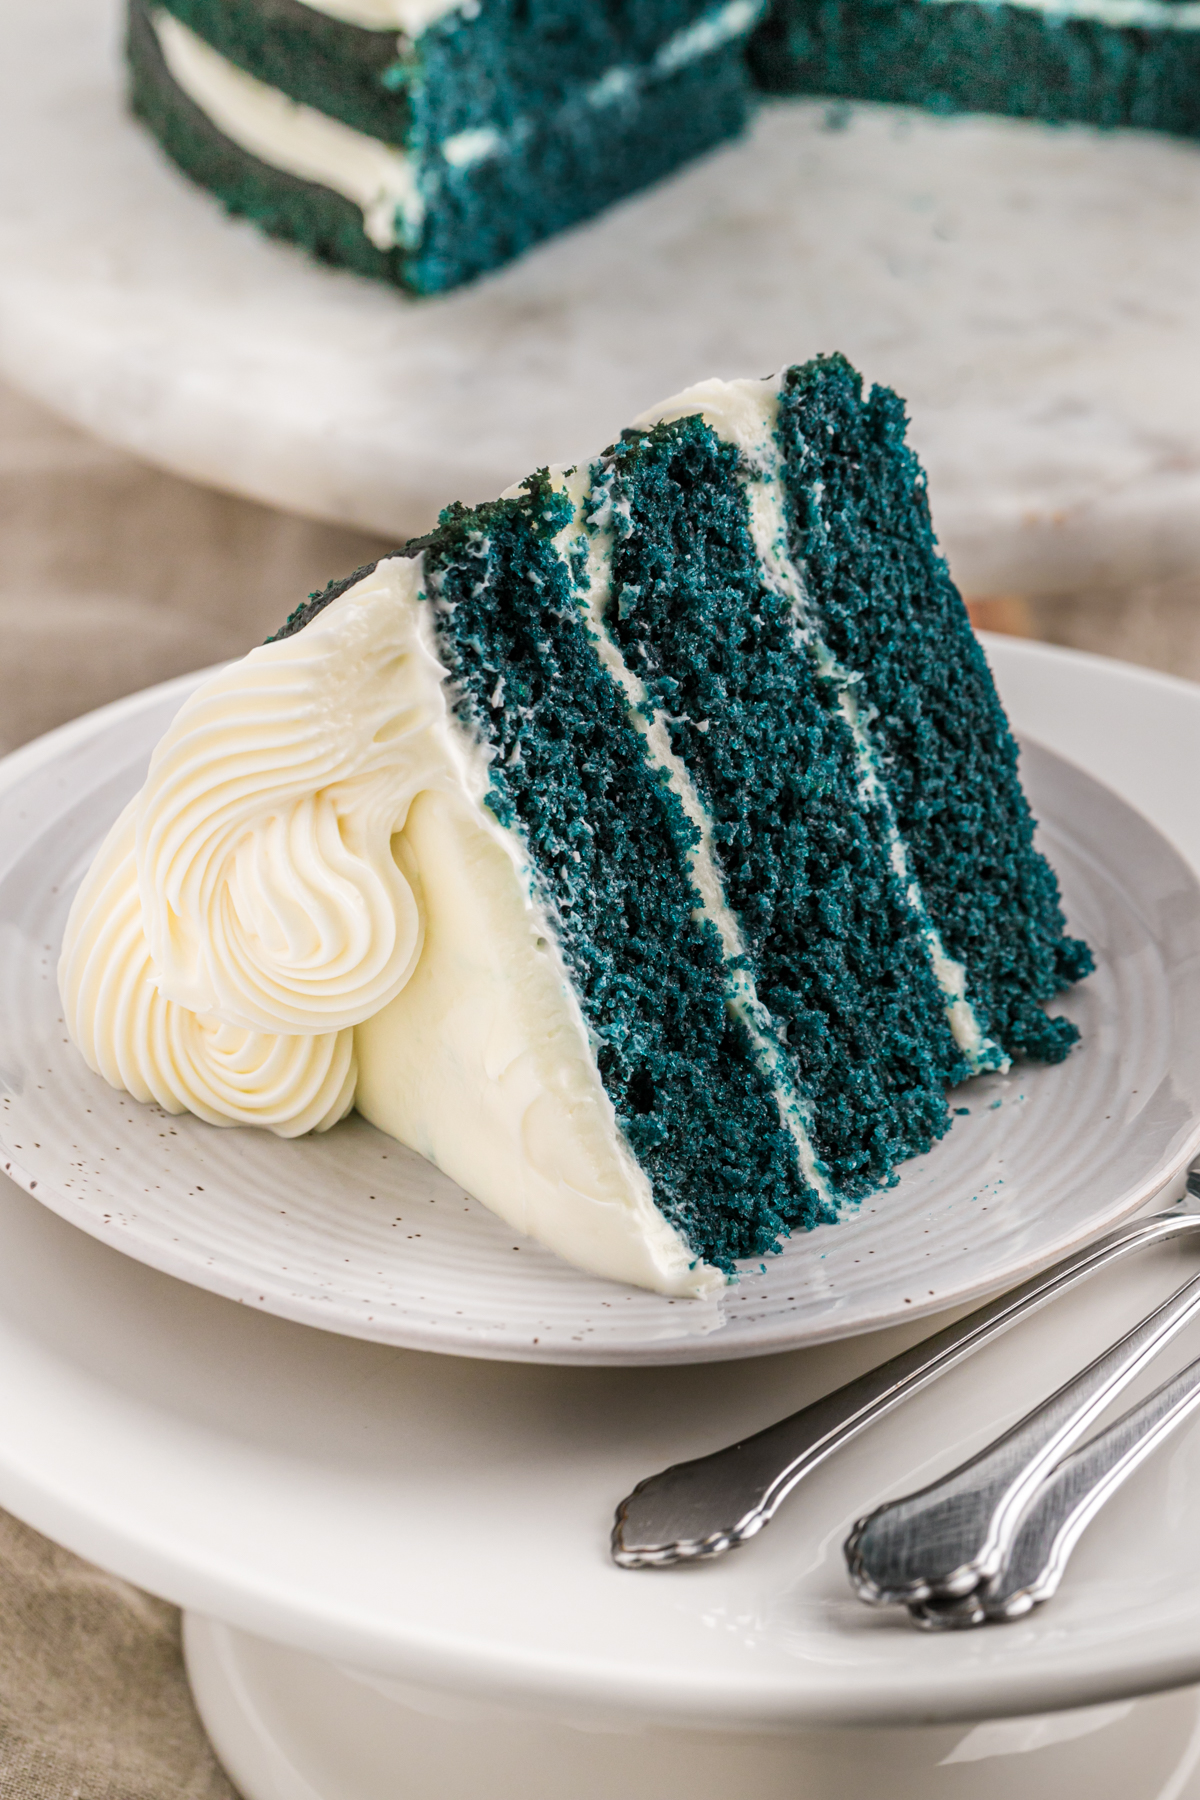
Y’all this blue velvet cake is straight up fire! I love how it gives you all those classic red velvet vibes but in an unexpected blue package. So you already know I keep it moist, tender and tangy but then set it off with a homemade cream cheese frosting. Get into it boos.
This post may contain affiliate links. Read our disclosure policy.

They’re Lovin’ It! Here’s what They’re Sayin’:
“I showed this to my husband and his first words were “I must have that!”. How fun is a blue velvet cake! The added coffee is perfection. It was delicious! WILL make again.”
—APRIL
How to Make Blue Velvet Cake
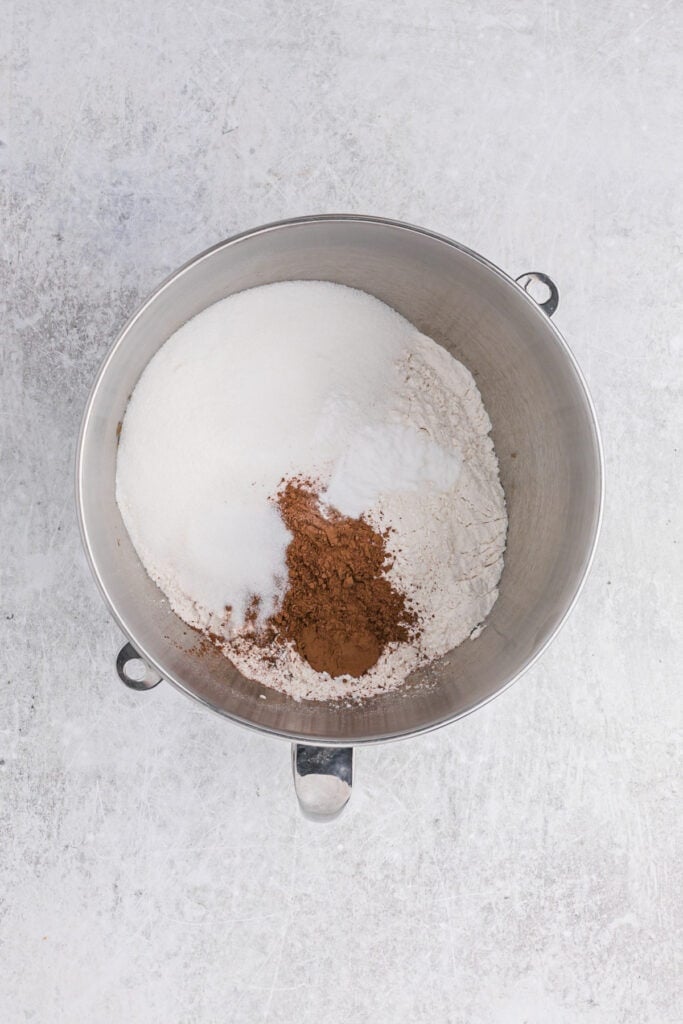
Step 1: In your stand mixer, add the dry ingredients and whisk to combine. I fit my stand mixer with the whisk attachment to add more air to the finished cake.
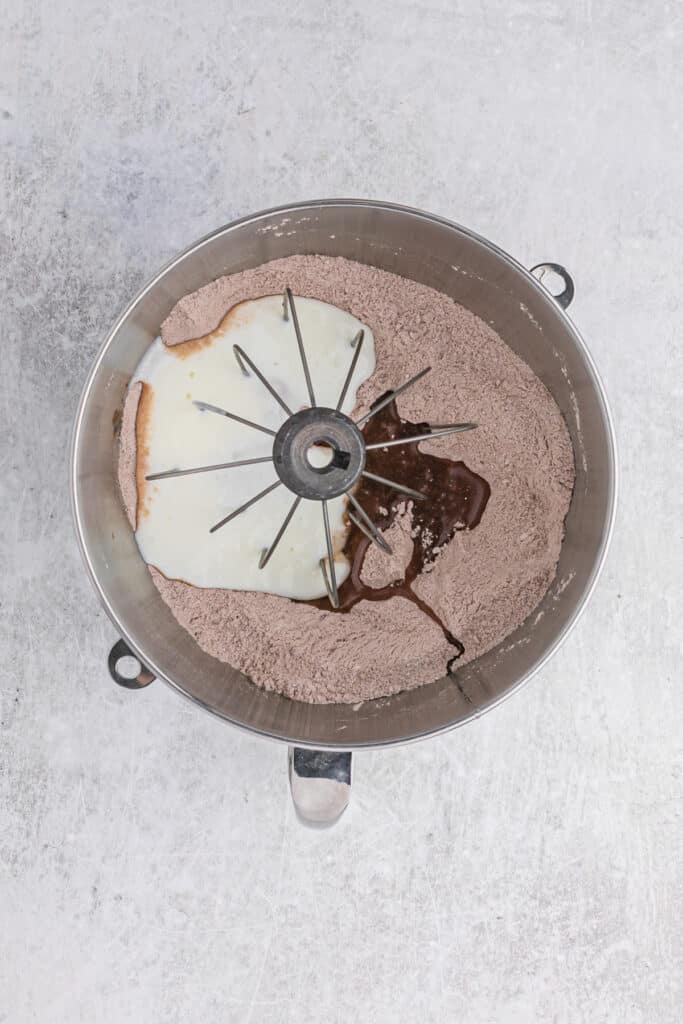
Step 2: Then add the oil and buttermilk.

Step 3: Next add in the eggs one at a time, followed by the remaining wet ingredients including the food coloring. Mix until just combined.
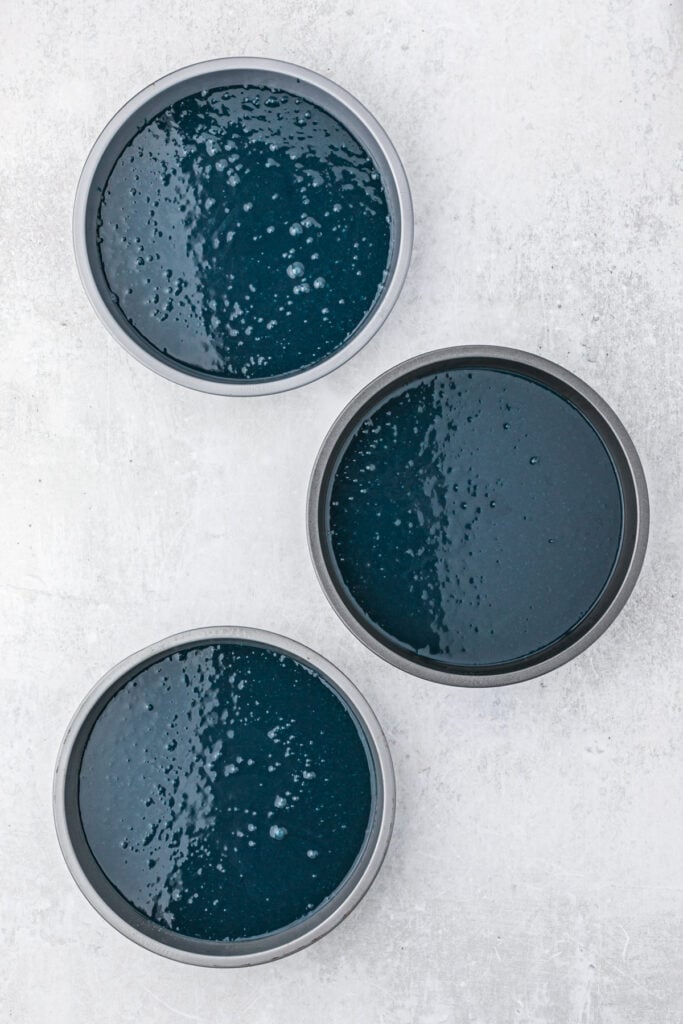
Step 4: Pour the batter equally between greased and lined cake pans and bake until a toothpick inserted comes out clean.
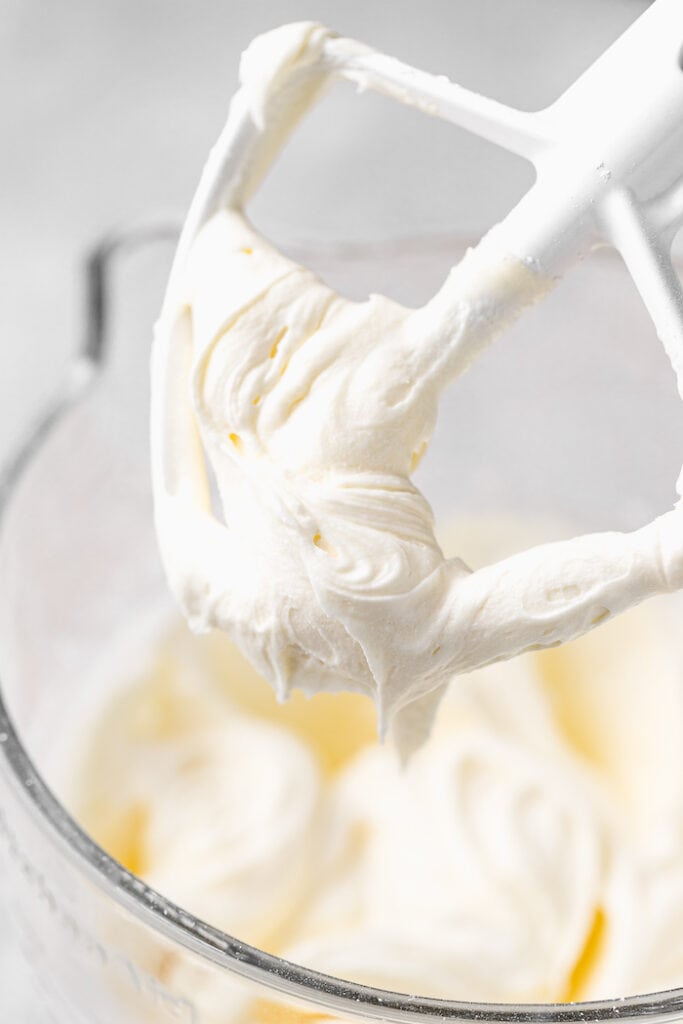
Step 5: Add butter and cream cheese to the bowl of your mixer and beat on high speed then add in your powdered sugar with the mixer slowed down. Once all sugar has incorporated, turn mixer back to high to continue whipping. Add salt and vanilla and continue whipping until it is smooth. If it is a bit loose, add more powdered sugar until it thickens up.
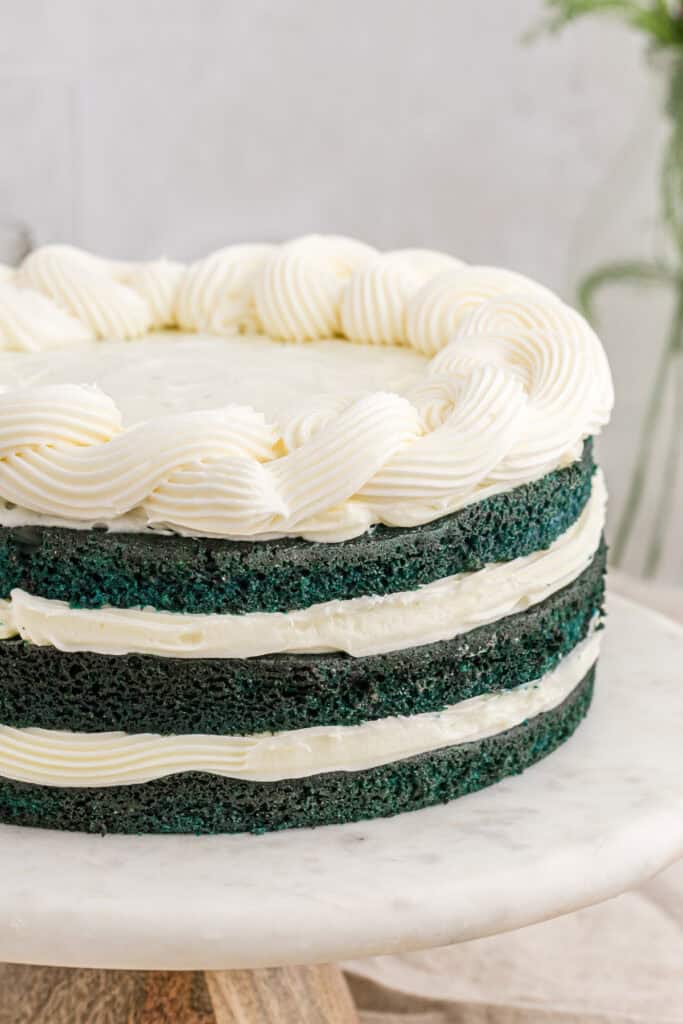
Step 6: Once layers are cooled, place 1 layer on a serving plate. Spread just the top with 1/3 of the frosting. Add the second layer and spread with another 1/3 of the frosting. Add the final layer, bottom-side up, and top with the remaining frosting.
Blue Velvet Cake Recipe
Want to Save This Recipe, Boo?
Ingredients
For the Cake:
- 2 1/2 cups sifted all-purpose flour
- 2 cups granulated sugar
- 2 tablespoons unsweetened cocoa powder
- 1 teaspoon baking soda
- 1 teaspoon salt
- 1 1/3 cups vegetable oil
- 1 cup buttermilk room temperature
- 2 large eggs room temperature
- 1/4 cup strong coffee hot
- 1 tablespoon vanilla extract
- 1 teaspoon apple cider vinegar
- food coloring to create blue look at notes below
For the Cream Cheese Whipped Frosting:
- 1 cup unsalted butter room temperature
- 32 oz cream cheese somewhat softened but still a little stiff
- 7 cups confectioner's sugar to stiffen more, go up another cup
- 1 tsp salt
- 2 tsp plus ¼ teaspoon vanilla extract
Instructions
For the Cake:
- Preheat your oven to 325°F. Liberally prepare 3 9-inch round cake pans with the nonstick method of your choice. I used non stick spray and parchment paper for an easy release.
- In the bowl of your stand mixer fitted with the whisk attachment, add the flour, granulated sugar, cocoa powder, baking soda, and salt and mix on low speed. Slowly add the oil and buttermilk.
- Increase the speed to medium-low and add the eggs 1 at a time, combining well after each addition and scraping down the sides and bottom of the bowl as needed. Slowly add the coffee, vanilla extract, vinegar, and food coloring. Scrape down the sides and bottom of the bowl and mix the batter until just combined. Be careful not to overmix.
- Evenly pour the batter into the prepared pans and bake for 20 to 27 minutes, or until a toothpick inserted into the center of a layer comes out clean. Do not overbake.
- Let the layers cool in the pans for 10 minutes, then invert onto wire racks. Let cool to room temperature. Lightly cover the cakes with foil or plastic wrap so they do not dry out.
For the Cream Cheese Whipped Frosting:
- Add butter and cream cheese to the bowl of your mixer and beat on high speed until it begins to thicken and fluff.
- Next slow down mixer and carefully add in confectioner’s sugar. Once all sugar has incorporated, turn mixer back to high to continue whipping.
- Add salt and vanilla extract and continue whipping until it is smooth.
To Assemble:
- Once the layers are completely cooled, place 1 layer on a serving plate. Spread just the top with 1/3 of the frosting. Add the second layer and spread with another 1/3 of the frosting. Add the final layer, bottom-side up, and top with the remaining frosting. Only frost the sides if you wish. Serve at room temperature. Store in the refrigerator or freezer.
Notes
- Leftover cake should be stored in an airtight container within the refrigerator due to the cream cheese frosting.
- Cake can also be frozen for up to 3 months! Thaw overnight in the refrigerator the day before you plan to enjoy.
- Unlike red velvet, unfortunately you can’t just head to the grocery store and grab a bottle of blue food coloring. It won’t result in the same saturation and vibrancy. To get the perfect color, you will need to do some mixing and use quality food coloring.
- Some like to create a blue with a couple drops of black and red.
- Here we actually used a mix of 2 tsp Sky blue and 1/8th tsp violet gel food coloring to get this coloring.
- Feel free to play around and figure out what will best work for the color you want. The brown from the cocoa makes it much harder to achieve this.
- Or if you (If you have a specific amount of each I recommend adding it here). Use a rubber spatula to continuously fold the cream cheese frosting on itself until the frosting color is consistent.
Nutrition
Recipe Tips
- No Dutch Processed Cocoa: Don’t use dutch here. It will make the color of the blue much darker and murkier.
- Firm Up Your Layers: These cake layers are very very tender so I also like to make sure they cool completely and even freeze a bit before frosting.
- Got food coloring everywhere except the cake?: Here’s a trick, if you have a bit of food coloring on your hands that looks as if it’s going to linger or stain, try rubbing it with a face cloth of white vinegar or a baking soda paste.
- Get the Right Blue: To get the perfect color, you will need to do some mixing and use quality food coloring. Here we actually used a mix of 2 tsp Sky blue and 1/8th tsp violet gel food coloring to get this coloring.
Want to Save This Recipe, Boo?
Recipe help
Absolutely boos. Bake the layers ahead of time, wrap in plastic wrap tightly and pop in the freezer until you are ready to ice and serve the cake.
The good ole toothpick trick works every single time. Insert a toothpick into the center of a layer and if it comes out mostly clean with just a few crumbs, it’s good to go.
You can add more powdered sugar to it so it firms up a bit. You can also chill in the fridge for 20 minutes so it firms up more without adding additional sugar.
 pinterest
Would there be a major difference if I left out the coffee?
Not a major difference at all. The coffee is mainly there to deepen and enhance the chocolate flavor from the cocoa powder. It won’t make the cake taste like coffee.
If you leave it out, the cake will still turn out great. You can simply replace it with hot water instead.
Will this recipe work for cupcakes? Any tips on baking temp/time if so?
It will! I have a post on converting a cake to cupcakes; you can find it here. Hope it helps!
I love this recipe and I have made it three times. I have both cookbooks and receive your emails. Thank you for your consistency.
Wow thank you so so much!