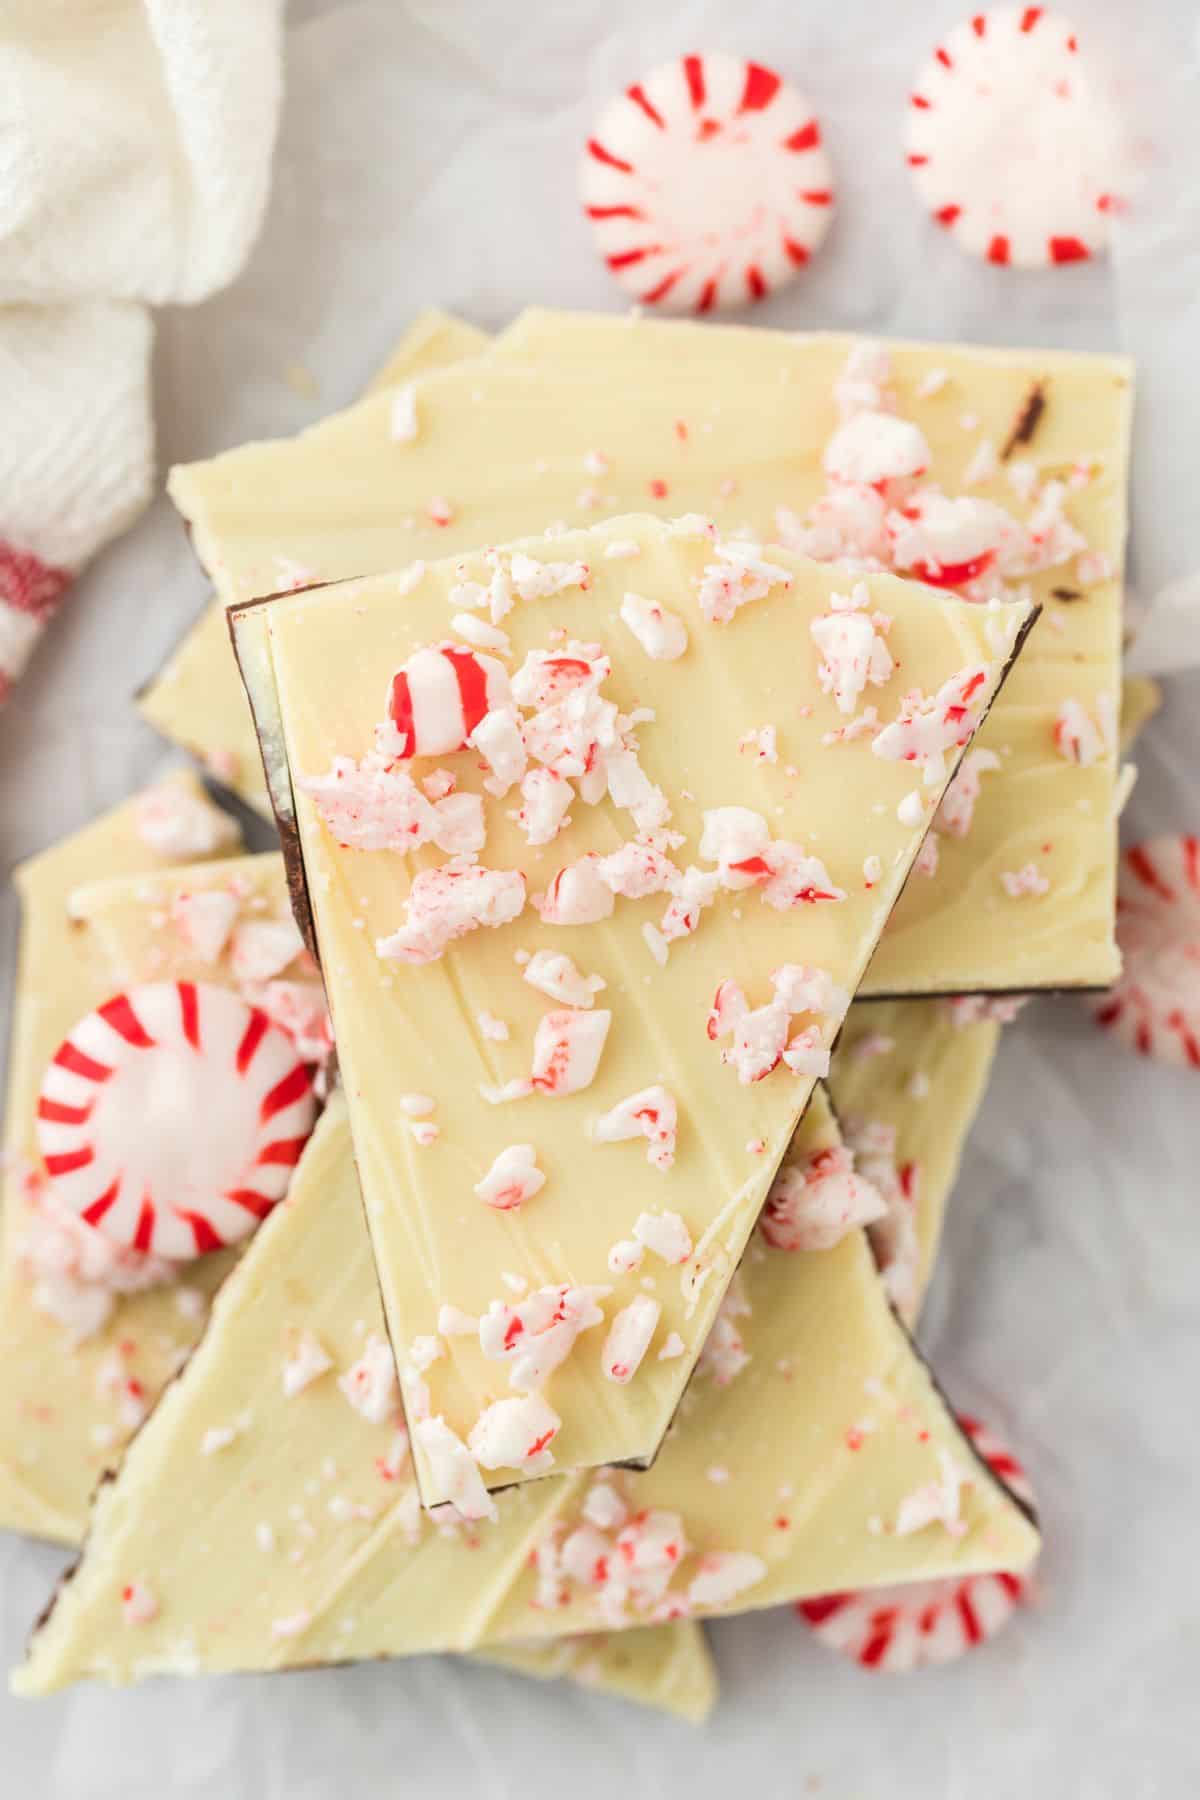
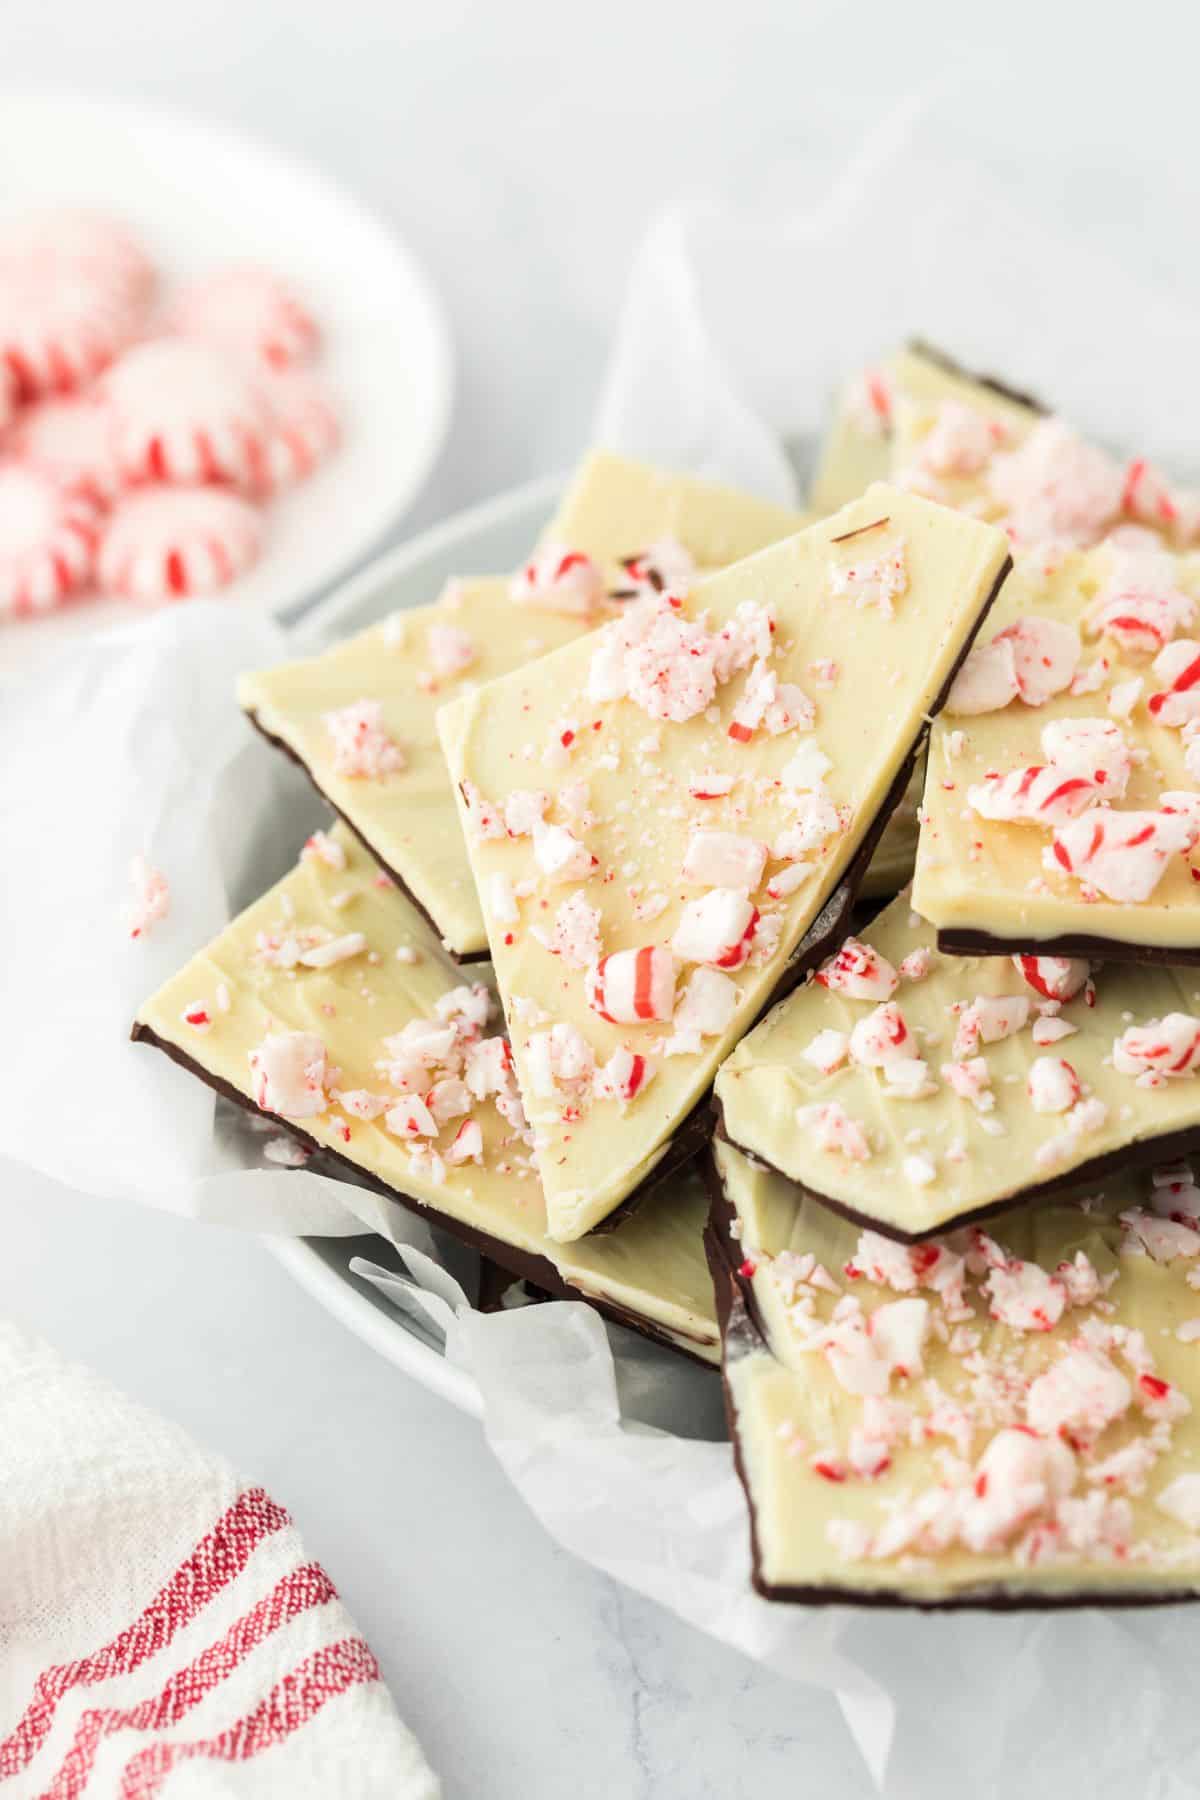
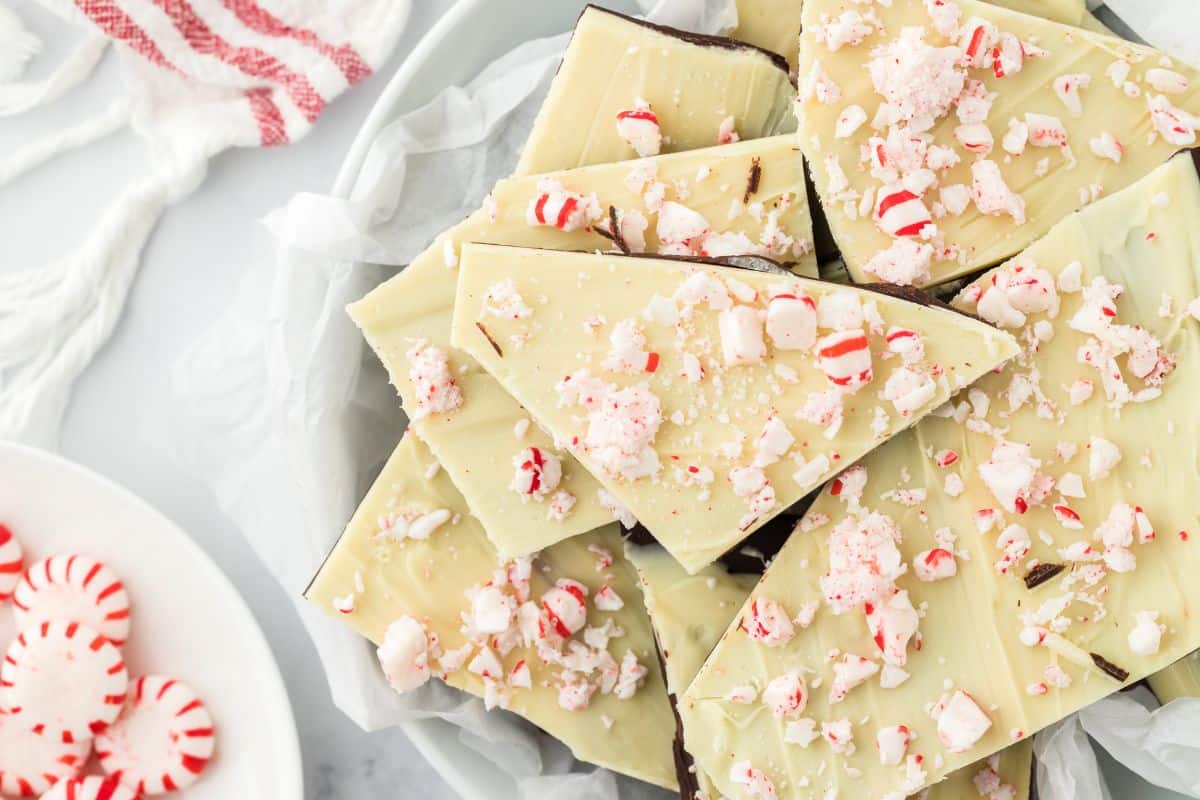
When the holiday season hits, there’s one treat I can’t skip making… peppermint bark! That rich chocolate and fresh peppermint combo? Pure festive magic, y’all! My take a classic peppermint bark starts with a layer of bittersweet chocolate, topped with creamy white chocolate, and finished off with a sprinkle of crushed peppermints for a holiday crunch. Trust me, boo, this one’s a crowd-pleaser that’ll have everyone reaching for more.
This post may contain affiliate links. Read our disclosure policy.
Want to Save This Recipe, Boo?
The key to nailing this bomb peppermint bark is in the layering. First, melt that bittersweet chocolate and spread it on a sheet pan. Give it a quick chill in the fridge, then layer on the white chocolate mixed with a hint of peppermint extract. Top it all off with a generous sprinkle of crushed peppermint candies for that signature holiday vibe. It’s simple but oh-so-stunning and crazy good!
The Lowdown on This Peppermint Bark Recipe
Cuisine Inspiration: Classic American
Primary Cooking Method: Stove
Key Flavor: Bittersweet with elements of creamy white chocolate with a burst of peppermint!
Skill Level: Beginner
- Easy to Make: Peppermint bark is a candy recipe recipe for cooks of all levels. It’s especially great for beginners who want to make special holiday treats but don’t feel confident in their baking.
- Versatile: Stick with the classic combination of chocolate and peppermint or get creative with different toppings and flavors.
- Make Ahead: An ideal dessert or treat for the holidays that you can make ahead! When stored properly it will last at least a few weeks.
- Simple Ingredients: All you need are four ingredients to make a batch of bark.
- Tastes Like the Holidays: The combination of chocolate and peppermint are made of holiday dreams bringing you the essence of Christmas in each bite.
Ingredients To Make Peppermint Bark
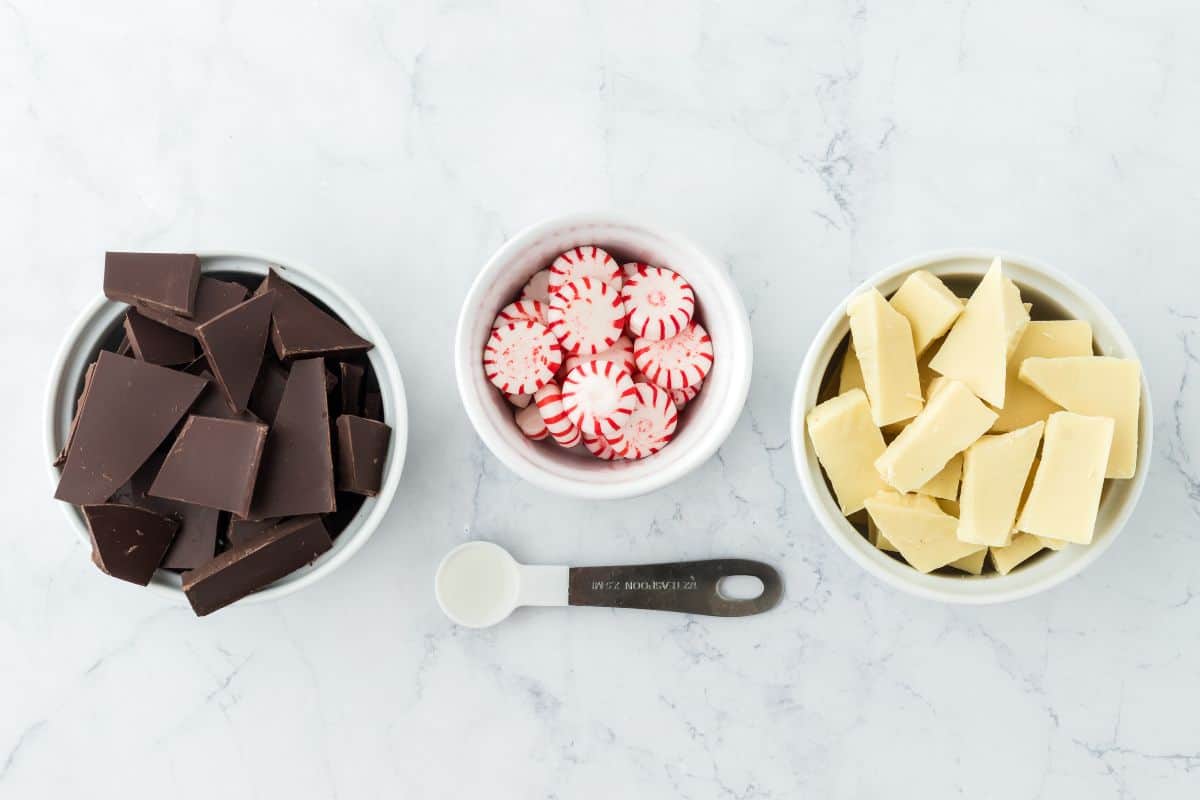
- Chocolate: We will be using a combination of white chocolate and bittersweet chocolate. I recommend using a high-quality brand of melting chocolates or chocolate bars. The white chocolate adds a creamy sweet essence while bittersweet chocolate gives it that perfect bitter contrast. You can also use dark chocolate if you like a more bitter element.
- Peppermint extract: Added to the chocolate to boost the peppermint flavor. Note don’t add more than written as it’s quite powerful and a little goes a long way.
- Peppermint candy: Use any peppermint hard candy you prefer — even candy canes work around the holidays.
How to Make Chocolate Bark
Learning how to make chocolate bark is not difficult. Here’s a look at the simple process for making it.
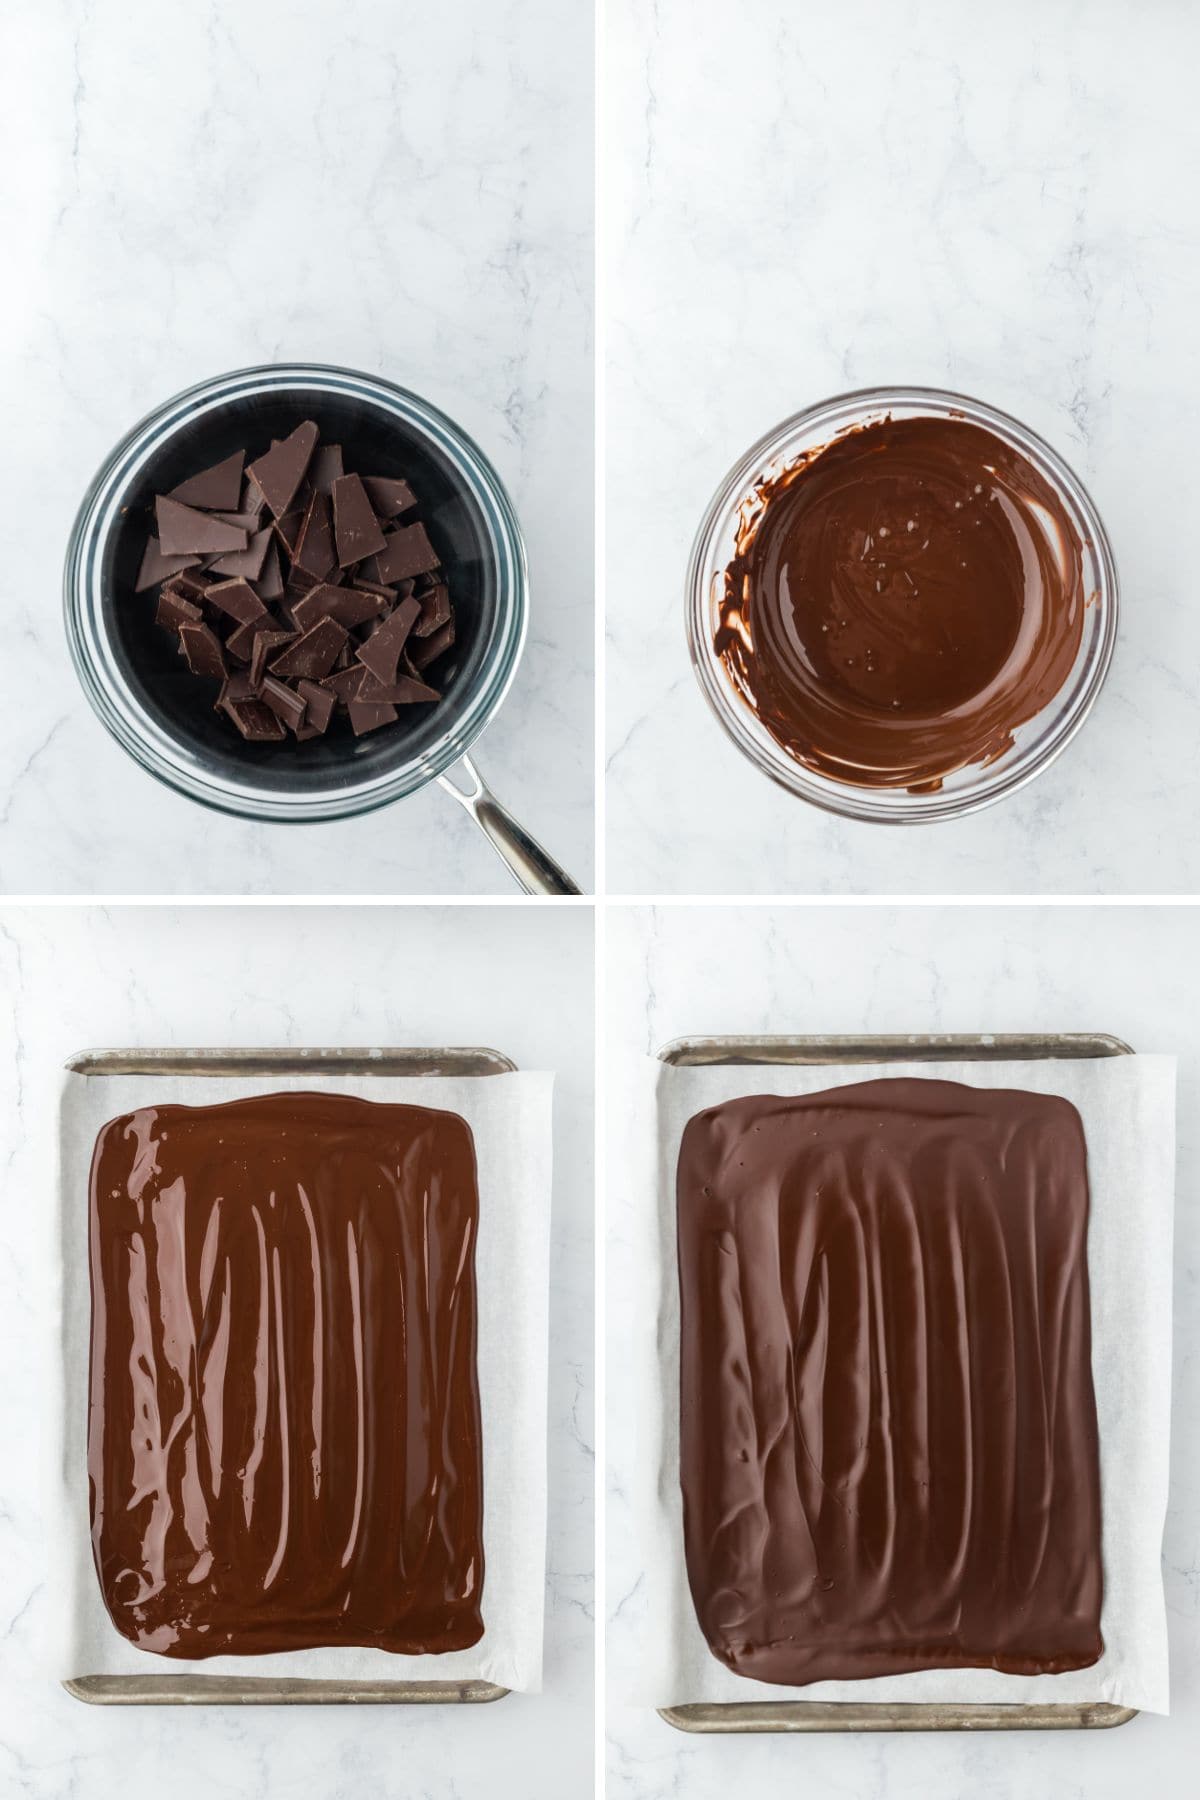
Step 1: Melt the Bittersweet Chocolate
- Dark Chocolate in a Bowl: Place the bittersweet chocolate in a heat-safe bowl or pan that will fit over a pan filled with an inch of simmering water.
- Melt the Chocolate: Melt the chocolate stirring occasionally until it’s smooth. Be careful to avoid getting water in the chocolate or overheating it as it may cause the chocolate to seize.
- Spread It: Pour the chocolate onto a pan prepared with parchment or a silicone mat. Spread the chocolate with an offset spatula leaving a ½ edge uncovered around all sides.
- Short Chill: Refrigerate it for 8-10 minutes. Don’t allow it to be fully set. We want the edges set and the middle still a little glossy. If it’s completely set, the layers won’t stay together.
Step 2: Melt the White Chocolate
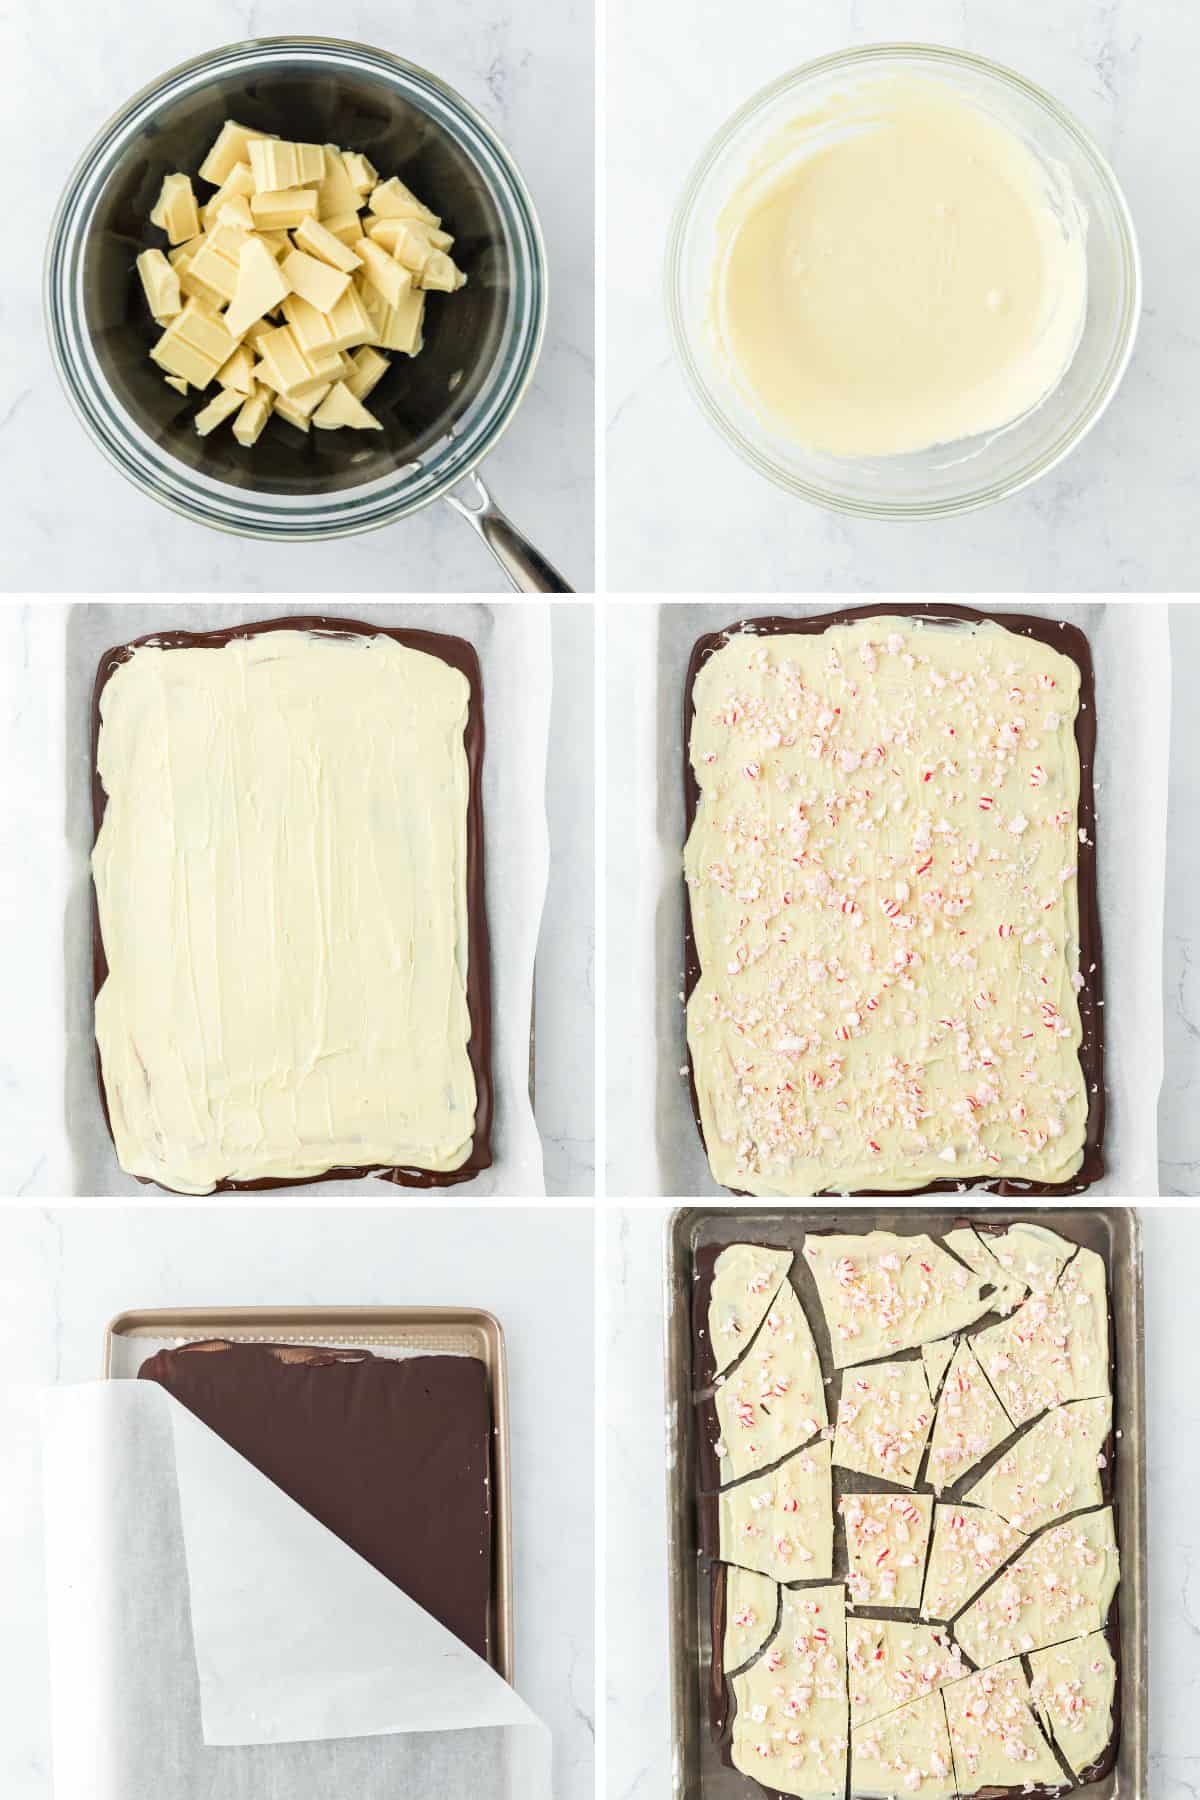
- Place in a Bowl: Add the white chocolate and peppermint extract to another heat-safe medium bowl.
- Melt the White Chocolate: Place it over the pan of simmering water and melt gently. White chocolate has a tendency to melt faster and overheat, so make sure you take it off the heat occasionally to not burn it.
- Spread on Top: Remove the pan with the dark chocolate from the refrigerator and quickly pour and spread the white chocolate over the bittersweet chocolate. Do this by placing all the white chocolate at one short edge of the bittersweet, then using an offset, quickly spreading it in one direction. We don’t want to melt the chocolate underneath and make a swirl pattern; we want two distinctive layers.
- Add Peppermint Candy: Sprinkle the crushed peppermints over the top and allow to chill in the refrigerator for another 30 minutes.
- Flip it: Turn the bark over onto another pan and remove the mat or parchment from the bottom.
- Break It Up: Break it into large pieces and enjoy!
Tips for Making the Best Peppermint Bark
- Best Utensil for Spreading: Use an offset spatula to spread your chocolate into thin, even layers. It helps to make everything even so you have perfect amounts of milk chocolate and white chocolate in each taste!
- Crush the Candy: The easiest way to crush your peppermint candies is to place them in a Ziploc bag and use a meat mallet or rolling pin to break them into small pieces.
- Partially Set the First Chocolate Layer: Don’t let it get completely hard — just 8-10 minutes is fine. This will ensure that the two different layers stick together.
- Let It Set: After adding the white chocolate, allow your bark to set in the refrigerator before breaking apart.
- Heating the Chocolate: The chocolate will melt more quickly in a metal bowl but watch it very closely to ensure it doesn’t overheat. This may cause the chocolate to burn. Once most of the chocolate is melted you can remove it from over the heated water and the residual heat in the bowl and melted chocolate will finish melting it.
Popular Substitutions & Additions
Get creative! Here are a few ideas for different toppings and combinations for making chocolate bark that’ll set yours apart from the rest.
- Toffee Hazelnut: Skip the peppermint extract and candies. Instead, sprinkle some chopped hazelnuts and toffee bits over the chocolate.
- Salted Caramel Pretzel: Swap the white chocolate for caramel chews melted into gooey perfection. Sprinkle the top with pretzels and some flaked sea salt instead of the peppermint candy.
- Cranberry Pistachio: Leave out the peppermint and top your bark with salted pistachios and dried cranberries.
- Gingerbread: Sprinkle crushed-up gingerbread cookies on top of the bark and leave out the peppermint elements.
- Single Type of Chocolate: Use double the amount of bittersweet chocolate or white chocolate if you don’t want to make a layered chocolate bark.
What to Serve with Chocolate Bark
- Sweets make a great holiday gift for friends and family. Create boxes or bags with this bark, chocolate turtle candy, divinity candy, and my Southern pralines recipe.
- Perfect for holiday dessert platters! They’re great along with other holiday favorites such as Christmas tree cakes, red velvet marble cake, and gingerbread crinkle cookies.
- Pair it with savory holiday snacks like this cranberry orange party mix and mini tomato tarts.
How to Store Peppermint Bark
To store chocolate bark, let it cool and harden completely first. Once it’s broken into pieces store them in an airtight container. Separate layers of bark with parchment or wax paper to prevent sticking.
Store the container in a cool, dry place. If your kitchen is warm or humid, you may want to keep the bark in the refrigerator to maintain its texture and prevent melting. I prefer to keep in the refrigerator so it keeps its signature snap.
How long will chocolate bark last?
Chocolate bark can generally be stored this way for several weeks, making it a perfect make-ahead treat! It may last slightly longer when stored in the fridge.
Can I freeze peppermint bark?
Yes, you can! Though it may soften the candy topping (or any other topping you use), the chocolate flavor will remain intact. Store it in the same way above with parchment in between the layers. You can freeze it for up to one month.
Frequently Asked Questions
This issue likely happens when you let the darker chocolate set for too long in the fridge before adding the white chocolate layer. It’s important to only partially set the chocolate so that it is a little soft and adheres to the white chocolate keeping the layers intact.
I love the offset spatula for this task but if you don’t have one you can use a butter knife, spatula, or the back of a spoon to spread out the chocolate.
I don’t recommend using chocolate chips for melting chocolate. They have ingredients added which help them maintain their shape when baked. I find they may not melt as smoothly as chocolate bars or melting chocolate.
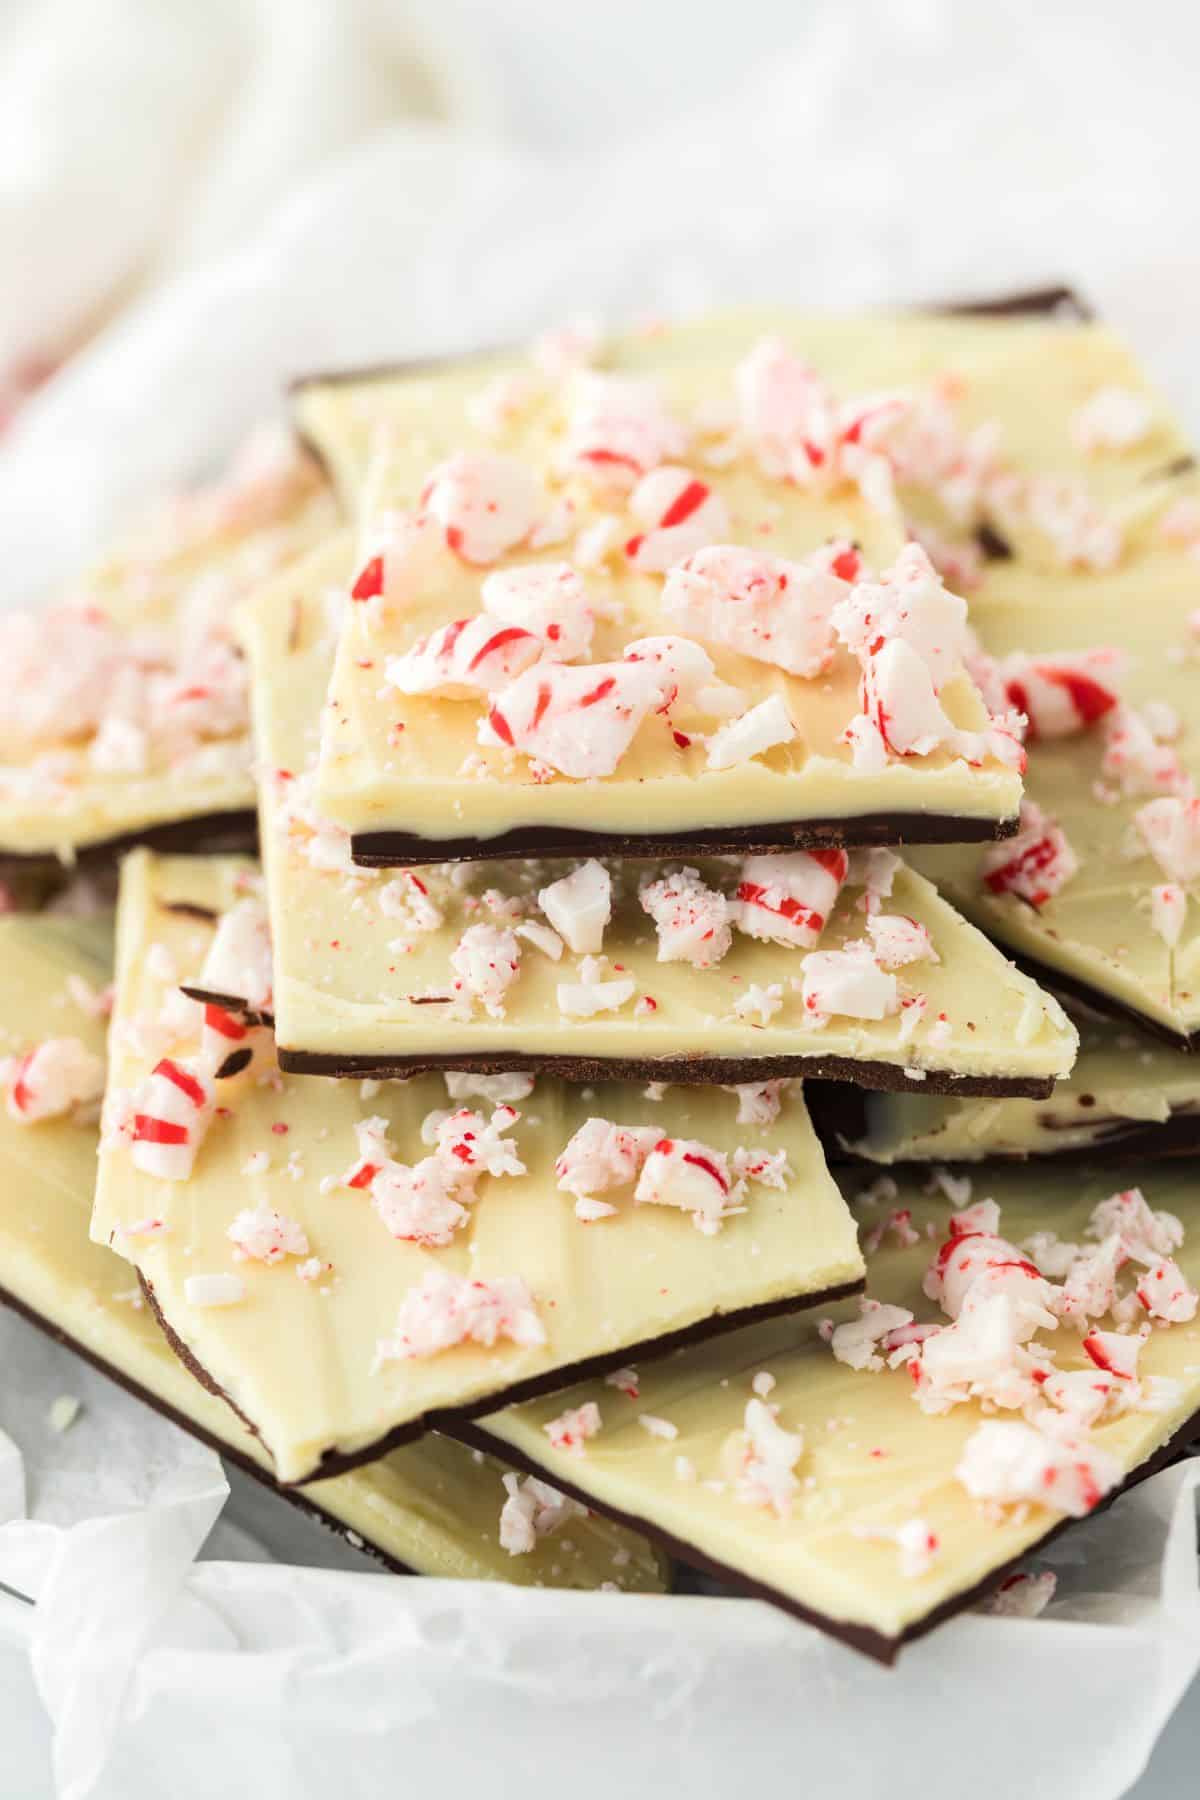
Y’all are going to love this easy chocolate bark I just know it! From its ease and simple ingredients to its minty-chocolate flavor, it’s the perfect addition to your holiday sweet treats menu! Make a batch today to enjoy on your own or to give away to friends and family this holiday season.
Favorite Candy Recipes for the Holidays
*Did you make this recipe? Please give it a star rating and leave comments below!* Post a photo of how your version of the recipe came out on Instagram (using #grandbabycakes)!!
Peppermint Bark
Want to Save This Recipe, Boo?
Ingredients
- 11 ounces white chocolate
- 11 ounces bittersweet chocolate
- ½ teaspoon peppermint extract
- ⅓ cup crushed peppermints about 15 candies
Instructions
- Prep a half sheet pan by adding either parchment paper or a silicone mat.
- In one medium bowl, melt bittersweet chocolate over a pan with 1 inch simmering water. Careful not to get water in the chocolate or get it too hot.
- Remove from pan and pour onto prepared pan. Spread with an offset spatula leaving a ½ edge uncovered around all sides. Set in refrigerator for 8-10 minutes. Don’t allow it to fully set. We want the edges set and the middle still a little glossy. If it’s completely set, the layers won’t stay together.
- While that’s cooling, in another medium bowl add white chocolate and peppermint extract. Place over pan of simmering water and melt gently. (White chocolate has a tendency to melt faster and overheat, so make sure you take it off the heat occasionally to not burn it.)
- Once melted, remove the pan from the refrigerator and quickly pour and spread the white chocolate over the bittersweet chocolate. Do this by placing all the white chocolate at one short edge of the bittersweet, then using an offset, quickly spreading it in one direction. We don’t want to melt the chocolate underneath and make a swirl pattern; we want two distinctive layers.
- Sprinkle crushed peppermints over top and allow to chill in the refrigerator for another 30 minutes.
Video
Notes
- Best Utensil for Spreading: Use an offset spatula to spread your chocolate into thin, even layers. It helps to make everything even so you have perfect amounts of milk chocolate and white chocolate in each taste!
- Crush the Candy: The easiest way to crush your peppermint candies is to place them in a Ziploc bag and use a meat mallet or rolling pin to break them into small pieces.
- Partially Set the First Chocolate Layer: Don’t let it get completely hard — just 8-10 minutes is fine. This will ensure that the two different layers stick together.
- Let It Set: After adding the white chocolate, allow your bark to set in the refrigerator before breaking apart.
- Heating the Chocolate: The chocolate will melt more quickly in a metal bowl but watch it very closely to ensure it doesn’t overheat. This may cause the chocolate to burn. Once most of the chocolate is melted you can remove it from over the heated water and the residual heat in the bowl and melted chocolate will finish melting it.
This peppermint bark is definitely going on my Christmas baking list – it looks awesome and so festive!
Hooray thanks so much!
This peppermint bark looks fabulous. . I’ll be making some myself really soon!!! can’t celebrate the holidays without it!! 🙂
Same here girl! It is necessary!
I LOVE that you called it Jackson Pollack bark, it totally does look like a painting…so beautiful, and I bet so delicious! I am always looking for easy holiday recipes like this one…looks amazing!
So simple. Sometimes I wondered how could it be so delicious and be that easy?
How festive is this! And peppermint bark just screams ‘holiday’ and I am all about the holidays right now. It really is the best time!
It totally is the best time!
Look so festive and colorful, Jocelyn! I’m deeply in love with red and green now and can’t wait to try this for Christmas.
I am too! I am loving all of the Christmas stuff!
This is so festive, perfect for Christmas!!!
Hooray Amanda!!
This peppermint bark looks delicious, Jocelyn! I’m totally addicted to this stuff during the holiday season, so I’m loving this recipe!
Hooray thanks so much Gayle!
Your bark is so beautiful, Jocelyn! Those colored chips make this look so much more festive!
I just love the fun I had making this bark girl!
I’ve made the simpler “original” bark and love this updated ‘twist’……absolutely festive……..let the gifting begin!!!!!!!!!!!!
Oh yeah girl I totally agree! Happy Holidays!
I love that you call these “Pollock” bark! Because that is exactly what it looks like!! So festive and pretty! I am ready for Christmas!! Pinned. 🙂
Hooray thank you so much Renee!