
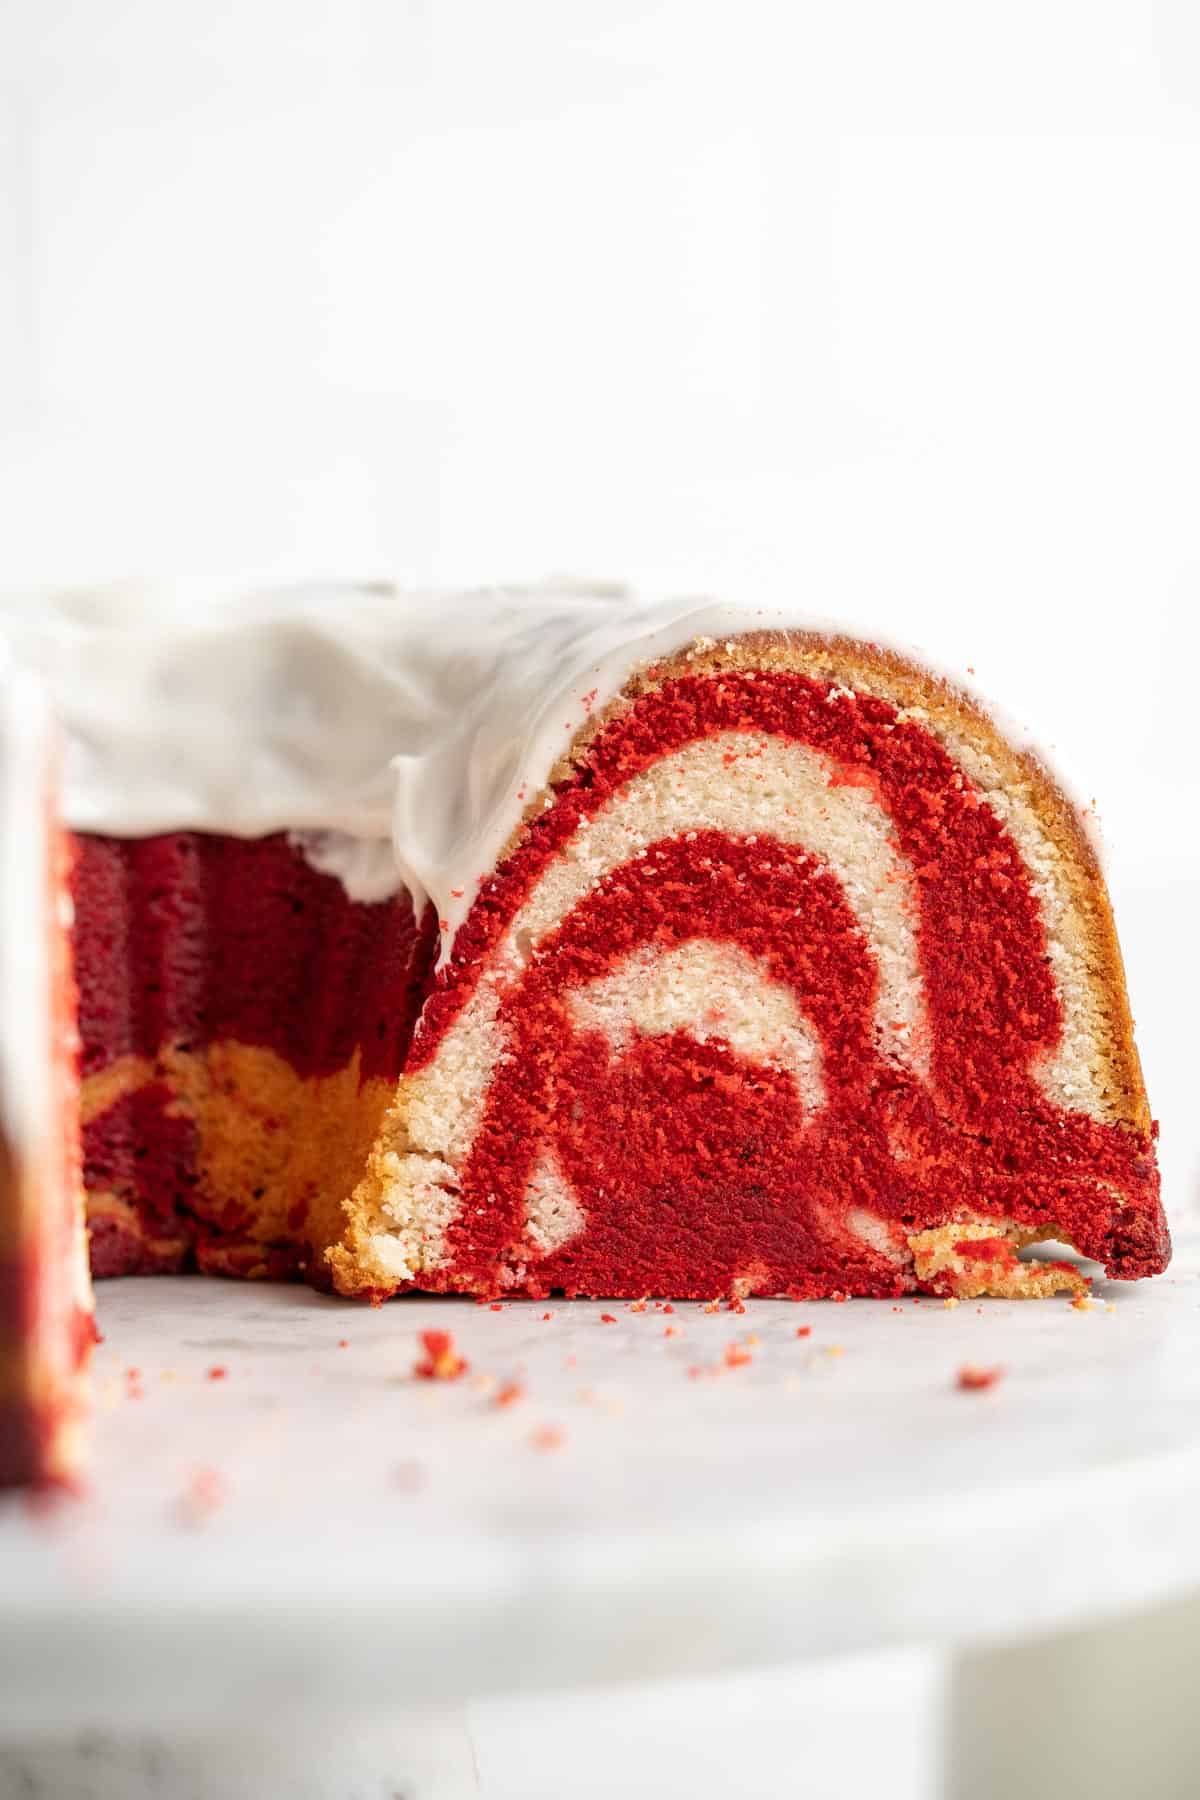
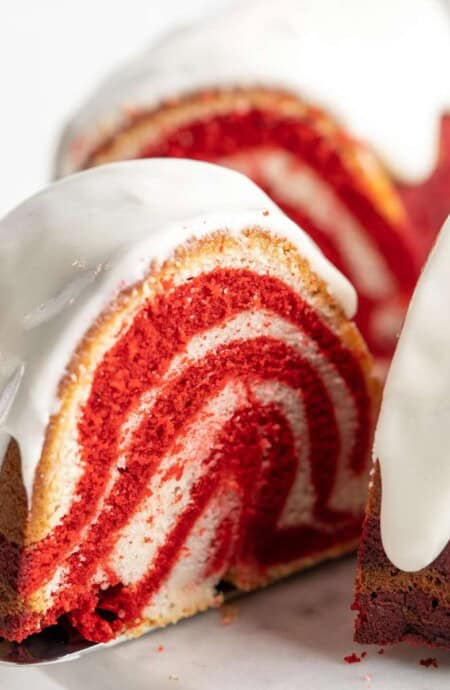
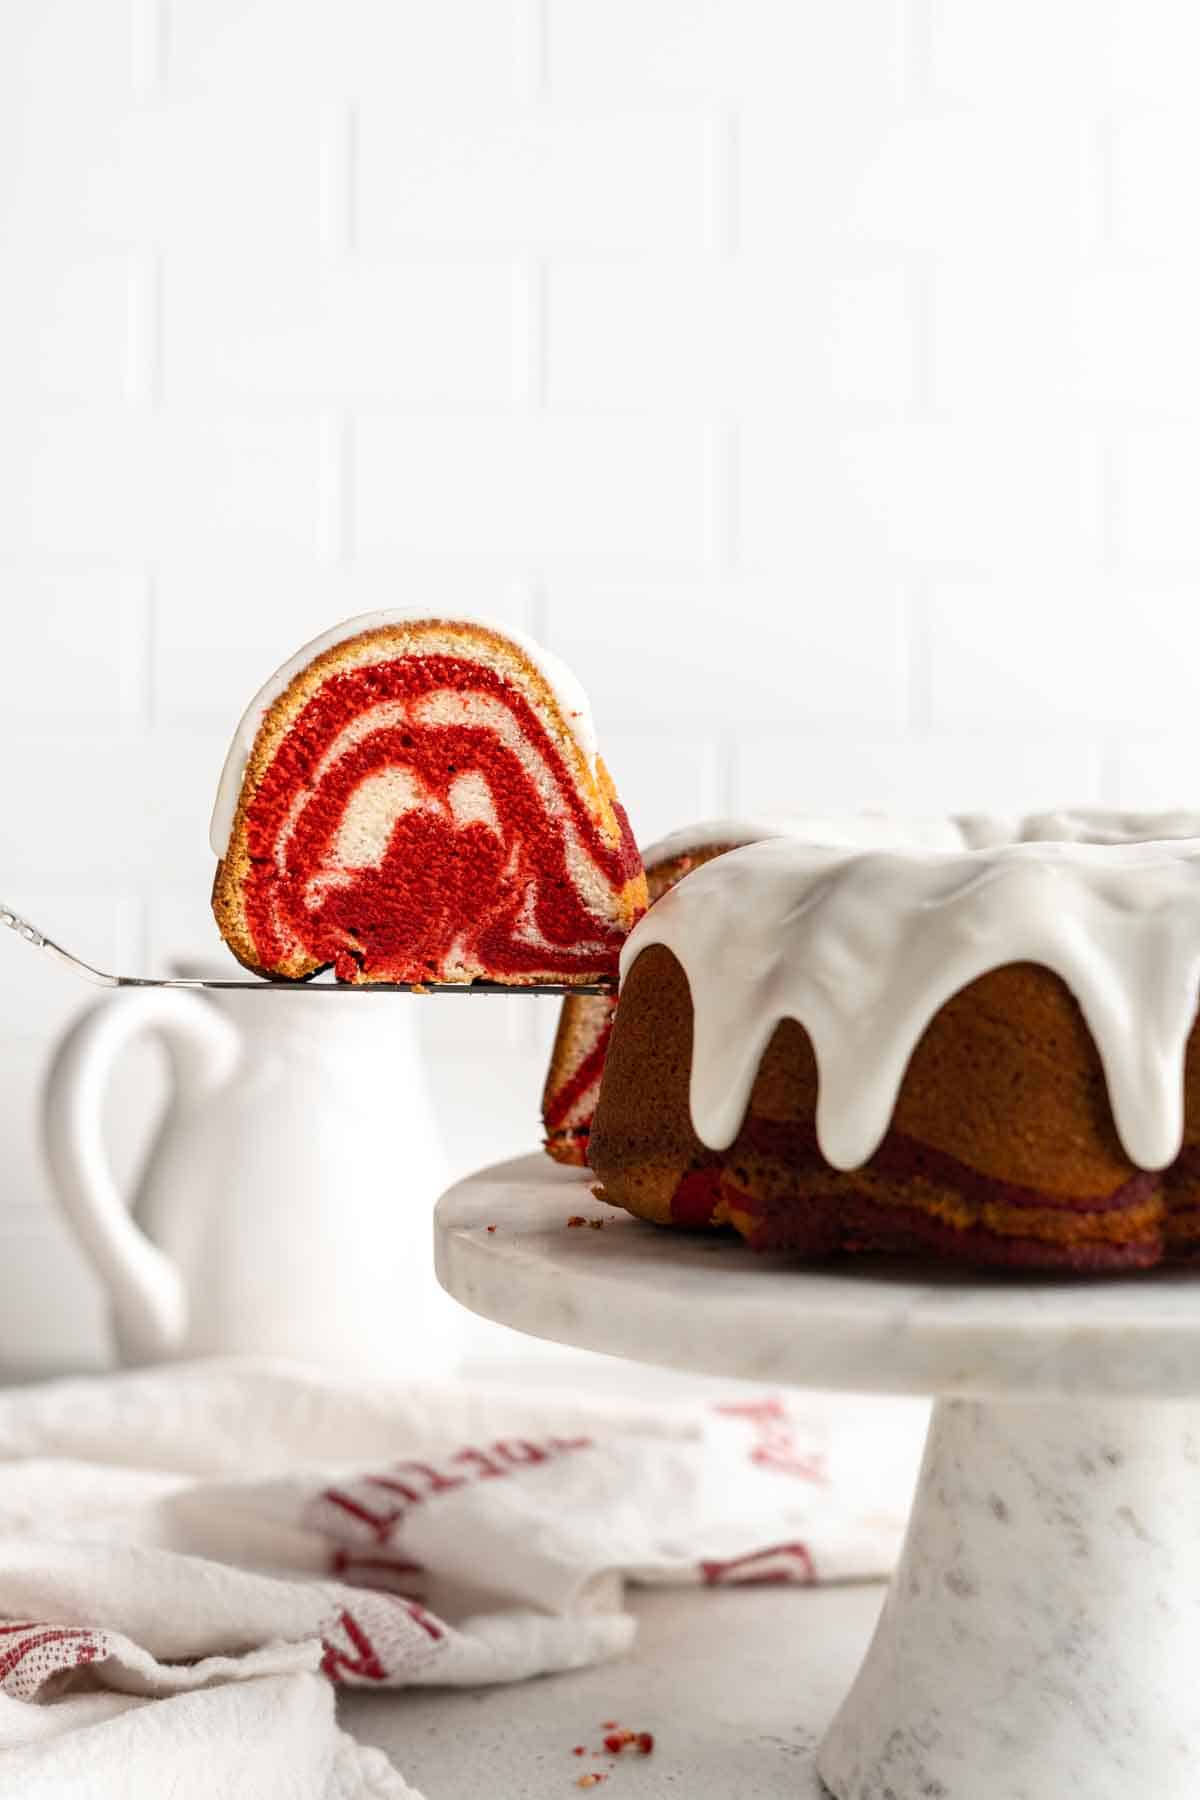
Y’all, my red velvet marble cake recipe is straight-up holiday perfection! It’s better than plain red velvet cake because with this one you get both vanilla and red velvet flavors swirled together in a tender and moist cake. I almost went full layer cake so you could see that pretty swirl from every angle, but then I was like… let me stay true to my pound cake roots. So pound cake it is, with a bomb cream cheese glaze. Folks will be begging you for the recipe boos, no lie! Good thing y’all can just point them to the video in the recipe card.
This post may contain affiliate links. Read our disclosure policy.
How to Make a Red Velvet Marble Cake
These step-by-step photos show how to make a red velvet cream cheese pound cake, but be sure to check the recipe card below for the full ingredient list and detailed instructions. Skip to the → Red Velvet Marble Cake Recipe
1. Cream the butter and cream cheese
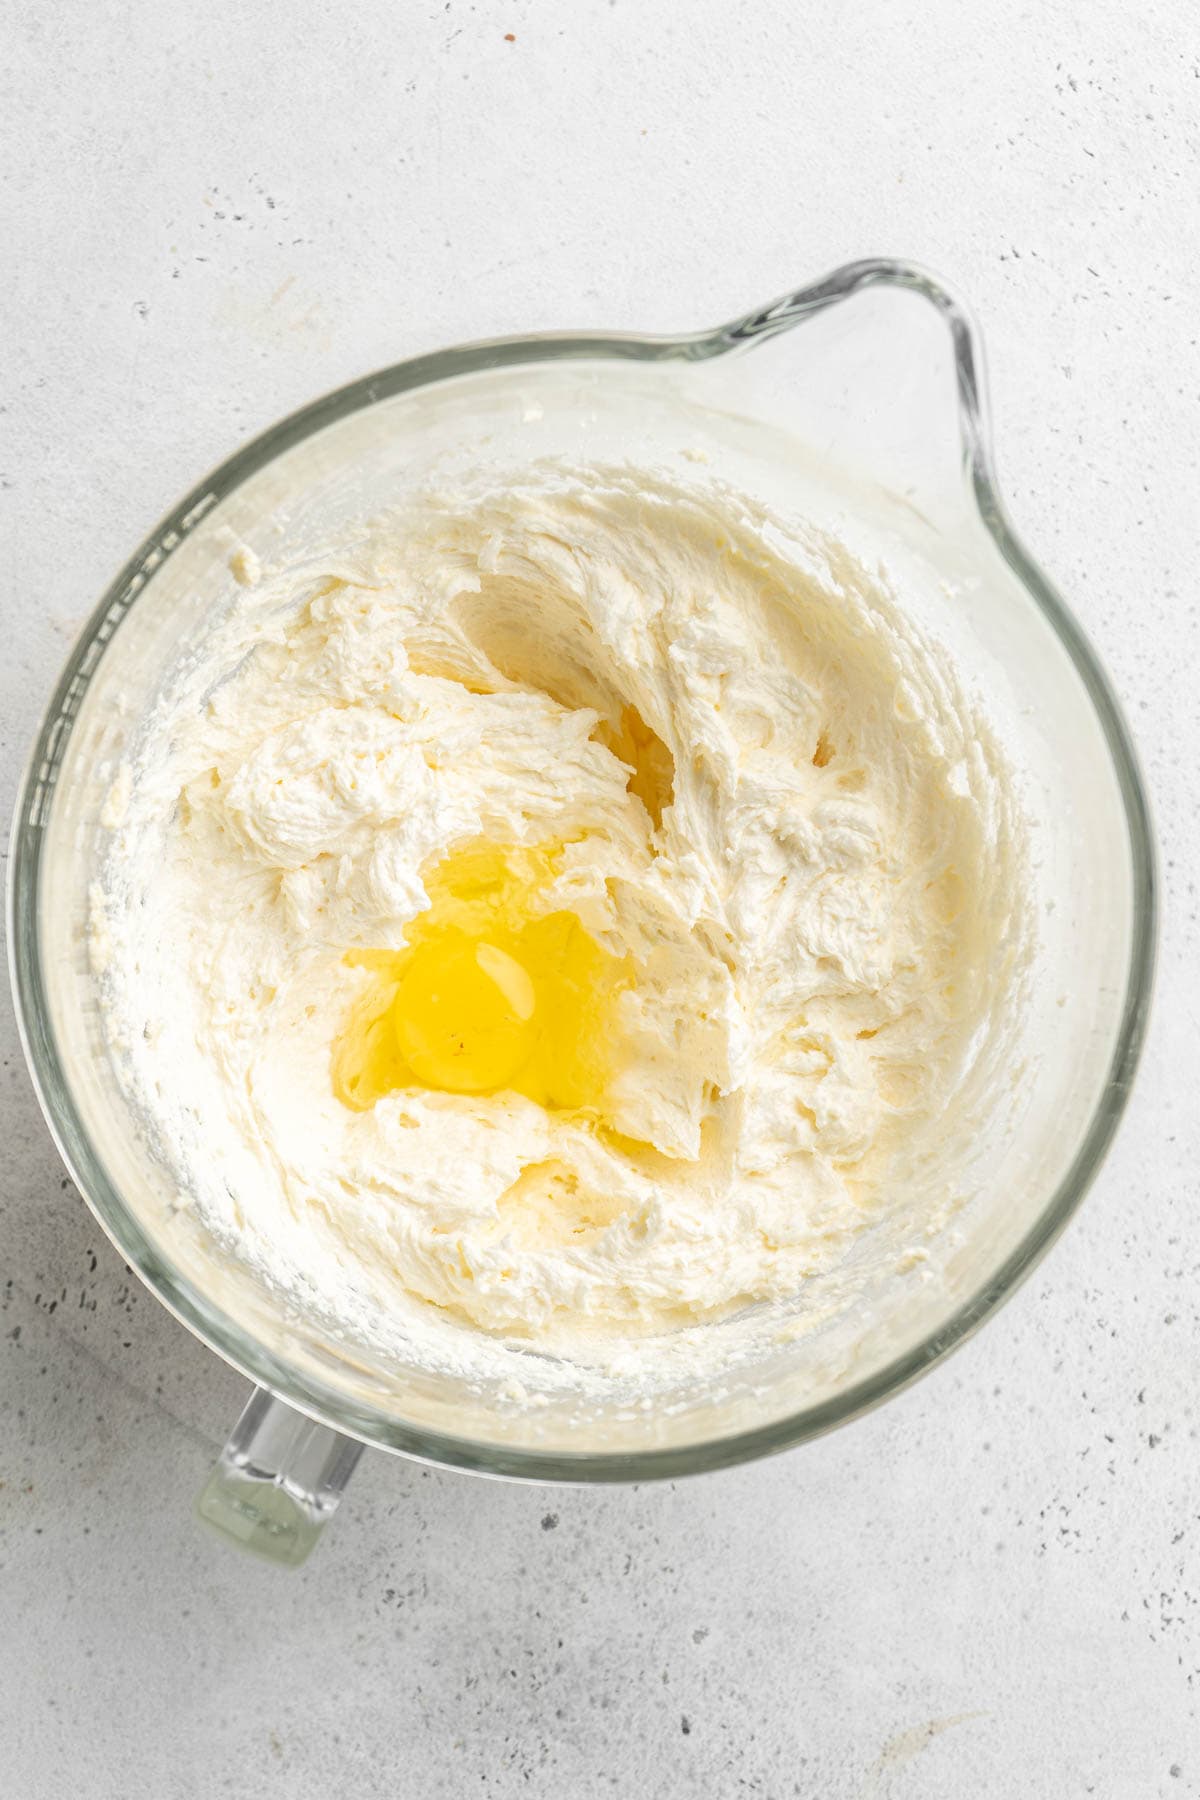
Beat them until smooth, add the sugar and oil, and whip until pale and fluffy. Then mix in the eggs one at a time while scraping the bowl.
2. Add the remaining ingredients
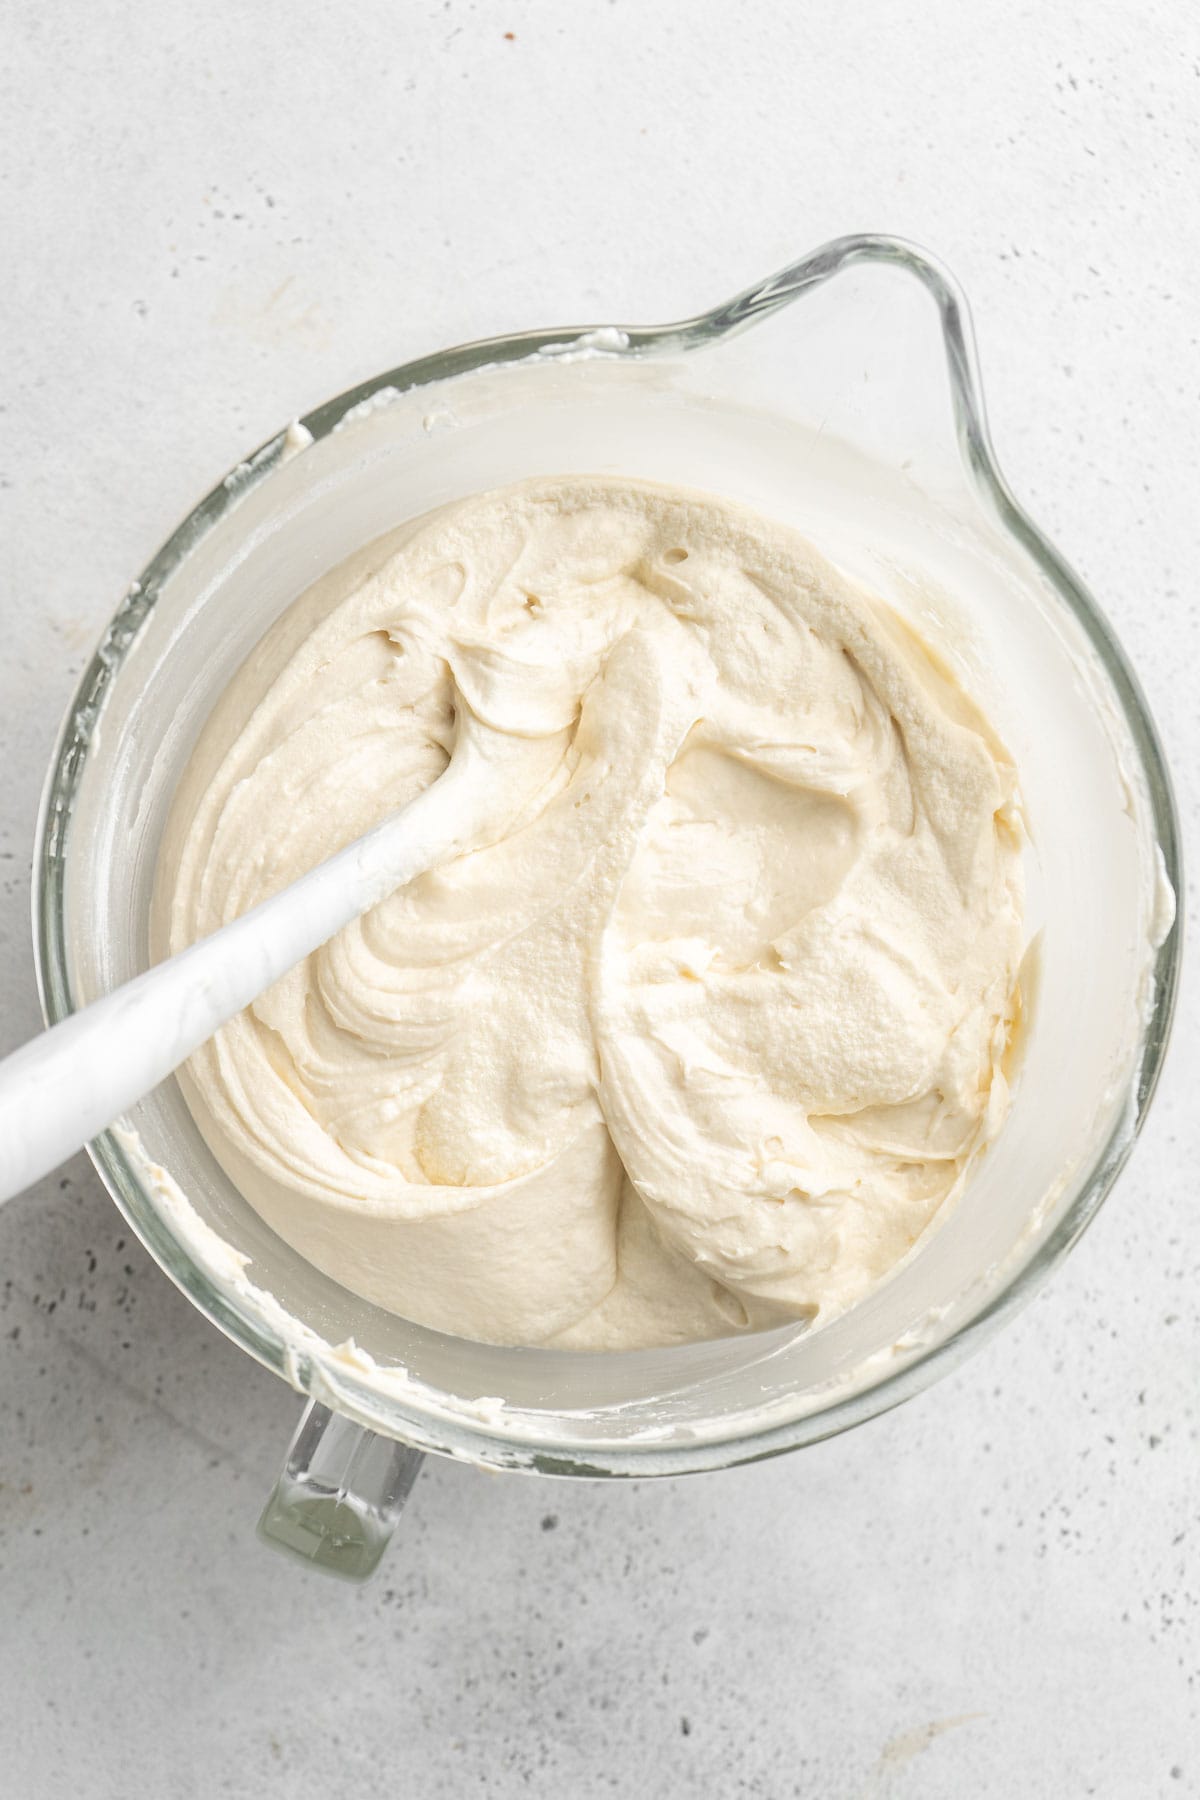
Mix in the cake flour in two increments, add the salt, then blend in the vanilla on low without overbeating.
3. Divide the cake batter into two bowls
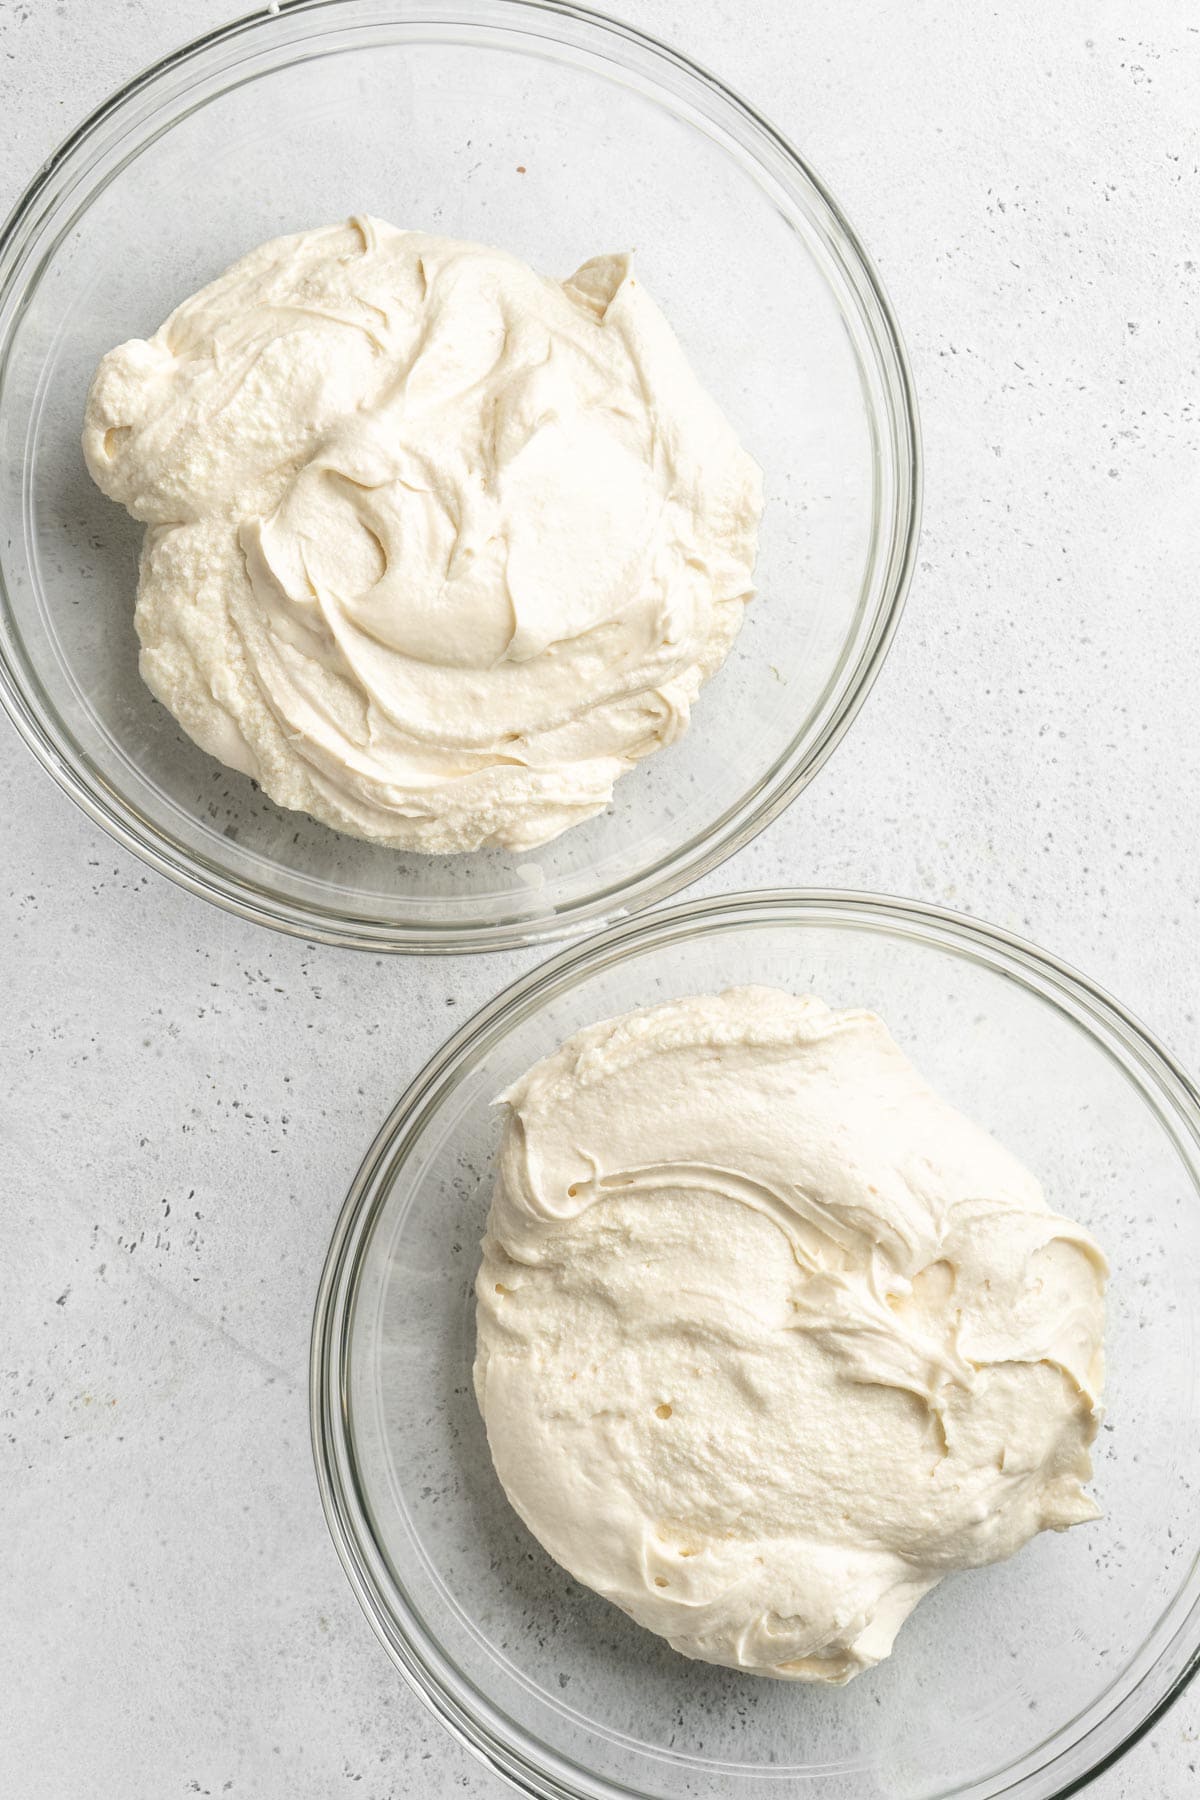
Split it evenly so you can prepare the red velvet portion.
4. Make the red velvet batter
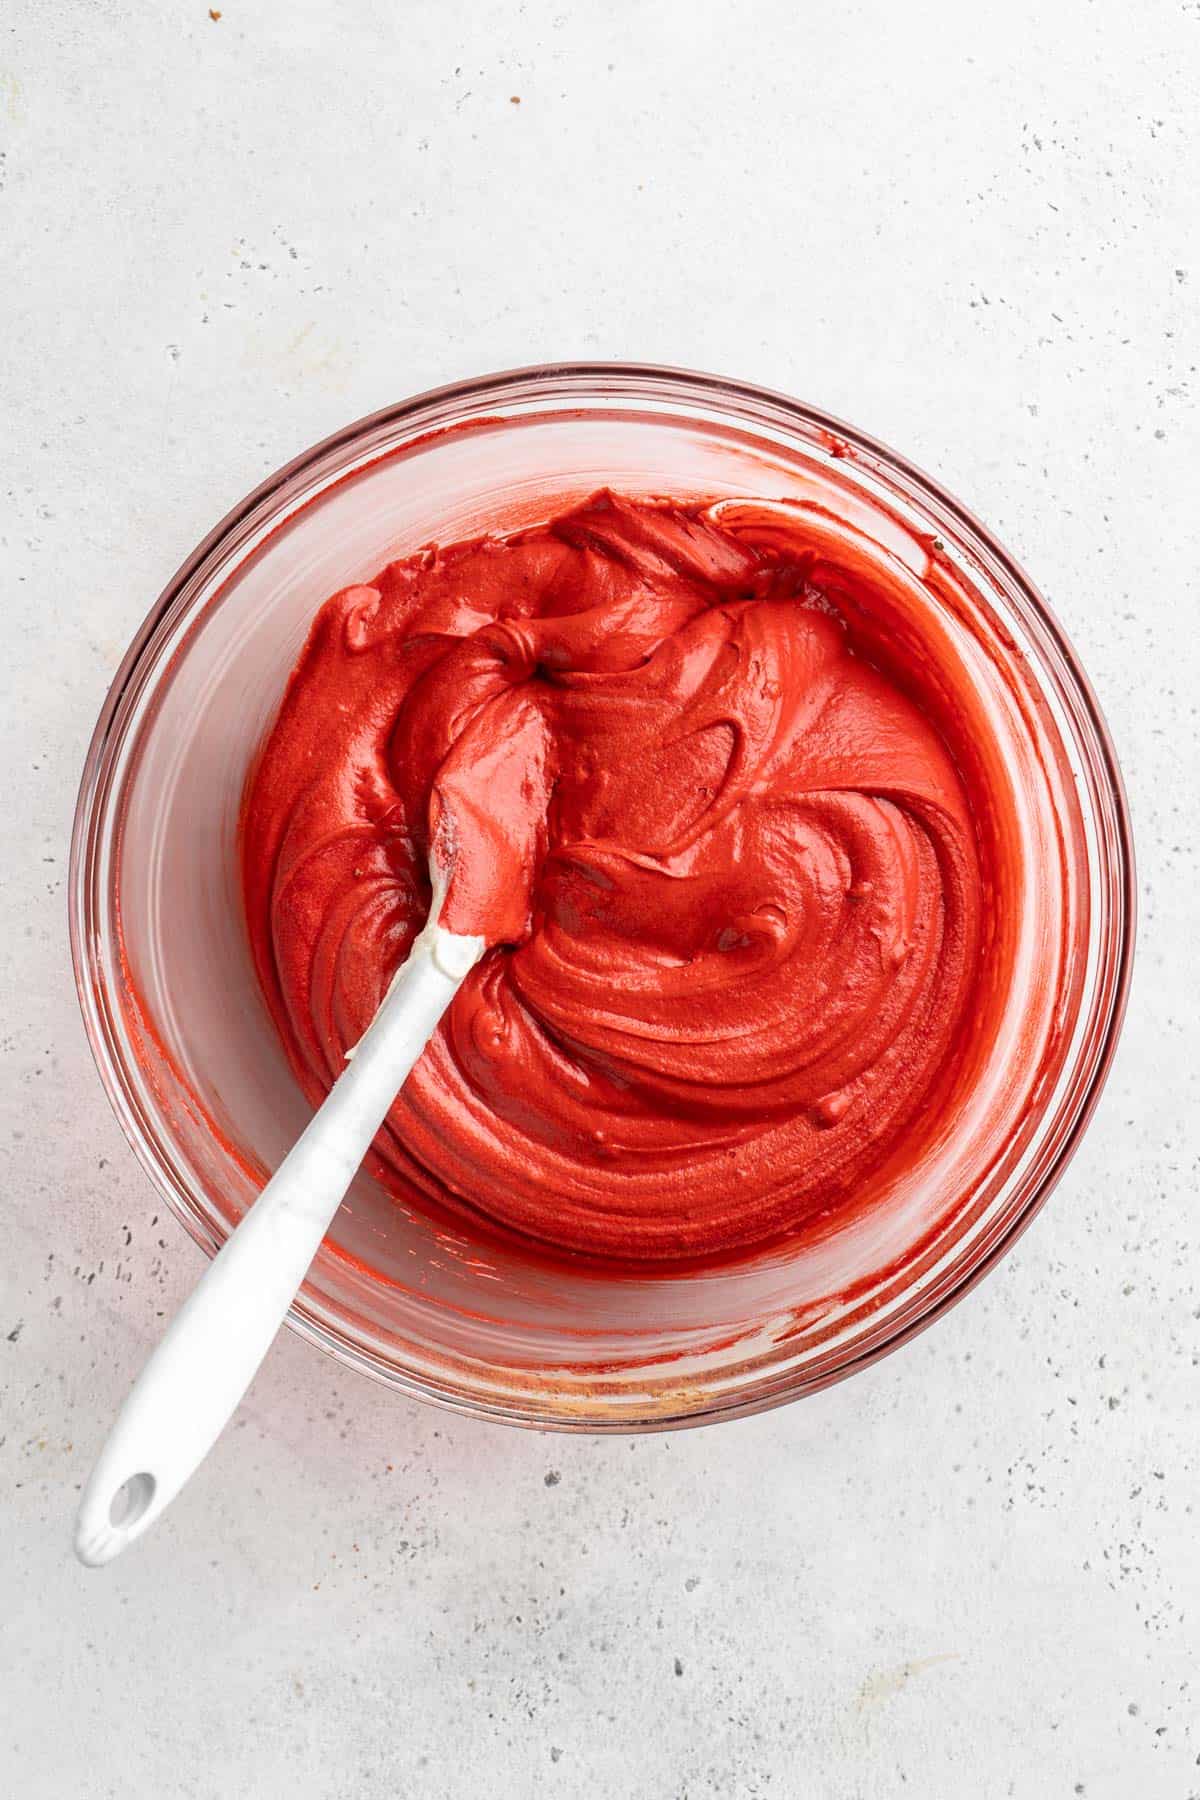
Add cocoa powder, red food coloring, and hot water to one bowl and whisk until the color and texture are fully combined.
5. Swirl the vanilla and red velvet batters
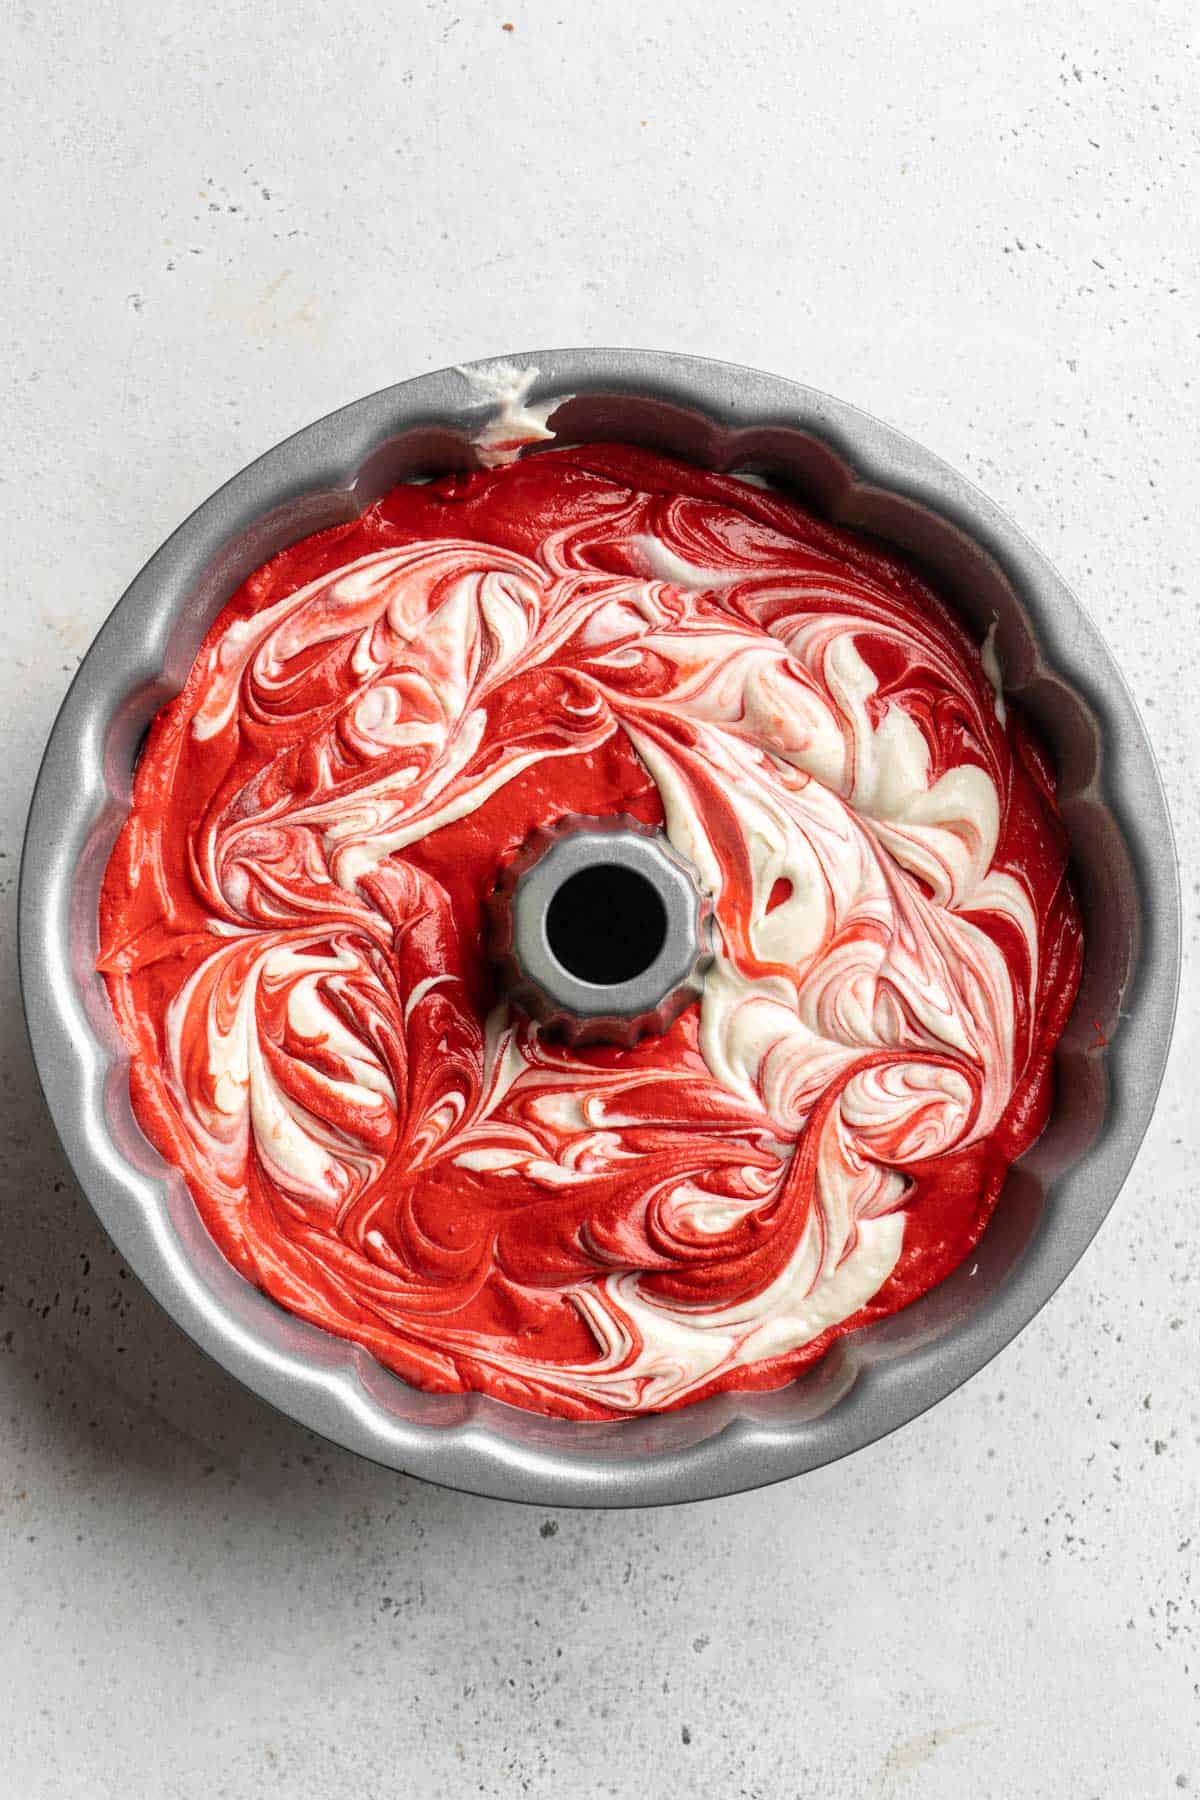
Drop alternating scoops of each batter into the Bundt pan, then swirl gently with a skewer for a marbled look.
6. Bake the marble cake
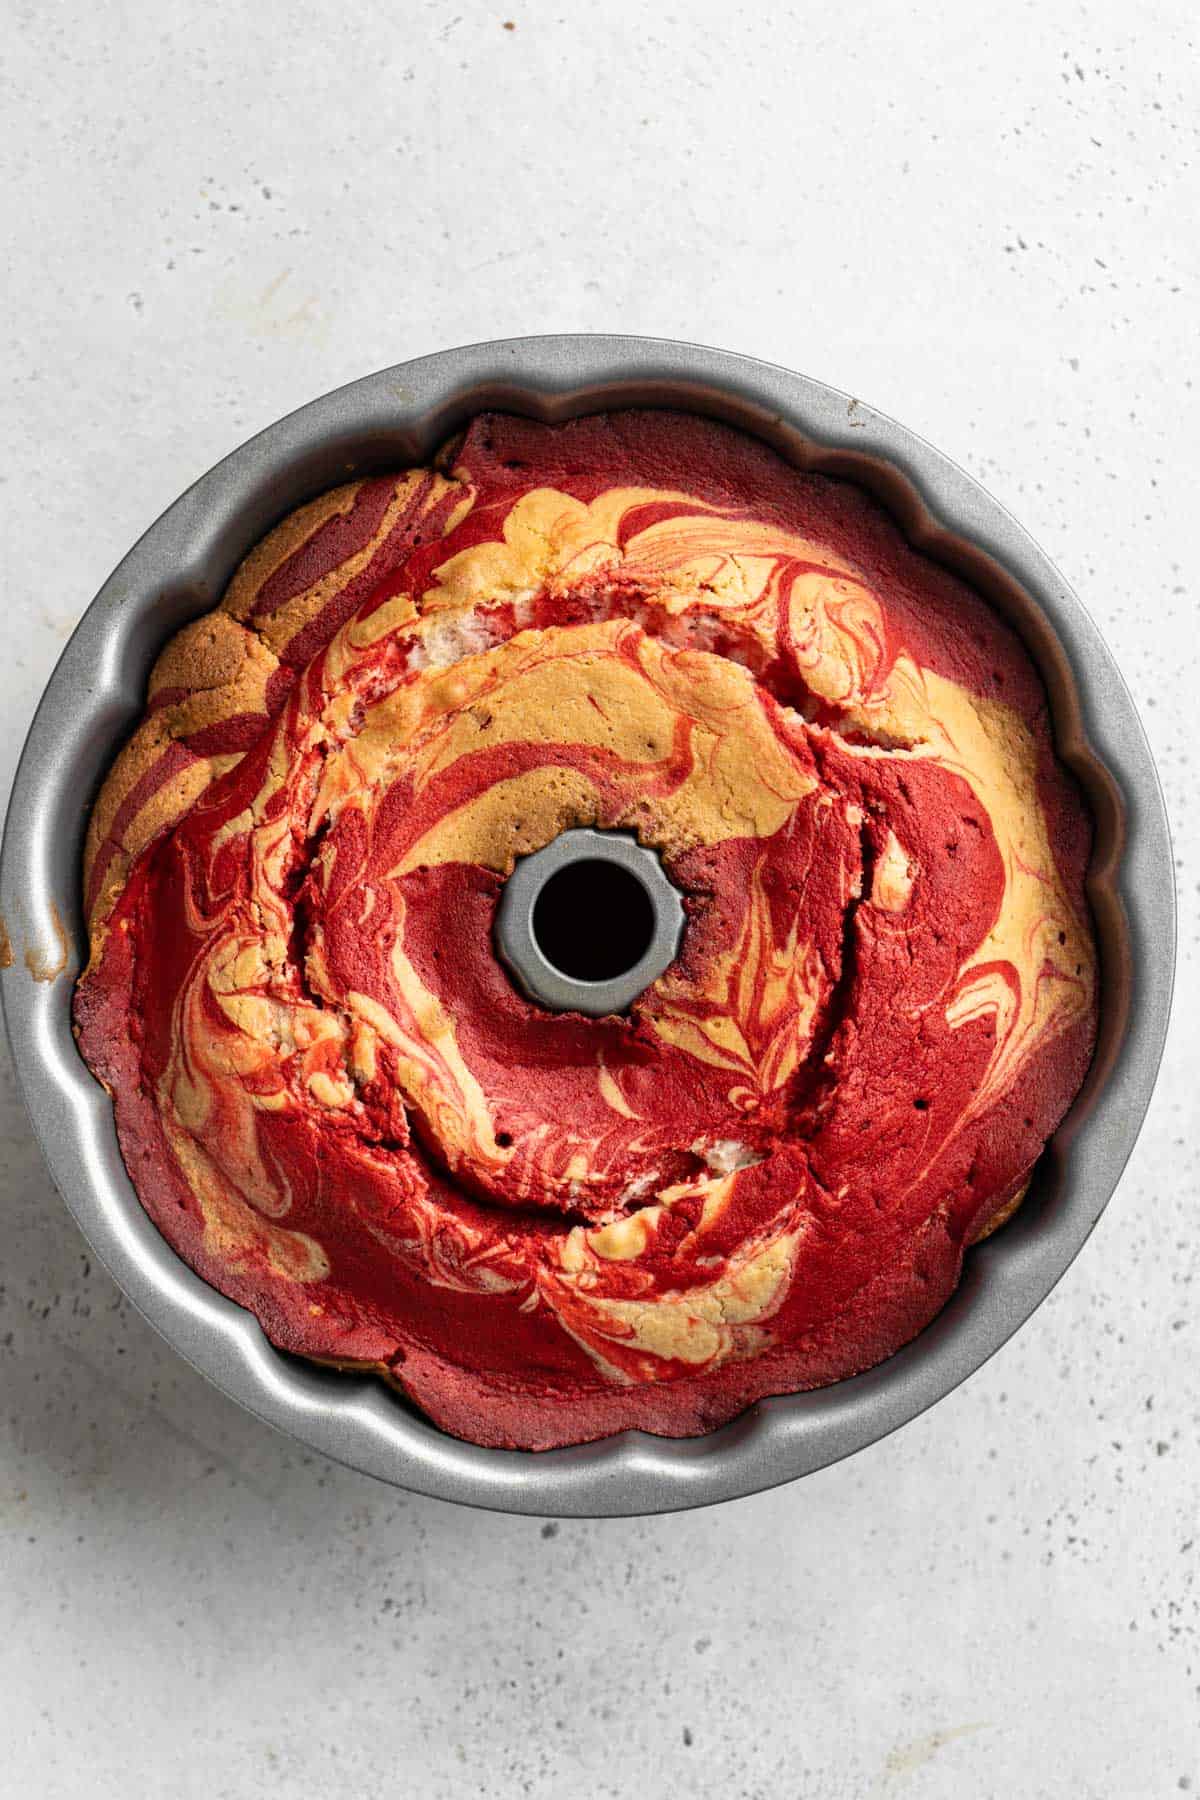
Bake until a toothpick comes out clean, cool briefly in the pan, then invert and let it finish cooling completely.
7. Make the cream cheese glaze
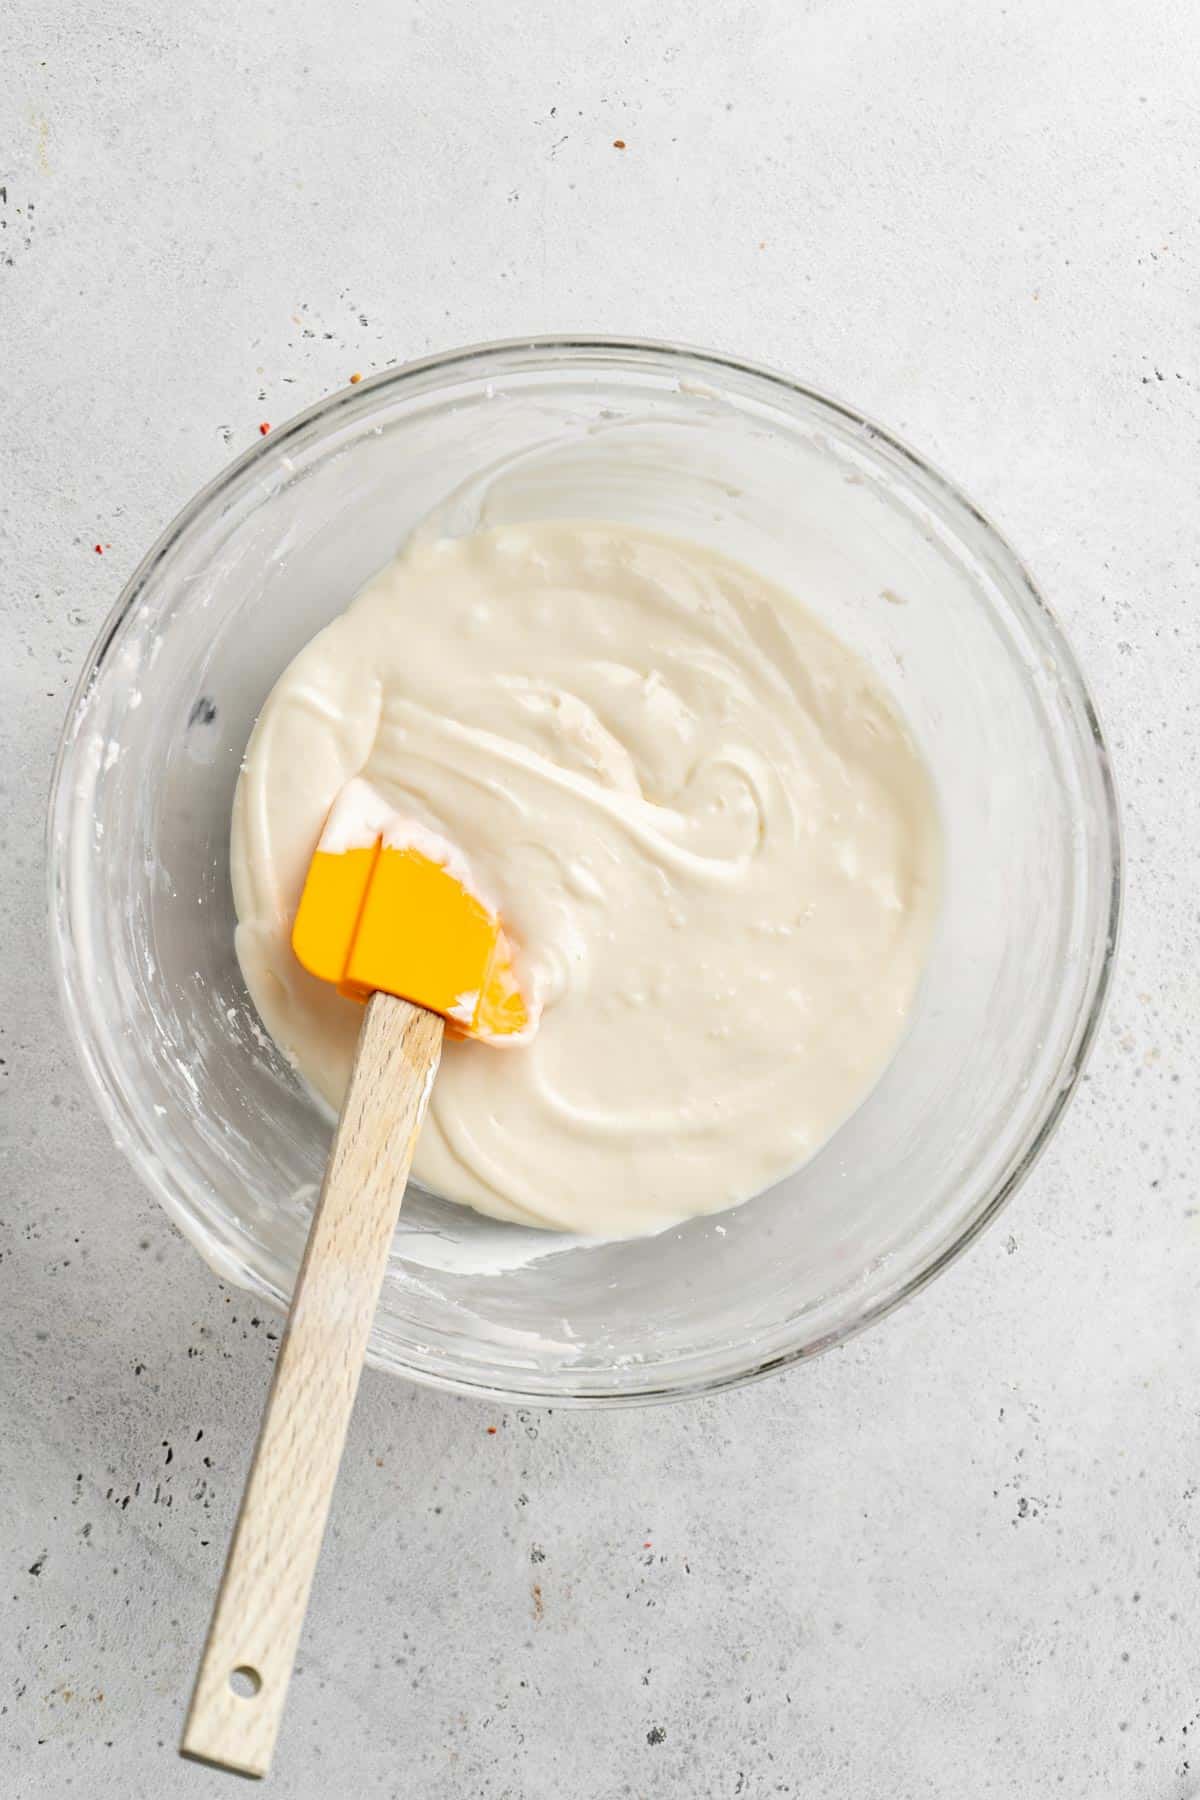
Whisk the cream cheese, powdered sugar, milk, and vanilla together until smooth and pourable.
8. Glaze your red velvet marble bundt cake
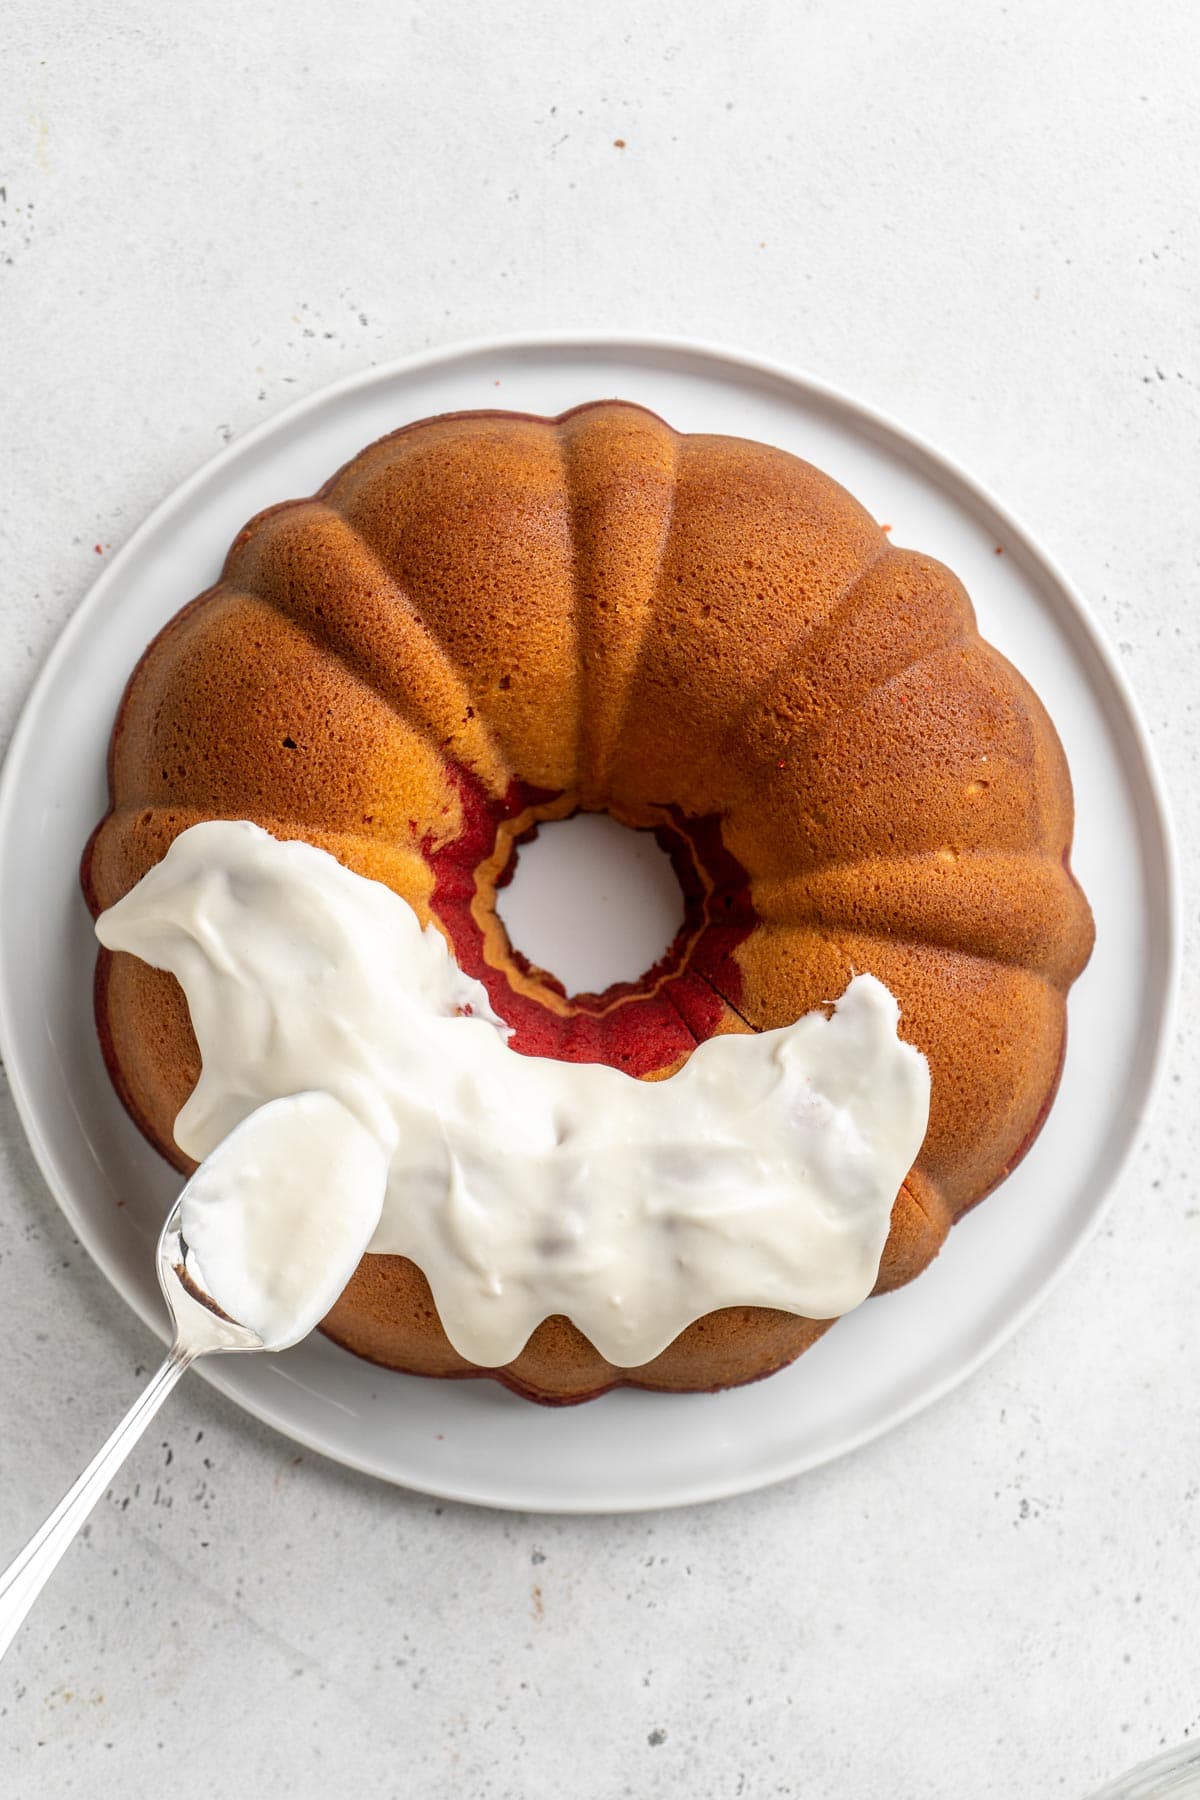
Pour the glaze over the top and let it drip down the sides.
PRO TIP: You want your glaze pourable but not too thin. Slowly pour it over the top of the cake so that you add just enough for it to drip down the sides. If you’re anxious that it may come out too fast when pouring, you can also use a spoon to drizzle it over the cake, giving you a bit more control.
Full Red Velvet Marble Cake Recipe
Red Velvet Marble Cake Recipe
Want to Save This Recipe, Boo?
Equipment
Ingredients
For the Cake:
- 1 ½ cups unsalted butter room temp, 3 sticks
- 8 ounces cream cheese room temp, 1 block
- 3 cups granulated sugar
- 1 tablespoon vegetable or canola oil
- 6 large eggs room temperature
- 3 cups cake flour
- 1 teaspoon salt
- 2 teaspoons vanilla extract
For the Swirl:
- 2 tablespoons unsweetened cocoa powder
- 1 tablespoon red food coloring
- 1 tablespoon hot water
For the Icing:
- 4 oz cream cheese room temperature
- 2 cups powdered sugar
- 4 tablespoons milk
- 1 teaspoon pure vanilla extract
Instructions
For the Cake:
- Start by preheating your oven to 325°F then liberally spray a 12-cup Bundt® pan with non-stick baking spray.
- In your mixer bowl, add butter and cream cheese and beat for two minutes on high speed. Next, slowly add in sugar and oil then continue beating on high speed for an additional five minutes until it’s a very pale yellow and fluffy.
- Next, add eggs, one at a time, combining well after each addition and scraping down the sides as needed.
- Turn your mixer down to its lowest speed, and slowly add flour into batter in two increments then add salt. Be careful not to overbeat.
- Lastly, add in vanilla extract, scrape down sides and mix until just combined and turn off mixer.
- Pour 1/2 of cake batter into a separate bowl and set aside. Whisk in cocoa powder, red food coloring and hot water until completely well mixed.
- Alternate dollops of vanilla and red velvet cake batter into Bundt® pan using a skewer to swirl batter.
- Bake for 1 hour and 15 -20 minutes or until a toothpick inserted in the center of the cake comes out clean.
- Cool in pan on a wire rack for 10 minutes, then invert cake on serving plate for at least an hour or until the cake is cool to the touch.
For the Cream Cheese Icing:
- Mix cream cheese, powdered sugar, milk and vanilla extract until smooth then pour over top of cooled cake and serve.
Video
Notes
How to Store
- Fridge: Wrap that cake up tight or pop it in an airtight container so it stays soft and moist. Because of the cream cheese icing, this one belongs in the fridge y’all. It will hold up for about 7 days. If you’re making it ahead, skip the glaze until serving.
- Freezer: Freeze it without the glaze, boos. Let the cake cool all the way, wrap it in plastic, then foil, and stash it for up to 6 months. Freeze the whole Bundt or slices if you want. Thaw it overnight in the fridge, then hit it with that glaze when you’re ready to eat.
Nutrition
Recipe Tips
- Use room temp ingredients. Y’all know the drill, boos! Soft butter, cream cheese, and eggs blend smoother and give you a creamy batter.
- Measure the flour right. Scoop it in with a spoon and level it off so your cake stays tender. And when you mix it in, keep your mixer on low so you don’t overwork the batter.
- Keep the batters separate. Use two utensils so the vanilla and red velvet don’t tint each other.
- Make clean swirls. Drop the batters in, then use a skewer to make big swoops first. Step back, see what it’s giving, then make smaller swirls. Don’t overdo it or the colors in your red velvet swirl cake will blend.
Want to Save This Recipe, Boo?
Recipe Help
Use the bake time as a guide, but don’t rely on it alone! This cake is dense, so it usually takes over an hour. The top should look set and spring back when you press it lightly. You can also slide a toothpick or skewer into the center. If it comes out mostly clean with a few crumbs, you’re good.
 pinterest
This cake is so pretty and Red velvet is a favorite in my family. It will be the perfect addition to my Holiday dessert table.
This turned out to be the most beautiful cake! The marbling really takes red velvet cake up a notch and I absolutely love the icing – it’s a must!
Fantastic! So happy to hear that it turned out well for you!
Jocelyn!! This cake is actual ART. I don’t bake much so I was pretti confident that mine wouldn’t look as pretty but it did, and it’s all because of how easy and approachable you made this. So thank you!
I was much happier when there was the “Jump to Recipe” option! Please reconsider giving your readers the choice… Thanks for great recipes.
Can I make it without eggs?
What substitutes should I use?
I have not made this recipe without eggs, but you could try a flax egg. I am not sure how it would turn out, but it should be okay.
Quick question , has anyone baked this cake in 8” rounds ? My partner has asked for a checkerboard cake , and he’s a fan of red velvet ( damn southern boys )
I’ve got the concentric ring issues down cold . Just don’t want to mess up this amazing cake
TIA
Time and Temp would be great !
I’ve made this Red Velvet Marble Cake three times now. Everyone loves it. Since, I didn’t have a 10-cup bundt pan, I made it in my tube cake pan and it was just as beautiful. I lessen my sugar 1/4 cup; no complaints, everyone thought it was just right for the sweetness. I was told that some people that doesn’t eat sweets, even enjoyed this cake. It has been a hit with everyone. I will continue to make. Thank you so much.
So you only put 1/4 cup of suger in it? I have family members the say way so I don’t want this too sweet
I love this decadent Bundt cake. Perfect for the holidays. Thank you for this recipe!
This cake is amazing! Not only is it absolutely delicious but it is so pretty. This was definitely a crowd pleaser and I actually just had a request to make it again, which I totally will! Thank you for this awesome recipe!
The recipe worked perfectly , the only change I made was I cut out the red food color , love the light chocolate flavor of red velvet , just not a fan of artificial colors . If I wanted to do a loaf pan version , in order to make 2 9/5 loaves would I leave the recipe as is , or increase by 1/4 ?
Thank you