
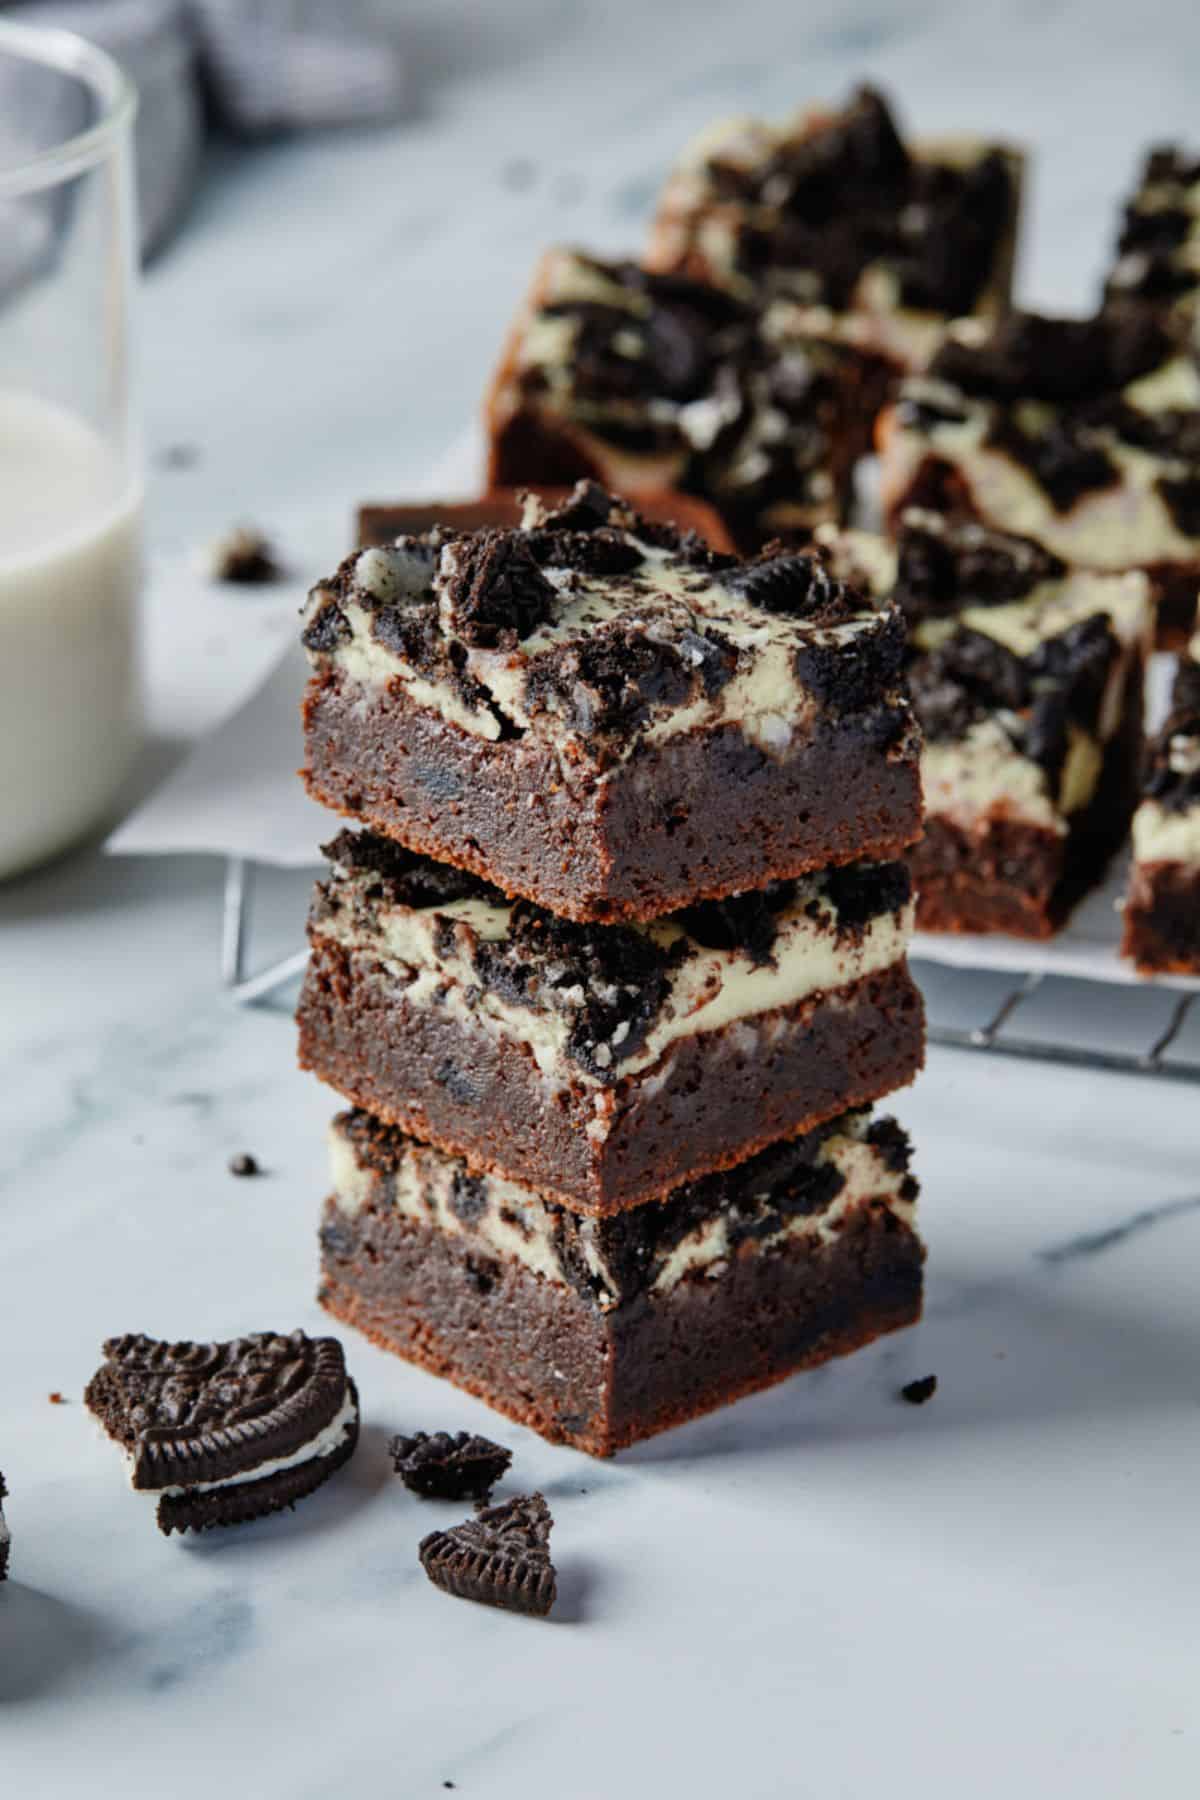
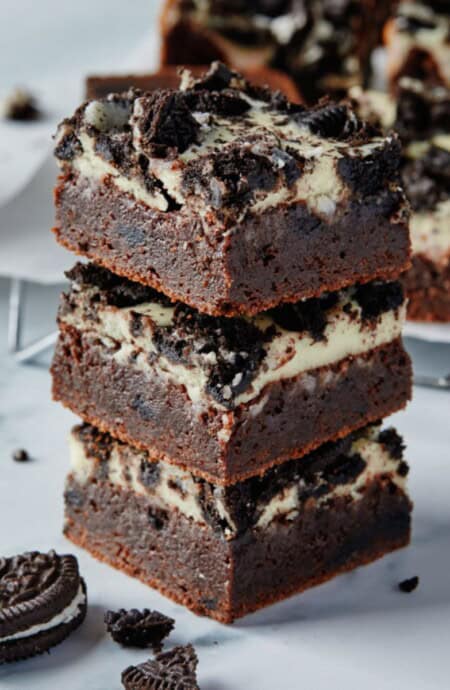
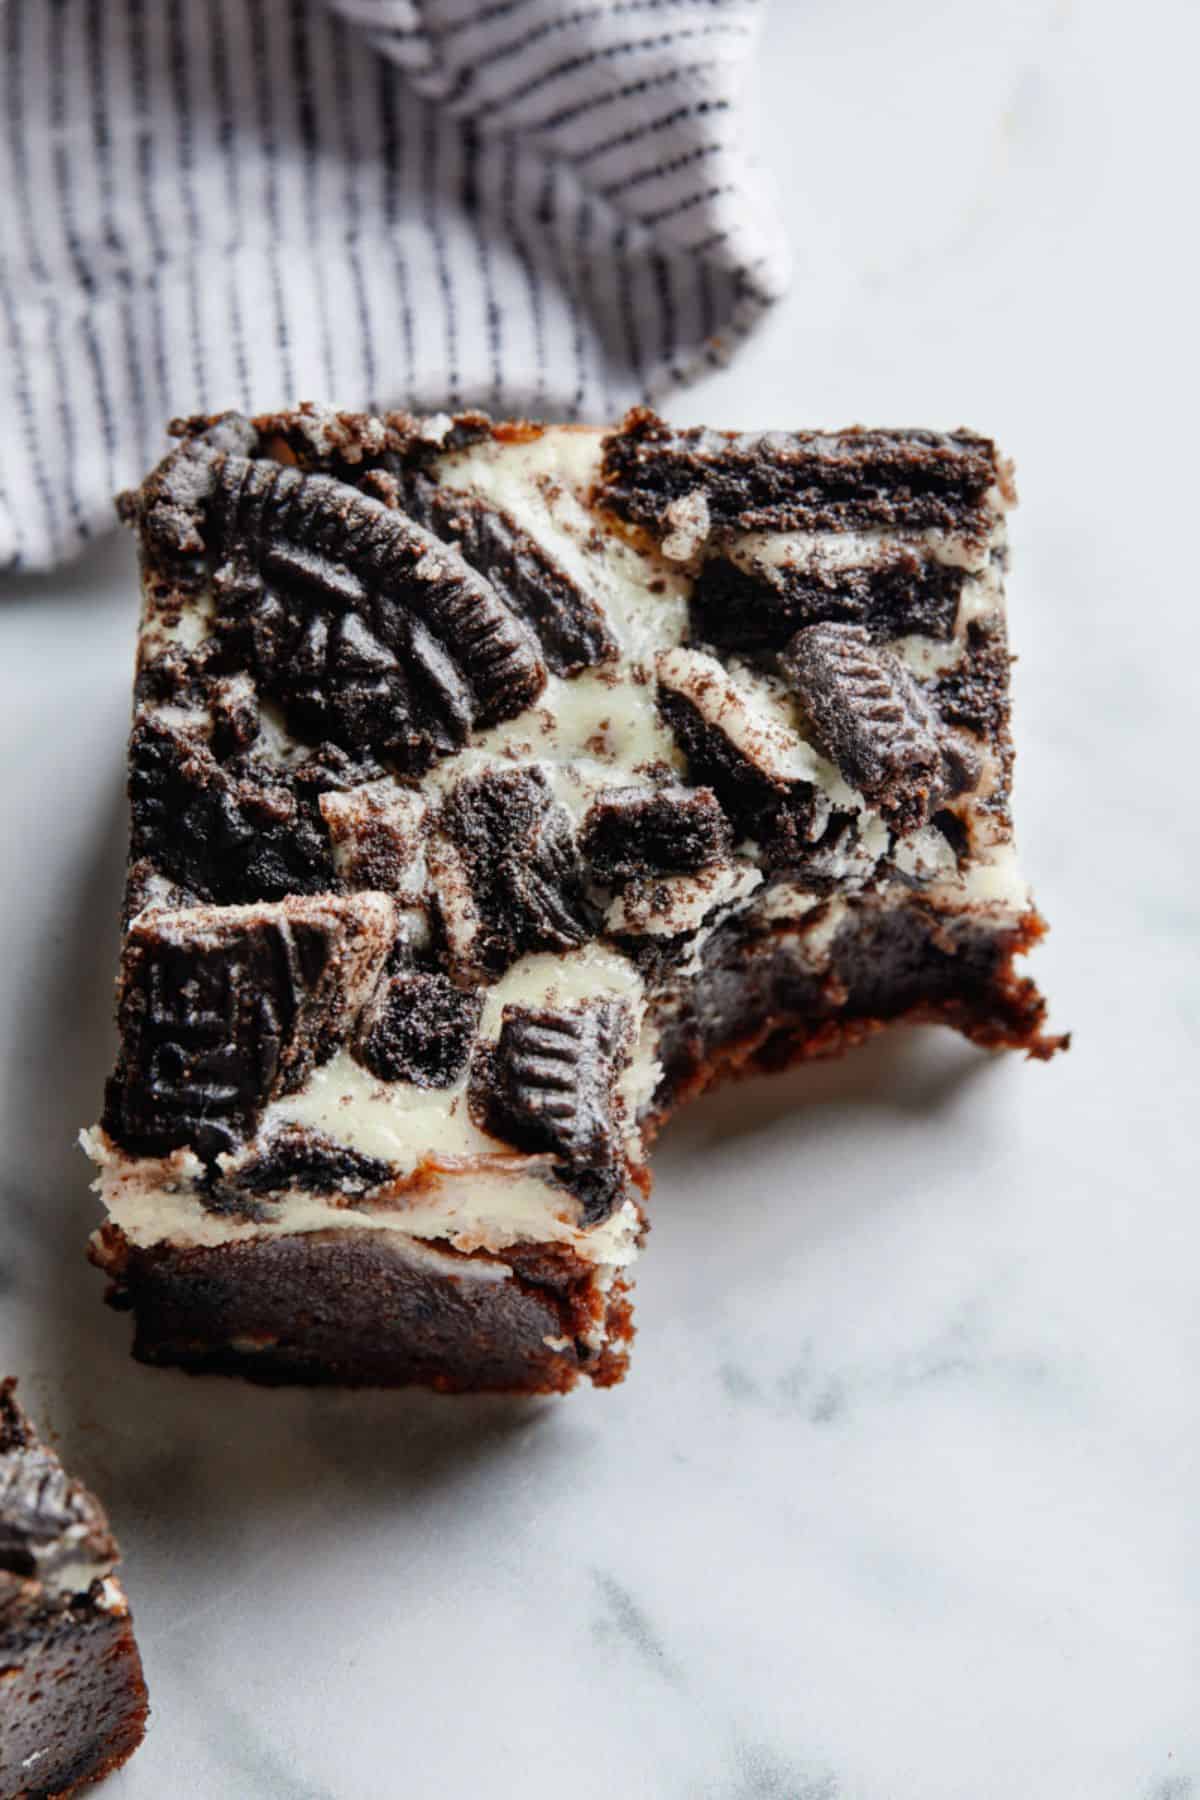
My Oreo Bars combine an Oreo fudgy brownie layer with a cheesecake layer finished with crushed Oreo cookies on top. It’s one of my fave indulgent desserts to serve for game days, bake sales or just chill at home nights. The two layers give you two bomb textures in one. Get into it!
This post may contain affiliate links. Read our disclosure policy.
How to Make Oreo Bars
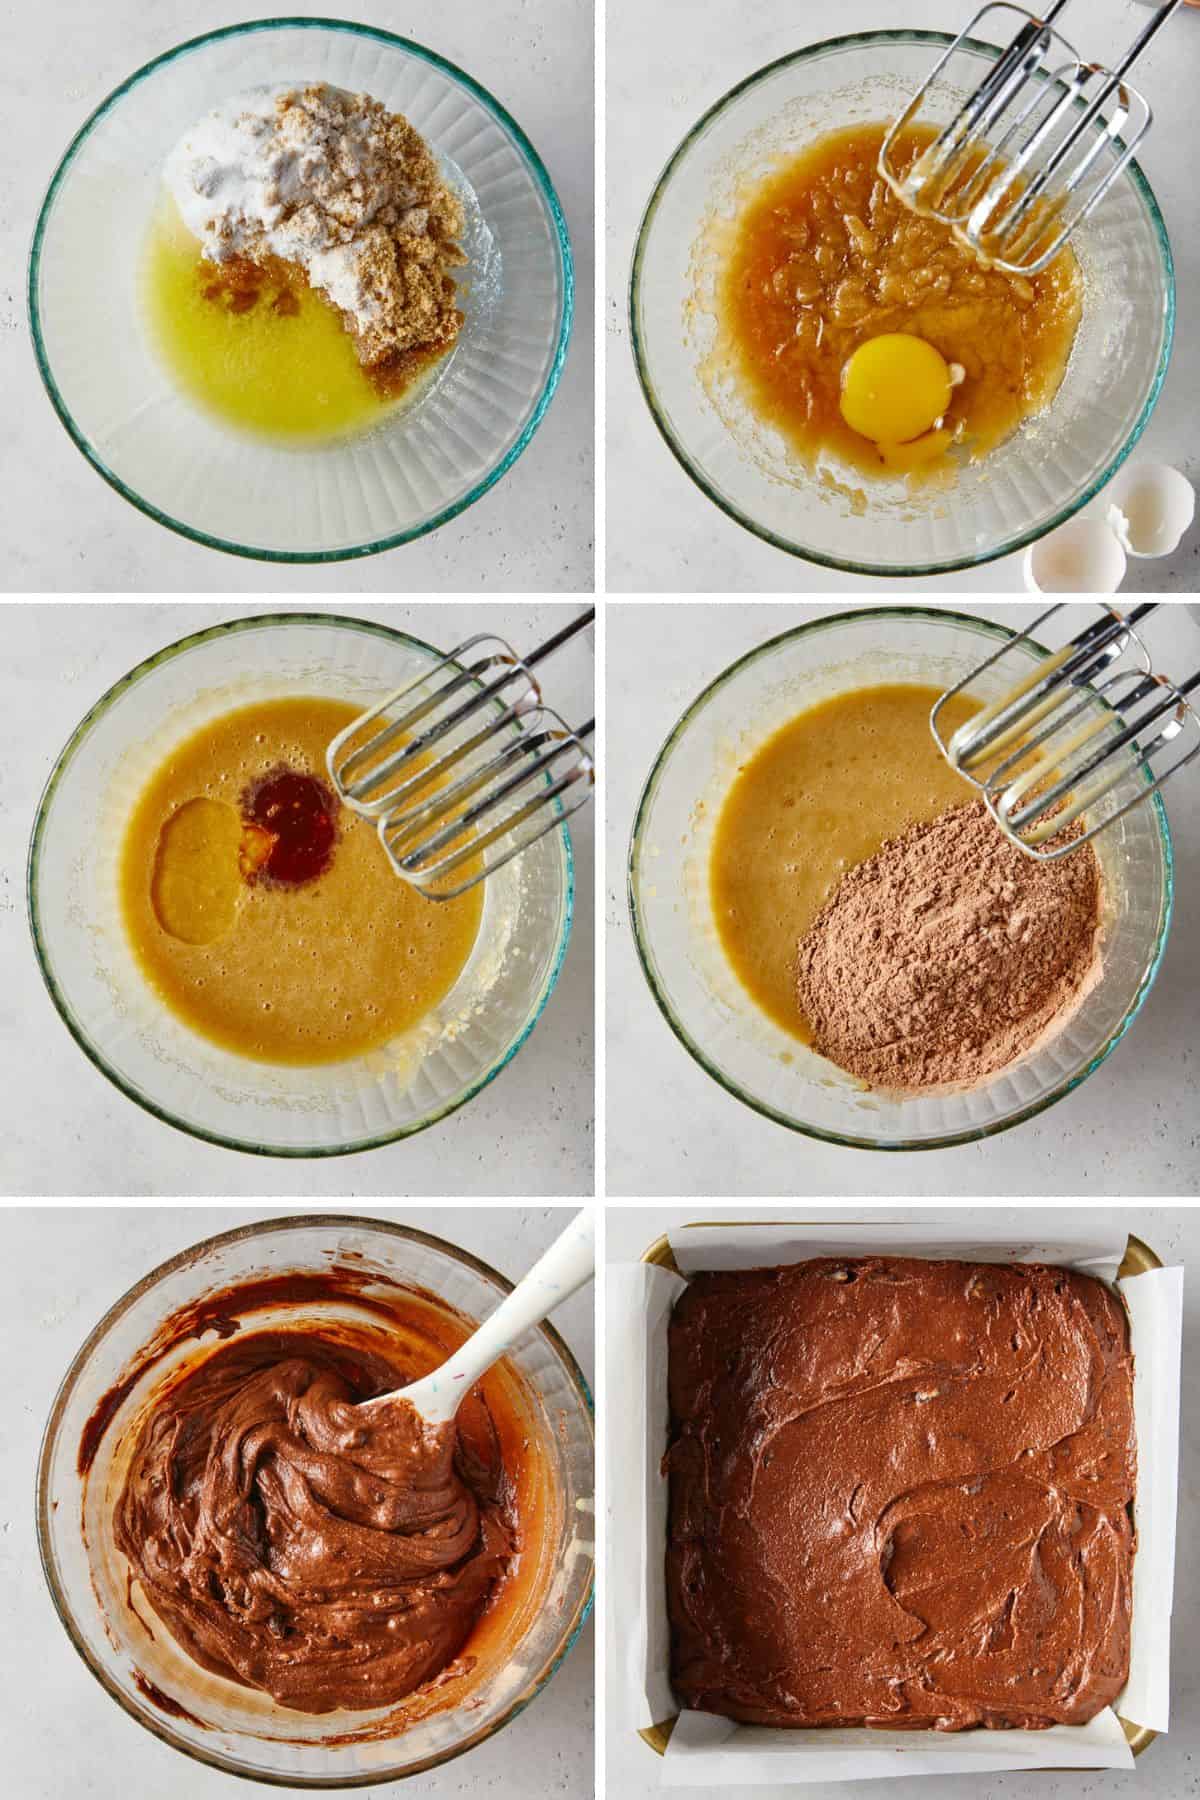
Step 1: Make the Brownie Batter
- Add the melted butter and both sugars to a bowl and mix on medium speed with an electric mixer.
- Add the eggs one at a time and mix after each one to incorporate it well.
- Add the oil and vanilla extract to the bowl.
- Combine the flour, cocoa powder, baking soda, and salt in a small bowl. Then add the dry ingredients to the bowl in two batches and mix on low speed. Mix only until everything is combined.
- Stir in the crushed Oreos using a spatula or wooden spoon.
- Pour the brownie batter into the prepared pan. Bake the brownies until the edges are just set and the center is still soft.
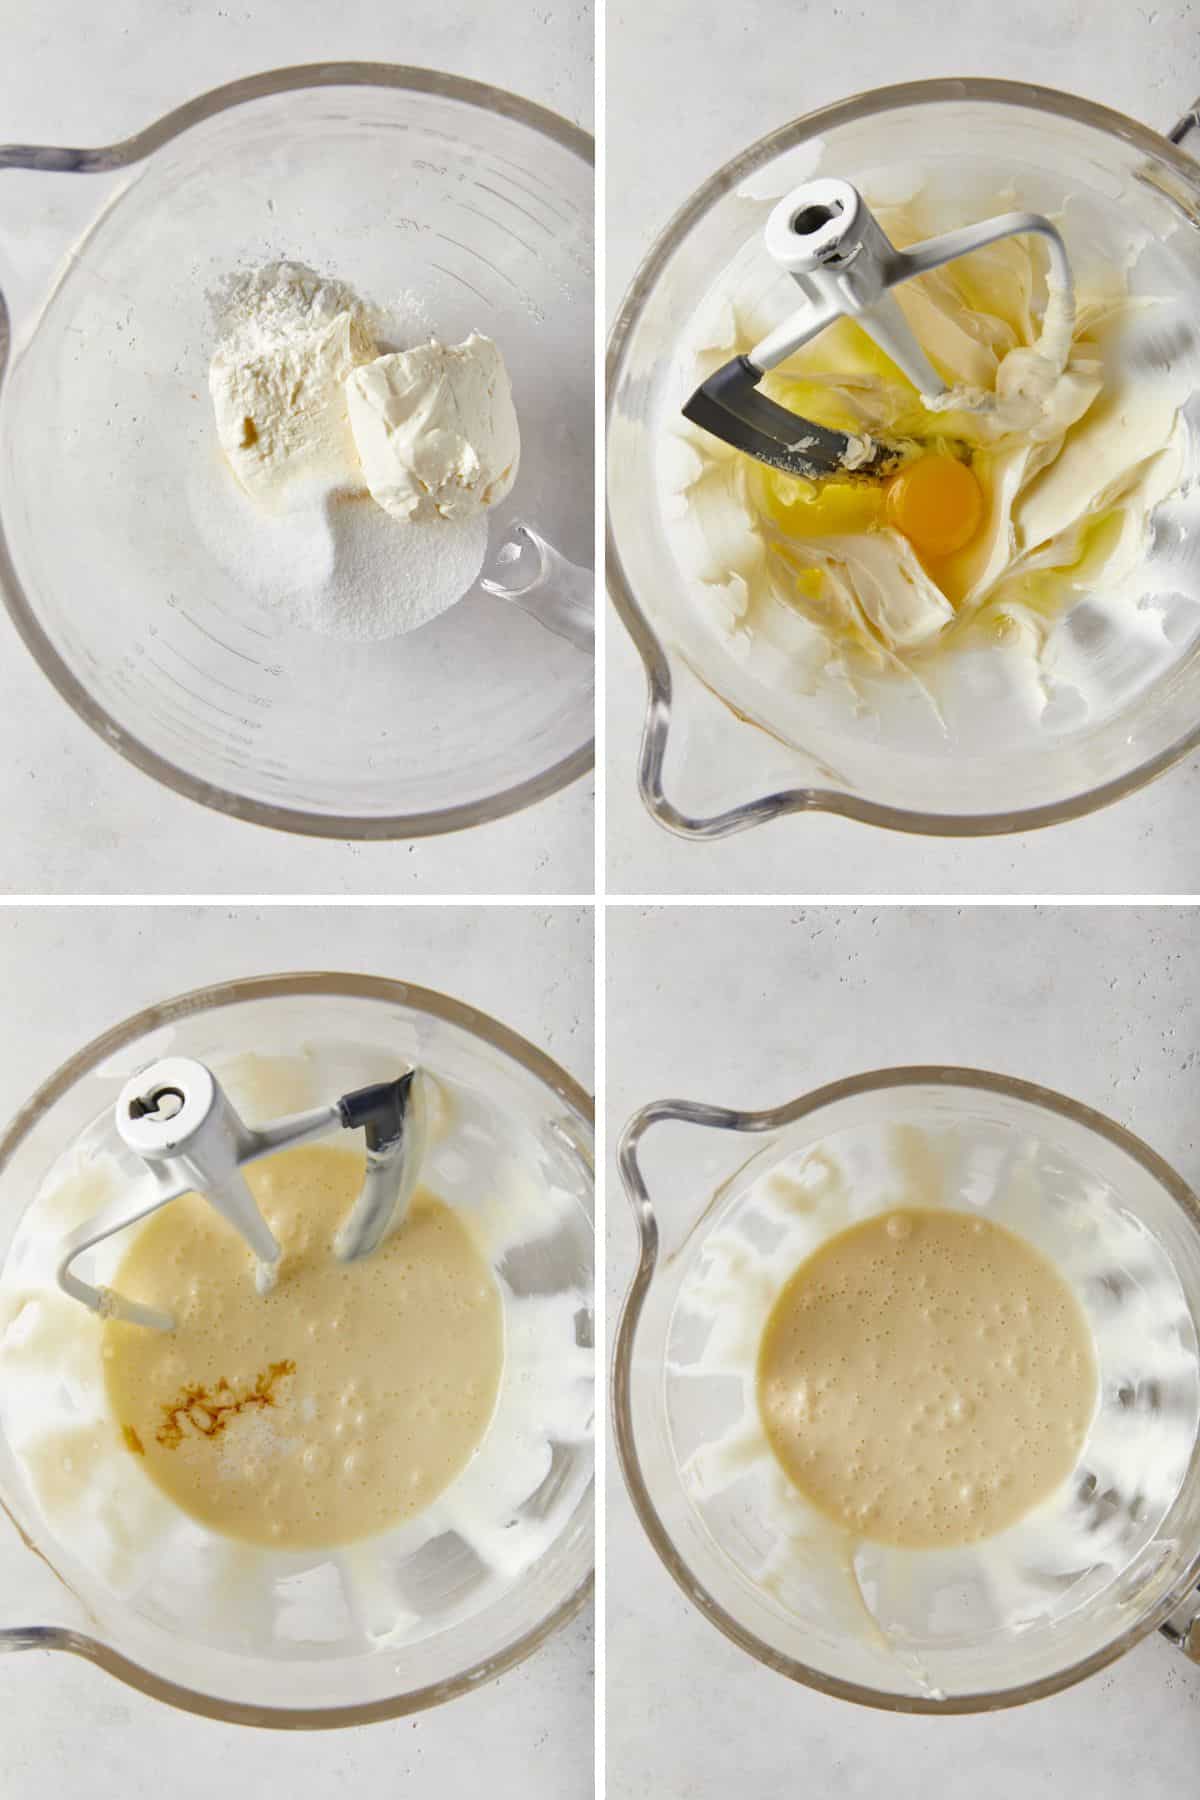
Step 2: Make the Cheesecake Layer
- Mix the cream cheese, sugar, and cornstarch in a mixing bowl until light and creamy.
- Add the egg and egg white. Mix until well combined.
- Add the heavy cream and vanilla extract.
- Mix them into the creamy mixture.
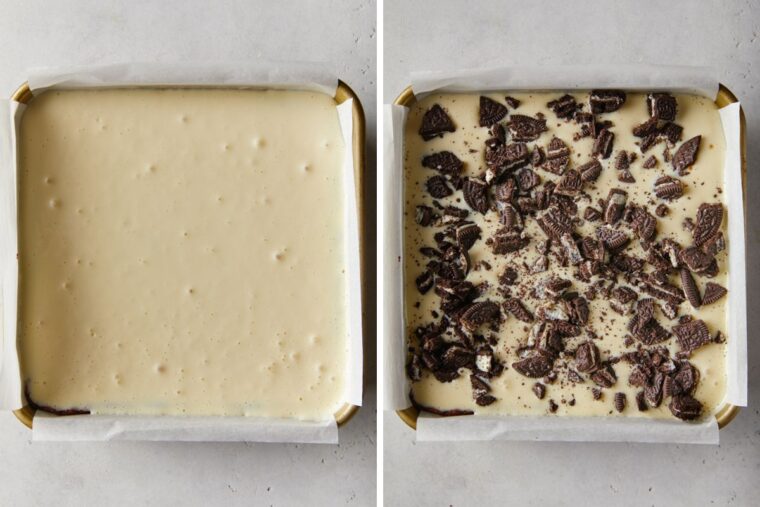
Step 3: Assemble
- Pour the cream cheese mixture over the brownie layer.
- Sprinkle the top with the crushed Oreos and continue baking at 225F until the cheesecake is set around the edges with just a tiny jiggle in the center when moved. Cool the bars completely in the pan and then move to the refrigerator for 5-7 hours.
Want to Save This Recipe, Boo?
Oreo Bars Recipe
Want to Save This Recipe, Boo?
Equipment
Ingredients
For Brownie
- ½ cup unsalted butter melted
- ¾ cup granulated sugar
- ½ cup packed light brown sugar
- 2 large eggs room temperature
- 1 tablespoon vegetable oil
- 2 teaspoons vanilla extract
- ¾ cup all-purpose flour
- ½ cup cocoa powder
- ½ teaspoon kosher salt
- ½ cup chopped Oreos
For Cheesecake layer
- 8 ounces cream cheese softened
- ⅓ cup granulated sugar
- 2 teaspoons cornstarch
- 1 large egg room temperature
- 1 large egg white room temperature
- 1 ½ teaspoons heavy cream
- 2 teaspoons vanilla extract
- 1 cup chopped Oreos
Instructions
For Brownie
- Preheat oven to 350F. Set rack in middle position. Liberally spray 8×8 inch square baking pan with nonstick baking spray, then line it with parchment paper, leaving at least 2 inches of overhang.
- In a medium bowl, using your hand mixer, add melted butter and both sugars. Mix on medium speed.
- Add eggs one at a time, mixing after each addition to incorporate well.
- Add in oil and vanilla extract.
- Combine flour, cocoa powder, and salt in a small bowl.
- Reduce mixer speed to low and add dry ingredients in two intervals. Mix until just incorporated. Stir in crushed Oreos by hand.
- Add brownie batter to prepared pan.
- Bake until edges are just set and the center is still soft, about 18 minutes.
For Cheesecake Layer
- Meanwhile, mix cream cheese, sugar, and cornstarch until light and creamy.
- Add in egg and egg white. Mix until well-combined.
- Add in cream and vanilla extract.
- Pour cream cheese mixture over brownie layer. Sprinkle the top with the crushed Oreos and continue baking for another 15 minutes at 350F.
- Lower the oven temperature to 225F and bake until cheesecake is set around the edges with just a tiny jiggle in the center when moved. Check after about 15 minutes. If it is too jiggly, let it bake another 3-5 minutes but keep an eye on it.
- Cool in pan completely, then move to refrigerator for at least for 2 hours. Cut with a hot knife and serve.
Notes
-
- Line Your Baking Pan. Using parchment paper in your pan with a 2-inch overhang makes it super easy to remove the bars after baking.
-
- Don’t Over Mix. This is crucial in most dessert recipes. Once you add the dry ingredients to the bowl, gluten begins to form. The more you mix the more you activate the gluten which leads to dry tough bars.
-
- Cool and Chill. After baking be sure to allow the bars time to fully cool and then chill in the fridge before cutting them. This gives the cheesecake layer plenty of time to set up.
-
- Use a Hot Knife for Cutting. Run your knife through a stream of running hot water and then dry off. The heat allows the knife to cleanly cut through the bars with clean even cuts. You may need to wipe the blade and run it through the water in between cuts.
How to Store Oreo Bars
To keep those Oreo cake bars super fresh, let them cool completely after baking. Store them in an airtight container and separate the layers with parchment paper if they are stacked up. The flavor will still be on point when stored in the fridge. It helps keep that great texture. They will be fine sitting out for about an hour or two but may not hold up so well outside on a hot day for a long time.How long will Oreo bars last in the fridge?
Kept this way, they’ll keep that perfect texture and taste in the fridge for up to 5 days, ready to be enjoyed whenever you are!Can I freeze Oreo cheesecake bars?
Freezing desserts, especially those with creamy dairy layers like cheesecake, can be a bit of a juggling act because freezing can switch up the texture. But if you’ve got some leftovers and you’re not ready to say goodbye just yet, go ahead and stash them in the freezer for a bit. Just keep them in a single layer or slide some parchment between them, and they’re good for a chill session of up to three months. When you’re ready to dive back in, let them thaw in the fridge.Nutrition
Recipe Tips
- Line Your Baking Pan. Using parchment paper in your pan with a 2-inch overhang makes it super easy to remove the bars after baking.
- Don’t Over Mix. Once you add the dry ingredients to the bowl, gluten begins to form. The more you mix, the more you activate the gluten, making those bars tough and dry.
- Cool and Chill. After baking be sure to allow the bars time to fully cool and then chill in the fridge before cutting them. This gives the cheesecake layer plenty of time to set up.
- Use a Hot Knife for Cutting. Run your knife through a stream of running hot water and then dry off. The heat allows the knife to cleanly cut through the bars with clean even cuts. You may need to wipe the blade and run it through the water in between cuts ya dig?
Recipe Help
This dessert bakes twice so there are two different times to check. The brownie layer is done when the edges appear set while the center is soft. After adding the cheesecake layer we cook again at a lower temperature and again the edges should be set while the center may be slightly jiggly.
If your brownies cook up on the dry side you may have either over mixed or over baked them. Make sure you just mix the brownie batter until they come together. Also, cooked items often experience carry over cooking where they continue to cook after they are removed from the oven. So as soon as they ready remove them from the oven.
First, you want to cut your parchment paper out slightly larger than the shape of your pan. I suggest allowing an extra 1-2 inches for the sides of the pan and then also another inch. This will allow the parchment to hang over the edge of the pan so you can easily lift the dessert out after baking. Next, spray your pan so the parchment paper will stick to the pan. Then, make 1-2 inch cuts at each of the corners towards the center of the paper so you can fold the corners in to fit the pan. Last, press the parchment into the pan and smooth it out into the corners and bottom of the pan.
 pinterest
Amazing recipe! Thank you for sharing!
You’re so welcome!
Made these for the Super Bowl. They were so good and very easy to make.
I’m baking these right now and can’t wait to try them. But I noticed that your cream cheese layer that was poured over the brownie batter looked so nice and even- i couldn’t get mine to spread evenly like that. Hopefully it doesn’t affect the texture or anything
I hope they turned out amazing for you, Irma!
These Oreo Bars look absolutely irresistible!
Thanks for sharing such a great Oreo Bars-making recipe!
Absolutely my pleasure
Question….for the baking of the cream cheese layer….is it bake at 350 for 15 min then lower to 225 until set or bake for 15 min at 225 until set. Written post and recipe are conflicting. Thanks!
Hey doll, after adding the cream cheese layer and Oreos, continue baking at 350F for 15 minutes, THEN lower to 225 and bake until set. Does that help?
Can this be doubled and baked in a 9×13?
I have not tried it in a 9×13, but I don’t see why not!
Hi there. Did you try this recipe doubled and 9×13? I am thinking of doing this in a few days and wondered if any issues
These Oreo bars are sooooooo good! I ate so many of these my family got mad at me. LOL. Thank you so much for this yumminess!